Top 15 Sensor-Based Project Ideas for Students
Summary
The integration of hands-on, interactive learning has fundamentally transformed how students can engage with Science, Technology, Engineering, and Math (STEM).
Modern learners flourish when education is tangible, engaging, and directly connected to the world around them.
By exploring projects built with sensors, educators and parents can convert abstract principles into vibrant, practical experiences that ignite curiosity, build critical thinking skills, and encourage innovative problem-solving.
Below, we explore 15 fantastic projects that turn fundamental electronic concepts into exciting, hands-on activities.

15 Sensor-Based Project Ideas
1. Motion-Activated Light
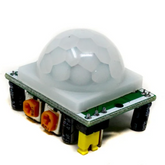
This project introduces the fundamentals of motion detection using a Passive Infrared (PIR) sensor.
You will create a smart system that automatically activates a light in response to movement, teaching a core concept used in modern security and home automation systems.
It's one of the most popular simple sensor projects for beginners.
Materials Needed:
- Arduino Uno or similar microcontroller
- PIR Motion Sensor
- LED
- 220-ohm Resistor
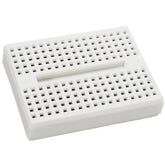
- Breadboard
- Jumper Wires
How to Get Started:
Begin by connecting the PIR sensor and the LED to your Arduino board using the breadboard and jumper wires.
Upload a simple program that continuously checks the PIR sensor's output pin.
Use an "if" statement in your code to turn the LED on when the sensor detects motion and turn it off after a short delay.
2. Automatic Plant Watering System
Keep your plants happy and hydrated with this practical and useful project.
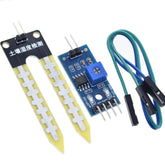
A soil moisture sensor is used to measure the dampness of the soil and automatically activate a small water pump when it becomes too dry.
This is a brilliant introduction to automated feedback loops.
Materials Needed:
- Soil Moisture Sensor
- Arduino Uno
- Small Submersible Water Pump (5V)
- Relay Module
- Connecting Pipes/Tubing
- Power source for the pump
How to Get Started:
Place the soil moisture sensor into the plant's soil and connect it to your Arduino. Connect the water pump to the relay module, which the Arduino will control.
Write a program that reads the analog value from the moisture sensor and triggers the relay to turn the pump on for a few seconds if the soil is dry.
3. RGB Color Detector
This fun project allows you to build a device that can identify and replicate colors.
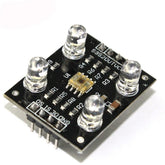
Using a specialized color sensor, your system will detect the color of an object placed in front of it and display that color using an RGB LED.
It's a great way to learn about light, color theory, and sensor calibration.
Materials Needed:
- TCS230/TCS3200 Color Sensor
- Arduino Uno
- RGB LED (Common Cathode)
- Three 220-ohm Resistors
- Jumper Wires and a Breadboard
How to Get Started:
Start by wiring the color sensor and RGB LED to your Arduino.
You will need to install a library for the color sensor to simplify the code.
The program will read the red, green, and blue frequency values from the sensor and map those values to the RGB LED to reproduce the detected color.
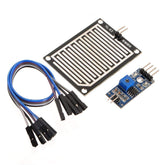
4. Rain Detection Alarm
Build a simple but effective alarm that alerts you when it starts to rain.
This system uses a rain-sensing module to detect water droplets and trigger a buzzer.
It's a foundational project for creating more complex weather monitoring stations or automated systems, like one that closes a window when rain is detected.
Materials Needed:
- Rain Sensor Module
- Arduino Uno
- Piezo Buzzer
- LED (optional, for a visual indicator)
- Jumper Wires and a Breadboard
How to Get Started:
Connect the rain sensor module and the buzzer to the Arduino.
The sensor provides both an analog and a digital output; for a simple alarm, the digital output is easiest.
Write a script that reads the digital pin and, when it detects a signal (indicating water), activates the buzzer.
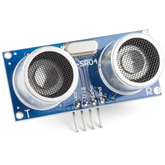
5. Ultrasonic Distance Measurer
Create your own digital tape measure using sound waves.
This project utilizes an ultrasonic sensor that emits high-frequency sound pulses and measures the time it takes for the echo to return.
The system then calculates and displays the distance to an object, demonstrating a key principle used in robotics and automotive systems.
This is one of the most classic sensor-based projects.
Materials Needed:
- HC-SR04 Ultrasonic Sensor
- Arduino Uno
- LCD Display (16x2) or use the Serial Monitor
- Jumper Wires and a Breadboard
How to Get Started:
Wire the ultrasonic sensor and LCD display to your Arduino.
Use a library to simplify the process of sending trigger pulses and reading the echo pin from the sensor.
The code will convert the travel time of the sound wave into centimeters or inches and print the result to the display.
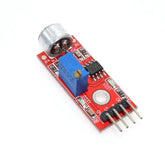
6. Music Reactive LED Display
Bring your music to life with a strip of LEDs that flashes and changes color in response to sound.
This exciting project uses a sound sensor to capture the beat and volume of your favorite tunes, translating the audio input into a dynamic light show.
Materials Needed:
- Sound Sensor Module
- Arduino Uno or Nano
- Addressable RGB LED Strip (like WS2812B)
- External Power Supply for the LED strip (if needed)
- Jumper Wires
How to Get Started:
Connect the sound sensor to an analog pin on your Arduino.
Wire the data pin of the LED strip to a digital pin.
Using a library like Adafruit NeoPixel, write a program that reads the sound level from the sensor and maps that value to control the brightness, color, or pattern of the LEDs.
7. Automatic Street Light Controller
This project mimics the smart streetlights found in modern cities.
It uses a Light Dependent Resistor (LDR) to detect the ambient light level and automatically turns an LED on when it gets dark and off when it's light.
It’s an excellent example of an energy-saving automated system and one of many great Arduino sensor projects.
Materials Needed:
- Light Dependent Resistor (LDR)
- Arduino Uno
- White LED
- 10k-ohm Resistor
- 220-ohm Resistor
- Breadboard and Jumper Wires
How to Get Started:
Create a voltage divider circuit with the LDR and the 10k-ohm resistor and feed the output to an analog pin on the Arduino.
Connect the LED to a digital pin.
Your code will continuously read the light level from the LDR and turn the LED on when the value falls below a certain threshold (indicating darkness).
8. Temperature Monitoring System
Build a digital thermometer that can display the current room temperature and even sound an alarm if it gets too hot or cold.
Using a digital temperature sensor, this system provides real-time environmental data, a core function of climate control systems and weather stations.
This is one of the most useful DIY sensor projects.
Materials Needed:
- DHT11 or DHT22 Temperature and Humidity Sensor
- Arduino Uno
- LCD Display (16x2)
- Buzzer (for an alarm)
- Jumper Wires and a Breadboard
How to Get Started:
Wire the DHT sensor, LCD, and buzzer to the Arduino.
Install the DHT library to easily read temperature and humidity data from the sensor.
Write a program to fetch the data every few seconds, display it on the LCD, and trigger the buzzer if the temperature goes outside a predefined range.
9. Gas Leakage Detector
Enhance safety by building a device that can detect flammable or harmful gases.
This critical safety project uses a gas sensor module to monitor the air and trigger a loud alarm if it detects dangerous gas concentrations.
It’s a great way to learn about environmental sensors and safety electronics.
Many electronics projects for students focus on important safety applications like this one.
Materials Needed:
- MQ-2 Gas Sensor Module (or similar, depending on the target gas)
- Arduino Uno
- Piezo Buzzer
- Red LED for a visual warning
- Jumper Wires and a Breadboard
How to Get Started:
Connect the gas sensor's analog output pin to the Arduino.
The sensor requires some time to warm up before providing stable readings.
Write a program that continuously monitors the sensor's value and, if it rises above a safe threshold, activates the buzzer and flashes the LED.
10. Obstacle-Avoiding Robot
Dive into the world of robotics with this classic project.
You'll build a small, wheeled robot that uses an ultrasonic or infrared sensor to detect obstacles in its path and navigate around them.
This project is a fantastic introduction to autonomous systems and is a cornerstone of many sensor-based projects.
Materials Needed:
- Robot Chassis Kit (with wheels and motors)
- Arduino Uno
- Motor Driver (like the L298N)
- HC-SR04 Ultrasonic Sensor
- Power source (like a battery pack)
- Jumper Wires
How to Get Started:
Assemble the robot chassis, attaching the motors and wheels. Mount the Arduino, motor driver, and ultrasonic sensor. Write a program that makes the robot move forward by default, but when the sensor detects an object within a certain distance, it stops, turns, and continues in a new direction.
11. Smart Dustbin
Add a touch of intelligence to a household object with a smart dustbin.
This system uses an ultrasonic sensor to detect when a hand is placed over the lid, which then automatically opens.
It’s a fun project that combines mechanical movement with sensor input, making it one of the more impressive sensor projects for students.
Materials Needed:
- Small Dustbin
- HC-SR04 Ultrasonic Sensor
- Arduino Uno or Nano
- Servo Motor
- Jumper Wires and Power Supply
How to Get Started:
Mount the ultrasonic sensor on the lid of the dustbin, facing upwards.
Attach the servo motor to the hinge of the lid so it can lift it. Write a program that monitors the distance reading from the sensor.
If an object (like a hand) comes within a close range, the code should activate the servo to open the lid for a few seconds.
12. Light Intensity Controller
This project goes a step beyond the automatic streetlight by creating a system that actively adjusts the brightness of an indoor light based on ambient conditions.
Using an LDR, your device will dim or brighten an LED to maintain a consistent level of light in a room, saving energy and reducing eye strain.
This is a very practical example of sensor based projects.
Materials Needed:
- Light Dependent Resistor (LDR)
- Arduino Uno
- White LED
- 10k-ohm Resistor
- Breadboard and Jumper Wires
How to Get Started:
Set up a voltage divider with the LDR to read ambient light levels.
Instead of a simple on/off signal, use Pulse Width Modulation (PWM) on one of the Arduino's digital pins to control the LED's brightness.
Your code should map the range of light readings from the LDR to the PWM output range (0-255) to create a smooth dimming effect.
13. Simple Weather Station
Combine multiple sensors to build your own mini weather station that can report on local environmental conditions.
By integrating temperature, humidity, and even barometric pressure sensors, you can create a comprehensive dashboard of weather data.
This is a great project to scale up, and it can be expanded into one of many more complex Raspberry Pi sensor projects.
Materials Needed:
- DHT11/DHT22 (Temperature and Humidity)
- BMP180/BMP280 (Barometric Pressure and Temperature)
- Arduino Uno
- LCD Display (16x2) or OLED Display
How to Get Started:
Connect your sensors to the Arduino, paying attention to whether they use analog, digital, or I2C communication.
Install the necessary libraries for each sensor.
Write a program that sequentially polls each sensor for its data and then formats and displays all the information neatly on your screen.
14. Home Security Burglar Alarm
Design a basic but effective burglar alarm system for your room.
This project uses a PIR motion sensor to detect intruders and a magnetic contact switch to sense if a door or window has been opened.
When triggered, it will set off a loud alarm, teaching the core principles of integrated security systems.
Materials Needed:
- PIR Motion Sensor
- Magnetic Contact Switch (Door Sensor)
- Arduino Uno
- Loud Piezo Buzzer or Siren
- LEDs for status indicators (armed/disarmed)
How to Get Started:
Connect both the PIR sensor and the magnetic switch to digital input pins on the Arduino.
The core logic of your program will be to check if either sensor is triggered.
If a signal is received from either the motion detector or the door switch, the code should activate the buzzer and a warning LED.
15. Heart Rate Monitor
This fascinating biomedical project allows you to visualize your own heartbeat.
It uses a pulse sensor that detects the change in blood volume in your finger with each heartbeat.
The data can be displayed on a screen or used to blink an LED in sync with your pulse, making it one of the most engaging sensor-based projects.
Materials Needed:
- Pulse Sensor Module
- Arduino Uno
- OLED Display or use the Serial Plotter in the Arduino IDE
- LED (optional, for a blinking visual)
- Jumper Wires and a Breadboard
How to Get Started:
Connect the pulse sensor to an analog input pin on your Arduino.
The sensor is sensitive, so ensure it is placed securely on a fingertip.
Use the provided library to process the raw sensor data into beats per minute (BPM).
Your program can then print the BPM to the display or blink an LED with each detected pulse.
Conclusion
Embarking on these hands-on projects does more than just teach technical skills; it builds confidence and demystifies the technology that shapes our modern world.
Each circuit built and line of code written is a step toward greater understanding and innovation.
The true value lies not just in completing a project, but in the process of troubleshooting, experimenting, and seeing your ideas come to life.
The journey doesn't have to end with these 15 ideas. The real adventure begins when you start modifying them, combining sensors, and designing your own unique creations.
By developing these foundational skills in electronics, programming, and problem-solving, students are not just preparing for a potential career in a STEM field—they are equipping themselves to be the curious, capable, and creative thinkers of tomorrow.


