Simple Rain Detector Project Using Arduino
Summary
In this step-by-step guide, we'll walk through how to build a simple but effective Arduino rain detector.
This project is perfect for beginners and serves as a fantastic introduction to working with sensors and microcontrollers.
By the end of this tutorial, you'll have a fully functional rain alarm that you built yourself. So, grab your tools, and let's get started on this exciting DIY rain alarm project!

What is a Rain Detector?
A rain detector is a small electronic device designed to sense the presence of water. When raindrops fall on its sensor, it triggers an alert, which could be a flashing light, a buzzing sound, or even a notification sent to your phone.
While you can buy commercial rain detectors, building your own is not only more affordable but also a rewarding way to learn about electronics.
So, why would you want to build one? The applications are surprisingly diverse:
- Automated Home Systems You can connect it to motorized windows or retractable awnings to automatically close them when it rains.
- Smart Gardening: Integrate it with your irrigation system to prevent overwatering your plants on rainy days.
- Weather Stations It can be a key component of a personal weather station, collecting data about local weather patterns.
- Creative Projects You could create an art installation that reacts to rainfall or a system that automatically covers your outdoor furniture.
This project is a great entry point into the world of smart devices and home automation.
Now that you know what it is and why it's useful, let's look at the components you'll need.
Required Components and Tools
The great thing about this project is that it doesn't require a long list of expensive parts. Most of these components can be found in a standard Arduino starter kit. Here’s what you’ll need to gather:
Electronic Components:
- Arduino UNO or Nano This will be the brain of our operation, processing the data from the sensor and triggering the alarm.
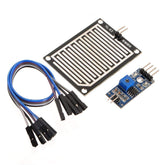
- Rain Sensor Module This is the star of the show. It usually comes in two parts: a sensing pad and a control module.
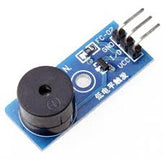
- 5V Active Buzzer This will provide our audible rain alert.
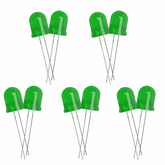
- LED (Light Emitting Diode) A visual indicator to complement the buzzer.
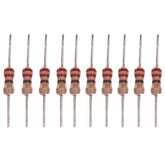
- 220-ohm Resistor To protect our LED by limiting the current.
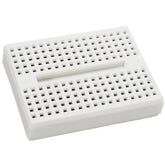
- Breadboard A solderless board that makes it easy to connect and test your circuit.
- Jumper Wires To connect all the components together.
Tools and Software:
- Arduino IDE The free software used to write and upload code to your Arduino board.
- USB Cable To connect your Arduino to your computer for programming and power.
Once you have all your components ready, it’s time to understand how the most important part of our Arduino rain detection system works: the rain sensor.
Understanding the Rain Sensor Module
The rain sensor module is what makes this Arduino project possible. It’s a simple but clever device that changes its electrical properties when it gets wet. Let's break down how to use a rain sensor.
The module consists of two main parts:
- The Sensing Pad: This is the flat board with a series of exposed conductive traces, usually made of copper. When the board is dry, the resistance between these traces is very high. But since water is conductive, when raindrops fall on the pad, they create a bridge between the traces, causing the resistance to drop significantly. The more water on the pad, the lower the resistance.
- The Control Module: The sensing pad connects to a small control board that does the heavy lifting. This board reads the resistance from the pad and converts it into a signal that the Arduino can understand. It typically has an LM393 comparator chip and provides two types of outputs:
- Analog Output (AO): This pin gives a voltage that varies with the amount of water on the sensor. A completely dry sensor will give a high voltage, and as it gets wetter, the voltage drops. This is useful if you want to measure the intensity of the rain.
- Digital Output (DO): This pin provides a simple HIGH or LOW signal. Using a small potentiometer on the module, you can set a threshold. When the amount of water on the sensor crosses this threshold, the DO pin will switch from HIGH to LOW. This is perfect for a simple alarm.
For our rain sensor with Arduino project, we'll be using the digital output to keep things straightforward. Now that we know how the sensor works, let's start building.
Step-by-Step Guide to Assembling the Circuit
We'll use a breadboard to assemble our circuit, which allows us to connect everything without any soldering. Just follow these connections carefully, and your Arduino rain detector will be ready in no time.

Here is the wiring diagram to guide you:
1. Connect the Rain Sensor Module to the Arduino:
- Connect the VCC pin on the sensor module to the 5V pin on the Arduino.
- Connect the GND pin on the sensor module to one of the GND (Ground) pins on the Arduino.
- Connect the D0 (Digital Out) pin on the sensor module to digital pin D2 on the Arduino.
2. Connect the LED:
- Take the 220-ohm resistor and plug one end into the same row as the longer leg (the anode) of the LED on the breadboard.
- Connect the other end of the resistor to digital pin D3 on the Arduino.
- Connect the shorter leg (the cathode) of the LED to the GND pin on the Arduino.
3. Connect the Buzzer:
- Connect the positive (+) leg of the buzzer to digital pin D4 on the Arduino.
- Connect the negative (-) leg of the buzzer to the GND pin on the Arduino.
Take a moment to double-check all your connections. A clean and correct wiring setup is key to a successful project.
Once everything is in place, it's time to give our Arduino rain detection system its instructions.
Writing the Arduino Code
With the hardware assembled, we now need to write a simple program, or "sketch," to tell the Arduino what to do.
This code will read the input from the rain sensor with Arduino and activate the LED and buzzer when rain is detected.
Open the Arduino IDE on your computer and paste the following code into a new sketch:
// Define the pins we are using
const int sensorPin = 2; // Rain sensor digital output
const int ledPin = 3;    // LED pin
const int buzzerPin = 4; // Buzzer pin

void setup() {
  // Set the pin modes
  pinMode(sensorPin, INPUT);
  pinMode(ledPin, OUTPUT);
  pinMode(buzzerPin, OUTPUT);

  // Start serial communication for debugging
  Serial.begin(9600);
}

void loop() {
  // Read the state of the rain sensor
  int sensorState = digitalRead(sensorPin);

  // The sensor's digital pin goes LOW when it detects rain
  if (sensorState == LOW) {
    // Rain is detected!
    digitalWrite(ledPin, HIGH); // Turn on the LED
    digitalWrite(buzzerPin, HIGH); // Turn on the buzzer
    Serial.println("Rain detected!"); // Print a message to the serial monitor
  } else {
    // No rain detected
    digitalWrite(ledPin, LOW);  // Turn off the LED
    digitalWrite(buzzerPin, LOW); // Turn off the buzzer
    Serial.println("No rain detected."); // Print a message
  }

  // Wait for a short period before checking again
  delay(500); // 500 milliseconds
}
Code Breakdown:
- Constants: We start by defining the pins for our sensor, LED, and buzzer. This makes the code easier to read and modify.
- setup(): This function runs once when the Arduino starts. Here, we set the sensorPin as an INPUT and the ledPin and buzzerPin as OUTPUTs. We also initialize the serial monitor, which is useful for debugging.
- loop(): This function runs continuously. It reads the digital value from the sensor. Since the sensor's digital output goes LOW when it detects moisture, our if statement checks for this condition. If Sensor State is LOW, it turns on the LED and buzzer. Otherwise, it keeps them off.
To upload the code, connect your Arduino to your computer via USB, select the correct board and port in the Arduino IDE's "Tools" menu, and hit the upload button.
Congratulations! Your Arduino rain detector is now complete. A great way to test it is to put a few drops of water on the sensing pad. The LED should light up, and the buzzer should sound, alerting you to the "rain."
Conclusion
You've successfully built a practical and fun DIY rain alarm project! Throughout this tutorial, you've learned not only how to use a rain sensor but also how to interface it with an Arduino to create a real-world application.
This project is a fantastic stepping stone into the exciting world of electronics and home automation.


