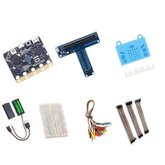
Top 20 BBC Micro:bit Projects in 2025
Summary
The BBC micro:bit continues to revolutionize how students and enthusiasts approach technology education in 2025.
This pocket-sized microcontroller has evolved into one of the most versatile tools for creative coding, physical computing, and interactive learning experiences.
With its built-in sensors, radio capabilities, and user-friendly programming environment, the micro:bit bridges the gap between digital concepts and tangible results.
Modern educators and makers appreciate how the micro:bit transforms abstract programming concepts into engaging, hands-on experiences.
The device's accessibility and comprehensive ecosystem of educational resources make it an ideal platform for learners of all ages.
From simple LED displays to complex IoT applications, the micro:bit empowers users to bring their creative visions to life while developing essential STEM skills.
Below, we present the top 20 exciting BBC micro:bit Projects that showcase the device's remarkable capabilities in 2025.

1. The Interactive Digital Pet
This project is an ideal starting point for anyone new to the micro:bit. It teaches basic programming concepts by creating a virtual pet on the LED display.
Dive into the basics of input and output by programming the micro:bit to simulate a digital pet. The 5x5 LED matrix becomes the pet's face, capable of displaying various emotions.
By pressing button A, your pet might show happiness with a smiley face, while pressing button B could make it sad. Utilize the built-in accelerometer to make the pet react to movement – a gentle shake could trigger a playful animation.
Incorporate the light sensor to influence the pet's behaviour; for example, it could 'sleep' when the ambient light level decreases, displaying a moon icon.
This micro:bit beginner project allows for a gradual understanding of conditional statements, loops (for animations), and sensor integration.
2. The Reaction Timer Game
A fun and competitive project that introduces logical control and game mechanics.
Challenge a friend with this engaging two-player game that tests reaction speed. Each player holds a micro:bit. One of the micro:bits is programmed to randomly illuminate one of its LEDs after a short, unpredictable delay.
The first player to press their micro:bit's button (A or B) after the LED lights up scores a point. The micro:bits communicate wirelessly using their built-in radio functionality to track the score and determine the winner.
When a player reaches a predetermined number of points, their micro:bit displays a "Player 1 Wins!" or "Player 2 Wins!" message on the LED matrix, signaling the end of the game. This project teaches about random number generation, event handling, radio communication, and keeping score using variables.
3. The DIY Electronic Dice (DIY micro:bit electronics)
An easy-to-make digital dice that can be used for board games.
Replace traditional dice with a more interactive and technologically engaging alternative. Program your micro:bit to simulate the roll of a standard six-sided die.
When the micro:bit is shaken (detected by the built-in accelerometer), it will generate a random integer between 1 and 6.
This number is then visually represented on the 5x5 LED matrix, either by displaying the numeral itself or by illuminating a corresponding number of LEDs in a pattern similar to a traditional die.
This simple but effective DIY micro:bit electronics project is a fantastic way to grasp the concepts of random number generation, accelerometer input for detecting shakes, and displaying numerical data on the LED matrix.
4. The Smart Alarm Clock
This project demonstrates how to create a useful gadget by combining various micro:bit features.
Build a basic yet functional alarm clock using your micro:bit. The LED matrix can be programmed to display the current time in a 24-hour or 12-hour format.
Utilize the built-in buttons (A and B) to allow the user to set the desired alarm time. When the current time matches the set alarm time, the micro:bit will activate an external buzzer or speaker connected via crocodile clips to its designated output pins, producing an audible alarm to wake you up.
This project is an excellent exercise in implementing loops for timekeeping, conditional logic to compare the current time with the alarm time, and controlling external electronic components.
5. The Fruit Keyboard (fun micro:bit experiment)
An entertaining project that explores the concept of capacitive touch and circuits.
Turn ordinary fruits into the keys of a makeshift musical instrument! Connect one end of a crocodile clip to one of the micro:bit's input/output pins (like P0, P1, or P2) and the other end to a piece of fruit.
When a person touches the fruit, their body completes a low-current electrical circuit, which the micro:bit can detect as a digital input. Program the micro:bit to play a different musical note (or even a short sound sample) for each fruit connected to a different pin.
This fun micro:bit experiment provides a hands-on understanding of basic electrical conductivity, how the micro:bit can sense touch through its pins, and how to generate sound output, demonstrating a playful intersection of electronics and everyday objects.
6. The Step Counter (BBC micro:bit wearable tech)
Turn your micro:bit into a personal fitness tracker.
Leverage the micro:bit's onboard accelerometer, which is designed to detect changes in motion and orientation, to create a functional step counter.
By programming the micro:bit to recognize the characteristic 'jolt' pattern of a step, you can increment a counter variable each time a step is taken. The current step count can be displayed in real-time on the LED matrix, allowing the user to monitor their activity.
For added functionality, you can program the micro:bit to reset the step count with a specific button press or to transmit the step data wirelessly to another micro:bit for logging or display on a larger screen.
This BBC micro:bit step counter project introduces concepts of sensor data interpretation, variable manipulation, and potentially wireless communication.
7. The Morse Code Communicator
This project teaches about communication protocols and text-based coding.
Delve into the world of communication by building a Morse code messaging system. On the transmitting micro:bit, you can implement a system where pressing and holding a button for different durations represents dots and dashes.
The micro:bit will then translate these dot-dash sequences into letters and numbers according to the Morse code standard, outputting the code visually on its LEDs (short flash for a dot, longer flash for a dash) or audibly using a connected buzzer.
This Morse code signal is then transmitted wirelessly using the micro:bit's built-in radio. The receiving micro:bit is programmed to receive these radio signals, interpret the dots and dashes, and translate them back into readable text, which is then displayed scrolling across its LED matrix.
This project reinforces understanding of binary encoding, timing, radio communication, and basic text manipulation.
8. The Environmental Data Logger
A great IoT project for science enthusiasts, focusing on data collection and analysis.
Transform your micro:bit into a portable environmental monitoring station. Utilize the onboard temperature sensor to measure the ambient air temperature and the light sensor to gauge the surrounding light levels.
Program the micro:bit to periodically take readings from these sensors and store the data. This data can be stored in the micro:bit's limited memory or transmitted wirelessly via radio to another micro:bit or a connected computer.
Subsequently, the collected data can be downloaded and analyzed using spreadsheet software or programming languages like Python to create graphs and identify trends in temperature and light intensity over time.
This project provides a practical introduction to data acquisition, storage, and basic data analysis techniques, fostering scientific inquiry.
9. The Automated Plant Watering System (micro:bit IoT project)
This is a more advanced project that delves into the world of the Internet of Things (IoT).
Create an autonomous system to care for your plants. Connect a soil moisture sensor to the micro:bit to continuously monitor the water content in the soil.
Program the micro:bit to read the sensor values and establish a threshold for dryness. If the soil moisture level falls below this threshold, the micro:bit will send a signal to a motor driver board.
This board, in turn, will activate a small water pump submerged in a water reservoir. The pump will then deliver water to the plant until the soil moisture sensor indicates that the desired level has been reached.
This micro:bit IoT project introduces concepts of sensor interfacing, controlling external actuators (the water pump) through a driver circuit, implementing conditional logic for automated decision-making, and the fundamental principles of closed-loop control systems.
10. The Smart Greenhouse Controller (DIY projects with micro:bit)
Building on the plant watering system, this project creates a full-fledged environmental control system.
Develop a sophisticated system to maintain optimal conditions within a miniature greenhouse. The micro:bit acts as the central control unit, continuously monitoring various environmental parameters using connected sensors.
It reads data from the soil moisture sensor to determine if watering is needed, from the temperature sensor to track the internal temperature, and from the light sensor to assess the amount of sunlight.
Based on pre-defined optimal ranges for each parameter, the micro:bit will automatically take corrective actions. If the temperature gets too high, it can activate a small fan to improve ventilation or control a servo motor to open a vent or window.
If the light level is insufficient, it could potentially trigger a small grow light (requiring additional components). If the soil is too dry, it will initiate the watering system (as described in the previous project).
This comprehensive DIY project with micro:bit demonstrates complex sensor integration, controlling multiple actuators, implementing more intricate conditional logic with multiple criteria, and building a rudimentary automated environmental control system.
11. The Radio-Controlled Car (programming with BBC micro:bit)
A classic robotics project that introduces remote control concepts.
Embark on the exciting world of robotics by building a simple radio-controlled car. One micro:bit will serve as the remote control unit.
By tilting this micro:bit forward, backward, left, or right, the onboard accelerometer detects the change in orientation and sends corresponding directional commands wirelessly via the built-in radio.
The second micro:bit is mounted on the car chassis and connected to a motor driver board. This board receives the radio signals from the controller micro:bit and translates them into signals that control the speed and direction of two DC motors connected to the car's wheels.
Different tilt angles of the controller can be mapped to varying speeds or turning radii of the car. This programming with BBC micro:bit project offers a hands-on understanding of accelerometer input, wireless communication protocols, motor control using a driver board, and the fundamental principles of remote operation in robotics.
12. The Musical Light Box
Combine music and light to create an artistic display.
Merge the worlds of audio and visual art by constructing a musical light box. Connect a Neopixel LED strip, which consists of individually addressable RGB LEDs, to the micro:bit using crocodile clips.
Program the micro:bit to generate different musical notes or sound frequencies through one of its output pins. Simultaneously, program the Neopixel strip to display a variety of dynamic and colorful light patterns.
The key creative aspect of this project lies in synchronizing the music and the lights. You can program the lights to change color or pattern in response to the pitch or rhythm of the sound being played.
For instance, higher notes could trigger brighter or faster-changing light patterns, while lower notes could produce calmer, slower transitions.
The project allows for exploration of sound generation, controlling addressable LEDs, and creating visually engaging displays that react to audio.
13. The Smart Security Alarm
A practical project that demonstrates how to create a simple security system.
Design a rudimentary security system for a door or window. Create a simple circuit using strips of conductive material, such as tin foil, placed across the opening you want to protect.
Connect these strips to two of the micro:bit's input pins using crocodile clips. As long as the conductive strips remain intact and connected, the micro:bit will read a specific input state.
However, if the door or window is opened, the conductive circuit will be broken, causing a change in the input state detected by the micro:bit. Program the micro:bit to monitor this input.
If a change in state (indicating a broken circuit) is detected, the micro:bit will activate an external buzzer connected to one of its output pins, producing a loud alarm sound to alert you to a potential intrusion.
This project illustrates basic circuit principles, digital input monitoring, and triggering an output based on a sensor event, providing a foundational understanding of security system design.
14. The Compass Bearing Finder
Harness the micro:bit's built-in magnetometer to create a functional compass.
Utilize the micro:bit's onboard magnetometer, a sensor that can detect magnetic fields, to build a digital compass. Program the micro:bit to read the data from the magnetometer, which provides information about the Earth's magnetic field.
By processing this data using trigonometric functions, you can calculate the current compass bearing (the direction you are facing in degrees).
The micro:bit can then visually display this bearing on its LED matrix, perhaps as a numerical value or by illuminating a sequence of LEDs to indicate the direction of North.
This project provides a practical application of sensor data processing, introduces basic concepts of magnetic fields and direction finding, and demonstrates how to represent numerical data visually.
15. The Wireless Game Show Buzzer
Create a multi-player game show system using the micro:bit's radio feature.
Design an interactive game show buzzer system for multiple participants. Each player has their own micro:bit. When a question is asked, players can press a designated button (e.g., button A) on their micro:bit to "buzz in." Their micro:bit will then transmit a unique identifier (e.g., player number) wirelessly to a central "host" micro:bit.
The host micro:bit is programmed to receive these signals, record the order in which players buzzed in, and indicate the first player to respond, perhaps by displaying their number on its LED matrix.
To prevent multiple players from buzzing in simultaneously after the first response, the host micro:bit can be programmed to ignore subsequent buzz-in signals until the host resets the system (e.g., by pressing its own button B).
Optionally, each player's micro:bit could also have a connected buzzer that sounds when they press their button, providing auditory feedback.
This project is a great way to explore radio communication between multiple devices, handling multiple inputs, and implementing basic game logic.
16. The Motorbike Simulator (creative micro:bit ideas)
A clever project that uses the micro:bit as a game controller.
Transform your micro:bit into a motion-sensitive controller for a virtual motorbike game on your computer. Using the micro:bit's accelerometer, program it to detect tilting motions in different directions.
These tilt movements can then be translated into control commands for the game. For example, tilting the micro:bit forward could accelerate the motorbike, tilting it backward could brake, and tilting it left or right could steer.
The micro:bit communicates these control signals to the computer via a USB connection, often utilizing a serial communication protocol. On the computer side, you would need to use a programming environment (like Python with libraries such as Pygame or processing) to create a simple motorbike game that reads the serial data from the micro:bit and updates the game state accordingly.
This creative micro:bit ideas project provides a fascinating way to bridge the physical world with the digital, demonstrating how sensor input from a microcontroller can be used to interact with computer applications and create intuitive game controls.
17. The Wireless Message Sender
An easy-to-use communication device for sending short messages.
Build a simple, two-way wireless communication device capable of sending short text messages between two micro:bits. On the sending micro:bit, you can implement a basic text input method.
This could involve cycling through letters and numbers displayed on the LED matrix using button presses and selecting a character with another press. Once the user has composed their message, pressing a specific button will transmit the message wirelessly using the micro:bit's built-in radio.
The receiving micro:bit is programmed to listen for incoming radio messages. When a message is received, it will display the text scrolling across its LED matrix, allowing the recipient to read the transmitted information.
This project introduces fundamental concepts of wireless communication, basic text encoding and decoding, and implementing simple user interfaces using button inputs and LED matrix output for message composition and display.
18. The Micro:bit Theremin
An innovative musical instrument that detects hand proximity.
Create a unique musical instrument inspired by the Theremin, which is played without physical contact. Utilize the micro:bit's touch-sensitive input/output pins.
By connecting one of these pins (e.g., P0) to an antenna (which can be a simple wire), you create a small electric field around it. When your hand or another conductive object gets closer to this antenna, it affects this electric field, and the micro:bit can detect this change as a variation in capacitance or resistance.
Program the micro:bit to interpret these proximity changes and map them to different musical pitches or frequencies. Connect a speaker to one of the micro:bit's output pins using crocodile clips.
As you move your hand closer to or further away from the antenna, the micro:bit will generate a corresponding change in the audio frequency sent to the speaker, producing the characteristic ethereal sound of a Theremin.
This project is an excellent example of using the micro:bit's capabilities for creative expression, exploring non-contact sensing, and understanding the relationship between physical interaction and sound generation.
19. The Micro:bit Controlled Robot Arm
A complex but highly rewarding project in robotics and control systems.
Take your robotics skills to the next level by building a robotic arm controlled by a micro:bit. One micro:bit will act as the control interface.
You can program it to use its buttons or accelerometer to send commands representing desired movements for the robot arm's various joints (e.g., base rotation, shoulder movement, elbow flexion, gripper open/close).
These commands are transmitted wirelessly via the micro:bit's radio to a second micro:bit mounted on the robot arm. This receiving micro:bit is connected to a servo driver board, which in turn controls the individual servo motors that actuate the different joints of the robot arm.
The received commands are interpreted by the robot arm's micro:bit to control the angle and movement of each servo motor, allowing for coordinated motion of the entire arm.
This advanced project integrates concepts of wireless communication, controlling multiple servo motors, understanding the kinematics of a robot arm, and implementing a control system where user input translates to physical actions in the robotic system.
20. The Interactive Wearable Badge
A project that combines fashion and technology to create an expressive accessory.
Merge fashion with technology by creating a personalized and interactive wearable badge. Secure the micro:bit onto a piece of felt using regular sewing thread.
Then, use conductive thread to connect the micro:bit's power and ground pins to a battery pack, and optionally, connect other input/output pins to touch-sensitive areas on the felt created with conductive thread.
Program the micro:bit to display animated graphics, scrolling text messages, or patterns on its LED matrix. You can make the badge interactive by programming it to respond to touch on the conductive areas, triggering different animations or messages.
For example, touching one area could change the displayed text, while touching another could alter the LED pattern. The micro:bit's accelerometer can also be used to make the badge react to movement, perhaps displaying a different animation when you walk or shake your arm.
This BBC micro:bit wearable tech project encourages creativity in both design and programming, allowing users to create unique and expressive wearable technology that responds to their environment and interactions.
Conclusion
The remarkable diversity of these 20 projects demonstrates the micro:bit's continued evolution as a powerful platform for creative expression, practical problem-solving, and educational innovation.
From simple beginner projects to sophisticated IoT applications, the micro:bit ecosystem provides limitless opportunities for learners to explore technology while developing valuable STEM skills.
These projects represent just a fraction of what's possible with the BBC micro:bit in 2025. As the platform continues to evolve with new accessories, software updates, and community contributions, we can expect even more innovative applications that push the boundaries of what's achievable with this remarkable device.
Whether you're a student taking first steps into programming or an experienced maker pursuing advanced projects, the micro:bit offers a pathway to transform creative ideas into tangible technological solutions.


