What is BBC micro:bit? Features, Uses, Pinout & Hardware Overview
Summary
Ever wondered how cool gadgets and smart devices are made? Meet the BBC micro:bit—a tiny, pocket-sized computer that’s your ticket to the world of coding and electronics. It is designed especially for young creators and beginners.
The micro:bit packs built-in sensors, LED lights, and buttons, letting you turn your ideas into interactive projects in no time. Whether you want to build a game, invent a gadget, or just see what tech can really do, the micro:bit makes it simple and fun.
This blog will tell you all about the BBC micro:bit and so you can start using it and make the most of it.

What is BBC Microbit?
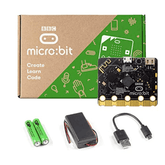
The BBC micro:bit is a tiny educational development board that makes learning coding and electronics simple and enjoyable for young students. The BBC micro:bit is a compact, programmable development board created to make learning coding and electronics engaging and accessible for young students.
The micro:bit features an array of built-in components, including LED lights, programmable buttons, a 3-axis accelerometer and magnetometer, and Bluetooth connectivity.
Its intuitive design allows students to quickly start coding and inventing, while more advanced programming tools are available as their skills progress, making the micro:bit a versatile tool for STEM education.

In the 1980’s, when computers were newly introduced, BBC developed the BBC Micro as part of the BBC Computer Literacy Project, to teach children about the basics of computing.
Since then, technology has progressed a lot.
So, nearly 30 years later in 2014, BBC announced that they planned to create a similar smaller computer to teach young students, which they named in BBC micro:bit, which was designed for modern STEM learning.
The micro:bit was launched in 2016 as part of a modern initiative to promote digital literacy.
What is the micro:bit used for?
It is a device that is used to teach children and beginners how to code and build simple electronic DIY projects. It is a small device that helps students understand how computers work and how they can control things like lights, buttons, motors, and sensors.
Students can use the BBC micro:bit to make lots of different fun and exciting projects.
They can make a digital thermometer that shows the temperature on the LED screen, build a step counter that counts how many steps they take while walking, or even create a small game where they can play rock-paper-scissors with their friends.
Students can also make simple robots that move around, create alarm systems for their rooms, or build weather stations that tell them about the temperature and humidity.
Students learn important skills like problem-solving, logical thinking, and creativity while having fun with their projects. The device is also affordable, which makes it accessible to schools with limited budgets.
Features of micro:bit

- The BBC micro:bit is packed with awesome features that make it perfect for building cool projects.
- The microbit board has a 25-LED matrix, which lets you scroll messages, display numbers, or create fun animations.
- It comes with an accelerometer to detect movement and tilting.
- It has a built-in compass so you can explore direction and navigation.
- With Bluetooth connectivity, you can interact with the internet or connect your micro:bit to other devices wirelessly.
- There are two user input buttons for custom controls, plus a micro USB port for easy programming from your PC.
- You can power it up with a battery pack, making it portable for projects on the go.
- The micro:bit runs on an ARM Cortex-M4 CPU and also includes a built-in speaker and microphone for sound-based experiments.
- Along the bottom, you’ll find a 20-pin edge connector, opening up even more possibilities to connect sensors, motors, and other electronics.
BBC micro:bit Pinout Diagram

The micro:bit has three main types of pins that you’ll use when creating your own projects: GPIO, 3V power, and GND (ground).
GPIO (General Purpose Input/Output) Pins (Pin 0,1,2)
The GPIO pins on the micro:bit let you connect and control a wide variety of external devices, such as LEDs, buzzers, or sensors. You can use these pins to send signals out or receive input from your custom circuits, making your projects interactive and dynamic.
3V Power Pin (Pin 3V)
The 3V power pin provides a steady 3-volt supply to power external components and modules you connect to the micro:bit. It’s perfect for running small sensors or devices that need a reliable power source straight from your board.
GND or Ground Pin (Pin GND)
The GND pin acts as the reference point for all electrical circuits connected to the micro:bit. It completes the circuit and ensures that all your connected components work safely and correctly, making it an essential part of every project.
Hardware Overview of Microbit
The micro:bit is packed with a variety of hardware features designed to help you create interactive and innovative projects.
Front Side Features

1. Buttons: The micro:bit has two programmable buttons, labeled A and B, that you can use for input in your projects. Press them to control games, trigger actions, or navigate menus.
2. LED Display & Light Sensor: A 5x5 grid of LEDs lets you display text, numbers, and animations. The same LEDs also act as a light sensor, allowing your micro:bit to detect and react to changes in light levels.
3. Touch Logo: The gold micro:bit logo on the front is touch-sensitive. You can use it as an extra input, just like a button, to trigger different actions in your code.
4. Microphone LED: A small LED next to the microphone lights up when the microphone is active. This lets you know when your micro:bit is listening for sound input.
Back Side Features

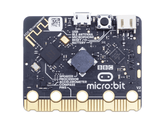
1. Radio & Bluetooth Antenna: The Radio & Bluetooth antenna enables wireless communication, letting your micro:bit connect to phones, tablets, or other micro:bits.
2. Processor & Temperature Sensor: The ARM Cortex-M4 CPU is the brain of the micro:bit, running all your code and managing the board’s features. Also, it can measure temperature using its built-in sensor, so you can build weather stations or monitor the environment.
3. Compass (Magnetometer): The built-in compass senses magnetic fields and direction, so your micro:bit can tell which way it’s facing.
4. Accelerometer: This sensor detects movement, shakes, and tilts, allowing your micro:bit to respond to motion.
5. Micro USB Connector: The micro USB port is used to connect your micro:bit to a computer for programming or to provide power.
6. Yellow USB LED: When you’re sending code to your micro:bit, this yellow LED flashes. It lets you know your device is talking to your computer.
7. Reset Button: The reset button restarts your micro:bit, which is handy if your program gets stuck or you want to quickly rerun your code.
8. Battery Port: This port is where you connect a battery pack to power your micro:bit when you’re not connected to a computer.
9. USB Interface Chip: This chip manages the connection between your micro:bit and your computer. It helps transfer your code and handles USB communication.
10. Speaker: A built-in speaker lets your micro:bit play sounds, music, or audio feedback directly—no extra parts needed.
11. Microphone: The built-in microphone allows your micro:bit to detect and respond to sounds, like claps or music, making sound-based projects possible.
12. Red Power LED: The red LED lights up when your micro:bit is powered on. It’s a quick way to check if your device has power from USB or batteries.
What language is used in micro:bit?
The micro:bit uses different types of programming languages, starting from block-coding to high-level languages like Python.
- MakeCode: Beginners can use MakeCode, which is a block-based language. It is like solving a puzzle—you just drag and drop blocks to create your program.
- Python and JavaScript: As students become more confident, they can move on to Python or JavaScript, which are text-based programming languages
Top 5 BBC micro:bit Projects Idea
Once a BBC Microbit is brought, it can be used directly to build projects. Here are 3 simple project ideas to help you get started:
Digital Thermometer
Students can program the micro:bit to display the current temperature on its LED screen. The built-in temperature sensor reads the room temperature and shows it as numbers or even as a simple bar graph. This project teaches students about sensors and how to display data in different formats.
Step Counter Project
Using the motion sensor inside the micro:bit, students can create their own fitness tracker that counts how many steps they take while walking or running. The device can be worn or carried in a pocket, and it will keep track of daily movement and display the step count on the LED screen.
Rock Paper Scissors Game Project
This classic game becomes digital when students program the micro:bit to randomly choose rock, paper, or scissors when they shake it. The LED screen shows different patterns for each choice, and students can play against the computer or challenge their friends.
Scrolling Name Badge Project
Students can turn their micro:bit into a digital name badge by programming it to scroll their name or a custom message across the LED display. This project is a fun way to learn about loops and text display, and it’s perfect for school events or clubs.
Simple Alarm System Project
By using the micro:bit’s motion sensor, students can create a basic alarm system that triggers an alert (like flashing lights or a custom sound) if the device is moved. This project introduces concepts of security and real-world problem solving, making it both practical and educational.
Is micro:bit Easy to Learn?
The micro:bit is very easy to learn, even for children who have never done coding before.
Younger students can start with simple block-based programming (like dragging and dropping puzzle pieces), which helps beginners understand coding concepts quickly.
This visual approach makes programming feel like solving a puzzle or playing with building blocks, which is much less scary than looking at complicated computer code with lots of confusing symbols and numbers.
The block-based programming uses colourful blocks that students can simply drag from one side of the screen and drop into their program. Each block represents a specific action, like "show a smiley face" or "play a sound" or "turn on a light." When students connect these blocks together, they create a complete program that tells the micro:bit what to do. This method is so simple that even primary school children can understand it within minutes.
Once the students become more comfortable with the basics, they can gradually move to text-based coding in Python or JavaScript. This progression allows them to grow their skills naturally without feeling overwhelmed. The transition from blocks to text is smooth because students already understand the logic and concepts behind programming.
This hands-on experience helps students gain confidence and enjoy the process of creating technology. They can experiment, make mistakes, learn from them, and try again without any fear. The immediate feedback keeps them engaged and motivated to keep learning and exploring new possibilities.
Who Uses micro:bit?
The micro:bit is mainly used by school students, specially by students in middle school or high school, to learn coding and electronics in a fun way.
Teachers also use it extensively to conduct STEM activities in the classroom and make their lessons more interactive and engaging. Many educators have found that students pay more attention and understand concepts better when they can actually touch and program real devices instead of just reading from textbooks.
It can be a useful addition in coding labs, STEM labs, and Robotic Labs for beginners, where students can work on group projects and learn together.
Beyond schools, even some college students and hobbyists use it to build small tech projects and prototype their ideas quickly. Engineering students often use it for their assignments and mini-projects, while hobbyists enjoy creating home automation systems, weather stations, or simple games in their free time.
Since it is affordable and easy to use, the micro:bit is a good choice for anyone who is starting to learn about computers, programming, and electronics.
Conclusion
The BBC micro:bit has proven to be an excellent tool for introducing young minds to the world of programming and electronics. Its simple design, affordable price, and hands-on approach make it perfect for students who are just starting their journey in technology.
From basic coding concepts to exciting projects like games and sensors, the micro:bit provides endless opportunities for learning and creativity.
Schools, teachers, and parents can confidently use this device to make STEM education more engaging and practical. As technology continues to grow, the micro:bit serves as a solid foundation for building future innovators and problem-solvers.
If you appreciate our work, don't forget to share this post and leave your opinion in the comment box.


