Building a Weather Station Using ESP32 Webserver
Summary
The ESP32 is a powerful microcontroller noted for its Wi-Fi and Bluetooth functionality. One of the most intriguing projects you can create using it is a weather station that collects and shows real-time weather data on a web server. This project is ideal for both enthusiasts and experts because it combines features of IoT, web programming, and data analysis. In this article, we'll walk you through the stages of building your own weather station using the ESP32.
Episode EE04

Why build a weather station?
Weather stations are not only useful but also provide excellent learning opportunities. By creating one yourself, you can:
- Real-time weather updates are available for your location.
- Learn to use sensors and microcontrollers.
- Understand how to configure and interact with a web server.
- Gain expertise in data logging and analysis.
Know about What is Esp32 Development Board
Components needed to build a Weather Station:
To get started, you will need the following components:
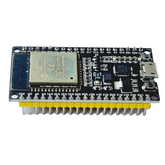
- ESP32 Board: The project's brain, capable of running the web server and collecting sensor data.
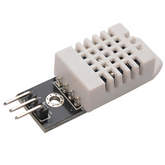
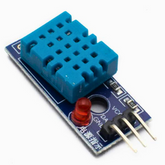
- The DHT11 or DHT22 Sensor is used to measure temperature and humidity.
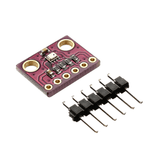
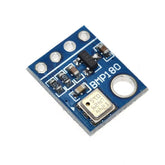
- BMP180 or BMP280 Sensor: Used for measuring barometric pressure.
- Jumper Wires: These are for connecting your components.
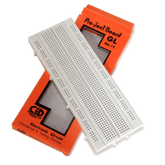
- Breadboard: This is for quick prototyping and connecting.
- Power Supply: For the ESP32, use a USB cable or battery pack.
- Resistors (optional): Depends on the circuit design.
Discover how the BMP280 sensor works and how can enhance your designs.
Check out our latest project Controlling an LED with Two ESP32s
Steps to Setting up the ESP32 Web Server
1. Installing Arduino IDE and ESP32 Board
First, make sure you have the Arduino IDE installed. If you do not already have the ESP32 board installed in your Arduino IDE, perform these steps:
- Navigate to File > Preferences.
- In the "Additional Board Manager URLs" section, type https://dl.espressif.com/dl/package_esp32_index.json.
- Navigate to Tools > Board > Board Manager and search for "ESP32". Install the most recent version.
2. Connecting the sensors.
DHT11/DHT22 Sensor: Connect the ESP32's VCC pin to 3.3V, the GND pin to ground, and the data pin to GPIO 4 (or any other GPIO pin you like).
Connect the BMP180/BMP280 sensor's VCC to 3.3V, GND to ground, SCL to GPIO 22, and SDA to GPIO 21.

3. Writing the Code
Here’s a basic code setup for the ESP32 weather station:
#include
#include
#include
#include
#include

// Replace with your network credentials
const char* ssid = "YOUR_SSID";
const char* password = "YOUR_PASSWORD";

// Initialize DHT and BMP sensor
#define DHTPIN 4
#define DHTTYPE DHT22
DHT dht(DHTPIN, DHTTYPE);
Adafruit_BMP280 bmp;

// Create AsyncWebServer object on port 80
AsyncWebServer server(80);

void setup() {
  // Start Serial Monitor
  Serial.begin(115200);

  // Connect to Wi-Fi
  WiFi.begin(ssid, password);
  while (WiFi.status() != WL_CONNECTED) {
    delay(1000);
    Serial.println("Connecting to WiFi...");
  }
  Serial.println("Connected to WiFi");

  // Initialize DHT and BMP sensor
  dht.begin();
  if (!bmp.begin()) {
    Serial.println("Could not find a valid BMP280 sensor, check wiring!");
    while (1);
  }

  // Serve the HTML and sensor data
  server.on("/", HTTP_GET, [](AsyncWebServerRequest *request){
    String html = "ESP32 Weather Station\n";
    html += "Temperature: " + String(dht.readTemperature()) + " °C\n";
    html += "Humidity: " + String(dht.readHumidity()) + " %\n";
    html += "Pressure: " + String(bmp.readPressure() / 100.0F) + " hPa\n";
    request->send(200, "text/plain", html);
  });

  // Start server
  server.begin();
}

void loop() {
  // Nothing here as server runs asynchronously
}
4. Uploading the Code
Connect the ESP32 to your PC. Choose the appropriate board and port in the Arduino IDE (Tools > Board > ESP32 Dev Module and Tools > Port). Click the Upload button. Once the code has been uploaded, use the Serial Monitor to see if the ESP32 has successfully connected to Wi-Fi. The IP address will be printed on the Serial Monitor. This is the address you'll use to connect to the web server.
5. Accessing Weather Data
Now that your ESP32 is functioning as a web server, you may get weather data by entering the ESP32's IP address into a web browser on your computer or smartphone. The website will show the current temperature, humidity, and pressure.
Also, read Building Smart Water Quality Monitoring System Using ESP32
Enhancing the project.
The basic weather station can be expanded.
- Add More Sensors: Measure additional environmental characteristics such as air quality and UV index.
- Data logging: Data logging is the process of storing data in a database or log file for future study.
- Mobile Application: Create a simple app to retrieve and display weather data on your phone.
- Weather Alerts: Set up notifications to inform you when the temperature rises above a certain level
Conclusion
Please do check out other blog posts about Popular electronics
Check out other related blog posts about Drones: Drone transmitter and receiver , Drone motors and Getting started with a Quadcopter
Make sure you check out our wide range of products and collections (we offer some exciting deals!)


