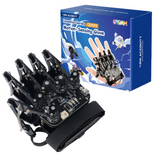
ACEBOTT QD023 Motion-Sensing Glove Assembly Guide
Summary
The concept of controlling devices with a simple hand gesture has long been a staple of science fiction, but it's now a tangible reality for makers, students, and robotics enthusiasts.
The ACEBOTT QD023 Motion-Sensing Glove is a DIY kit that aims to bring this advanced capability to your workbench, promising intuitive, real-time control for your projects.
It comes packed with features designed to appeal to both curious beginners and experienced developers.
In this detailed walkthrough, we'll unbox the kit, examine its core components, and provide a clear, step-by-step guide to its construction.
Let's find out if the ACEBOTT QD023 is the right tool to bring your gesture-controlled ideas to life.

What is the ACEBOTT QD023 Glove Kit?
It's a wearable device kit that you assemble to translate your hand and finger movements into digital commands.
At its heart is an ESP32 microcontroller, a powerful and popular choice in the DIY electronics world known for its integrated Wi-Fi and Bluetooth capabilities.
This makes it a compelling option for anyone looking to dive into wireless robotics or create a unique STEM Robotics Project without starting from scratch.
It is positioned as a powerful yet approachable entry into the world of wearable tech and human-machine interfaces.
Hardware and Software Features
Let's get into the specifics of what makes this glove tick. The ACEBOTT QD023 features a spec sheet clearly designed to deliver a precise and responsive user experience.
Hardware Breakdown
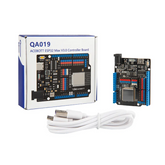
- ESP32 Controller: The entire system is powered by an integrated ESP32 controller board. This capable microcontroller handles all the processing, reads data from the sensors, and transmits commands via its built-in Bluetooth functionality, eliminating the need for bulky external modules. This is a core component that makes this a great piece of ESP32 Wearable Tech.
- Five High-Precision Encoders: To track the movement of each finger, the kit utilizes five rotary encoders. As you bend your fingers, these encoders rotate, providing precise data on the flexion of each digit. This allows for nuanced control, far beyond simple open-or-closed hand gestures.
- 6-Axis Accelerometer and Gyroscope: Beyond finger movement, the glove tracks the orientation and motion of your entire hand using an accelerometer and gyroscope module. This sensor detects tilt, rotation, and sudden movements, enabling a full range of gesture-based commands.
- Acrylic Exoskeleton and Fabric Glove: The mechanical structure is made from laser-cut acrylic pieces that you assemble into an exoskeleton. This frame houses the electronics and is mounted onto a comfortable fabric glove, providing a sturdy yet wearable foundation for the device.
Software and Programming
One of the most appealing aspects of the QD023 is its accessible software ecosystem.
- Arduino and ACECode Compatibility: The glove is fully compatible with the popular Arduino programming environment, giving developers a familiar platform for writing custom code. It also works with ACECode, ACEBOTT's own programming language, which can be more beginner-friendly.
- Pre-Configured Code and Tutorials: To lower the barrier to entry, the kit comes with pre-loaded control code and comprehensive, step-by-step tutorials. This "plug-and-play" approach means you can get the glove working with compatible ACEBOTT robots right out of the box before diving into custom programming.
- Open-Source Potential: The open-source nature of the software allows for secondary development and endless customization. You can modify the existing code or write entirely new programs to integrate the glove with virtually any project that can receive Bluetooth signals.
Unboxing the ACEBOTT QD023 Glove Kit

Opening the box, you’ll find all the components neatly organized. Before starting, it’s a good practice to lay everything out and verify you have all the parts listed in the manual.
This initial inventory check will ensure a smooth assembly process for your Gesture Control Glove Kit.
Inside the box, you should find:
- The fabric glove
- A set of laser-cut acrylic plates
- The ESP32 controller board
- Five rotary encoders
- An accelerometer module
- A 4xAAA battery holder and USB-C cable
- All necessary wires, screws, Velcro straps, and foam pads
Step-by-Step Assembly Instructions
Now it's time to begin the ACEBOTT QD023 Glove Kit Assembly. This guide will walk you through the key phases of construction. For visual learners, following along with an official video guide can be very helpful.
Step 1: Building the Finger Mechanisms

The first task is to construct the five articulated finger units that house the encoders.
- Mount the Encoders: Take the main acrylic piece for one finger and align a rotary encoder with the designated mounting holes. The shaft of the encoder should face outwards. Secure it with the provided self-tapping screws, but be careful not to overtighten and crack the acrylic.
- Attach the Linkages: Connect the smaller acrylic pieces that form the linkage system. These pieces are what connect to your fingertips and translate their movement into rotation for the encoder. Ensure the joints can move freely.
- Repeat for All Fingers: Follow the same process for the remaining four fingers. This is the most repetitive part of the build, so take your time and ensure each one is constructed correctly.
Step 2: Attaching the Assembly to the Glove

With the finger units complete, the next step is to integrate them with the fabric glove.
- Prepare the Straps: The kit uses Velcro straps to attach the mechanical parts to your fingers. As shown in the official ACEBOTT QD023 Tutorial videos, you’ll cut small pieces of Velcro and loop them through the designated slots on the end of each finger linkage.
- Mount the Main Plate: The large acrylic plate that will hold the ESP32 and battery pack sits on the back of your hand. Attach it using the provided foam pads for comfort and the larger Velcro straps to secure it around your palm and wrist.
- Connect the Finger Units: Place the assembled finger mechanisms onto the back of the glove, aligning them with your fingers. Put the glove on and slide your fingers through the Velcro loops you prepared, adjusting them for a snug but comfortable fit.
Step 3: Wiring the Electronics

This is where the glove comes to life.
- Connect the Encoders and Accelerometer: Plug the wiring harnesses from each of the five encoders and the accelerometer module into their corresponding ports on the ESP32 mainboard. The ports are clearly labeled, so match them carefully according to the manual.
- Install the Battery Holder: The glove is powered by four AAA batteries. Stick the battery holder to the designated spot on the main plate using the included double-sided tape and plug its power cable into the control board.
Step 4: Final Touches and Power-On

Before you start controlling things, a few final steps are needed.
- Cable Management: Tidy up the wires to prevent them from snagging on anything while you're moving your hand.
- Final Fit Adjustment: Put the glove on one last time. Adjust all the Velcro straps—around your fingers, palm, and wrist—to ensure the device is secure and the mechanical parts move smoothly as you flex your hand.
- Power Up: Turn on the switch on the battery holder. The ESP32 board should light up, indicating it's powered on and ready to pair with a device. Your DIY Motion-Sensing Glove is now complete.
Conclusion
Congratulations on assembling your ACEBOTT QD023 Motion-Sensing Glove! You’ve not only built a sophisticated piece of wearable technology but also gained hands-on experience with mechanics, electronics, and robotics.
This project is a fantastic introduction to the world of human-machine interfaces.
The assembly is just the beginning. The true excitement lies in what you’ll do with it.
Whether you use it to pilot a robotic car, manipulate a robotic arm, create a custom video game controller, or invent an entirely new application, the QD023 provides a powerful and intuitive platform for your creativity.
Now go on and bring your gesture-controlled ideas to life.


