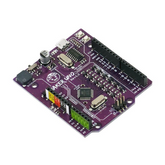
Introduction to Cytron Maker Nano
Summary
The landscape of microcontroller development has evolved dramatically, and finding the perfect balance between power, features, and simplicity has become increasingly important for makers, students, and professionals alike.
This is where the Cytron Maker Nano comes in. It’s a development board that's quietly revolutionizing how we approach Arduino-compatible projects without the usual compromises that plague similar platforms.
What immediately catches your attention about this board isn't just its compact size or impressive feature set, but how seamlessly it bridges the gap between beginner-friendly Arduino development and professional-grade project requirements.
After spending considerable time exploring its capabilities, I can confidently say this isn't just another Arduino clone. It's a thoughtfully engineered solution that addresses real pain points in the maker community.
If you're working on STEM education projects, developing an Arduino robot, or diving into complex programmable robot for kids' applications, this guide will walk you through everything you need to know about the Cytron Maker Nano to determine if it's the right platform for your next innovative project.

What Is the Cytron Maker Nano?
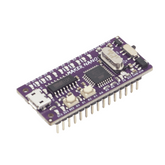
The Cytron Maker Nano represents a fascinating evolution in Arduino-compatible development boards that genuinely surprised me with its attention to detail and practical engineering choices.
Built around the familiar ATmega328P microcontroller that powers the classic Arduino Nano, this board manages to pack significantly more functionality into a nano-sized form factor without sacrificing the simplicity that makes Arduino so accessible.
What sets this board apart from the crowded field of Arduino alternatives is its integrated peripherals and thoughtful pin arrangement.
The Maker Nano board eliminates many of the external components typically required for common projects, effectively reducing your component count and simplifying circuit design. This becomes particularly valuable when working on educational projects or when space constraints matter.
The platform has gained significant traction in STEM learning kit applications and educational environments where reliability, ease of use, and built-in features matter more than raw processing power.
It's positioned perfectly for developers who need something more capable than basic Arduino boards but don't want the complexity of advanced development platforms.
The board maintains full Arduino IDE compatibility, ensuring that your existing sketches, libraries, and development workflow remain unchanged.
This compatibility extends to popular Arduino shields and accessories, making it an excellent upgrade path for existing Arduino users looking for enhanced capabilities.
Key Features of Maker Nano

After thoroughly testing the Cytron Maker Nano across various project scenarios, I've identified features that genuinely enhance the development experience rather than just adding marketing bullet points.
The integration of commonly used peripherals directly onto the board represents a significant time-saver for both prototyping and final implementations.
- Built-in RGB LEDs: The board includes programmable RGB LEDs that eliminate the need for external indicator lights in most projects. These aren't just status indicators – they're fully programmable and perfect for visual feedback in Arduino robot applications or educational robot with sensors projects.
- Integrated Buzzer: A built-in buzzer provides immediate audio feedback capabilities without requiring external components. This proves invaluable for debugging, user interface feedback, or creating simple sound effects in interactive projects.
- Enhanced Power Management: The Maker Nano board features improved power regulation and USB-C connectivity for reliable power delivery. The board can be powered via USB-C, external power jack, or through the VIN pin, providing flexibility for different deployment scenarios.
- Comprehensive GPIO Access: All Arduino Nano pins remain accessible while adding several additional GPIO options. The pin layout maintains breadboard compatibility while providing clearly labeled connections that reduce wiring errors during prototyping.
- Built-in Voltage Regulation: Multiple voltage rails (3.3V and 5V) are available with sufficient current capacity for sensors and peripherals commonly used in STEM education projects. This eliminates the need for external voltage regulators in most applications.
The board's compact design doesn't compromise on connectivity options. Multiple communication interfaces including I2C, SPI, and UART are clearly marked and easily accessible, making it straightforward to connect sensors, displays, and communication modules essential for modern Arduino projects.
Maker Nano Pinout Diagram Explained

Understanding the Cytron Maker Nano pinout is crucial for successful project implementation, and the thoughtful pin arrangement becomes apparent once you start working with the board.
The designers clearly prioritized practical usability over simply cramming maximum pins into minimum space.
Digital I/O Pins (D0-D13)
The Maker Nano board maintains full Arduino Nano compatibility with its digital pin configuration.
Digital pins D0-D13 are clearly marked along the top edge of the board, with each pin capable of digital input or output operations at 5V logic levels.
- Serial Communication Pins: Pins D0 (Rx) and D1 (Tx) serve as the hardware UART interface, marked in distinctive blue coloring in the diagram. These pins handle USB serial communication and can be used for external serial device communication, though they should be avoided during USB programming.
- External Interrupt Pins: D2 and D3 support external interrupts (INT0 and INT1 respectively), essential for responsive input handling in robotics applications. These pins are particularly valuable in Line Following Robot projects where immediate response to sensor changes is critical.
- PWM-Capable Pins: The diagram clearly identifies PWM-capable pins D3, D5, D6, D9, D10, and D11 with special markings. These pins provide analog output simulation through pulse-width modulation, essential for motor speed control, LED brightness adjustment, and servo positioning in Arduino robot applications.
Analog Input Pins (A0-A7)
The bottom edge of the board features analog input pins A0-A7, providing expanded analog capabilities compared to the standard Arduino Nano.
These pins offer 10-bit ADC resolution (0-1023 values) for precise sensor readings.
- Dual-Function Capability: Analog pins A0-A5 can function as either analog inputs or digital I/O pins (D14-D19), providing flexibility when analog functionality isn't required. This feature proves valuable in projects with mixed analog and digital sensor requirements.
- Extended Analog Inputs: Pins A6 and A7 are analog-only inputs, clearly marked in the diagram with distinctive coloring. These pins cannot function as digital outputs but provide additional analog sensing capabilities for sensor-heavy applications.
Power Distribution System
The pinout diagram reveals a comprehensive power distribution system designed for reliable project operation across various scenarios.
- Multiple Voltage Rails: The board provides both 3.3V and 5V regulated outputs, clearly marked with distinctive colors in the diagram. The 3.3V rail supplies up to 150mA, while the 5V rail can provide up to 500mA, sufficient for most sensor and peripheral requirements.
- Ground Connections: Multiple GND pins are distributed around the board perimeter, minimizing ground loop issues and providing convenient connection points regardless of your circuit layout approach.
- Power Input Options: The diagram shows VIN pin for external power input (7-12V recommended), alongside the USB-C connector for direct 5V power supply. This flexibility accommodates both bench testing and field deployment scenarios.
Communication Interface Pins
- I2C Interface: The diagram clearly marks SDA (A4) and SCL (A5) pins for I2C communication, essential for connecting multiple sensors, displays, and modules commonly used in STEM education projects. Pull-up resistors are integrated on-board, simplifying I2C device connections.
- SPI Interface: SPI communication pins are accessible through D10 (SS/CS), D11 (MOSI), D12 (MISO), and D13 (SCK). These pins enable high-speed communication with SPI devices like SD cards, displays, and sensor modules frequently used in educational robot with sensors applications.
Integrated Peripheral Connections
The pinout diagram reveals dedicated connections for the board's built-in features, which don't consume regular GPIO pins.
- RGB LED Control: Built-in RGB LEDs are controlled through dedicated internal connections, allowing full-color visual feedback without using external pins. These LEDs are programmable and perfect for status indication in programmable robot for kids projects.
- Integrated Buzzer: The onboard buzzer connects through internal circuitry, providing audio feedback capabilities without requiring external components or GPIO pins. This feature proves invaluable for debugging and user interface feedback in Arduino Alvik tutorial implementations.
- User Button: A programmable user button is integrated on the board, connected to D2 with proper debouncing circuitry. This button can serve as user input or mode selection in interactive projects.
Special Function and Reset Pins
- Reset Functionality: The RST pin allows external reset control, useful for system recovery or coordinated multi-board applications. The pin is clearly marked and includes proper pull-up circuitry.
- AREF Pin: The AREF (Analog Reference) pin allows external analog reference voltage setting for improved ADC accuracy in precision measurement applications. This becomes important in sensor-heavy STEM learning kit implementations.
- IOREF Pin: The IOREF pin outputs the board's logic level (5V), enabling shield compatibility detection and proper voltage level matching for connected peripherals.
Step-by-step Guide to Setting Up the Board
Getting started with the Cytron Maker Nano is refreshingly straightforward, and I'll walk you through the entire process from unboxing to running your first program. The setup process typically takes less than 30 minutes, including software installation and testing.
- Open Arduino IDE → File > Preferences
- In "Additional Boards Manager URLs" field, paste this exact URL
- https://raw.githubusercontent.com/CytronTechnologies/Cytron-Arduino-URL/master/package_cytron_index.json
- Click OK to close Preferences

- Go to Tools > Board > Boards Manager

- Search for "Cytron" and install "Cytron AVR Boards"

- Restart Arduino IDE completely
- The Maker Nano should now appear under Tools > Board in the Cytron boards section
The entire setup process is designed to be beginner-friendly while providing the flexibility that experienced developers expect. The Cytron Maker Nano tutorial documentation provides additional examples and troubleshooting guidance for more complex setup scenarios.
Cytron Maker Nano vs Arduino Nano
Comparing the Cytron Maker Nano against the traditional Arduino Nano reveals significant differences that affect project development approaches and overall user experience. After working extensively with both platforms, the distinctions go well beyond simple feature counts.
| Feature | Cytron Maker Nano | Arduino Nano |
|---|---|---|
| Microcontroller | ATmega328P | ATmega328P |
| Built-in LEDs | RGB LEDs | Single status LED |
| Audio Output | Integrated buzzer | Requires external components |
| Power Connector | USB-C + power jack | Mini-USB + VIN pin |
| Voltage Rails | 3.3V and 5V regulated | 3.3V and 5V regulated |
| Form Factor | Breadboard compatible | Breadboard compatible |
| Price Point | Slightly higher | Lower cost |
| Educational Focus | STEM education optimized | General purpose |
- Built-in Peripherals: The integrated RGB LEDs and buzzer on the Cytron Maker Nano eliminate external components required for visual and audio feedback. This proves particularly valuable in Arduino Alvik tutorial scenarios and programmable robot for kids applications where simplicity and immediate feedback enhance the learning experience.
- Power and Connectivity: USB-C connectivity provides more reliable power delivery and modern connector compatibility compared to the Arduino Nano's mini-USB connection. This becomes important in educational environments where connector durability matters.
- Educational Applications: The Maker Nano board is specifically designed with STEM learning kit applications in mind. Built-in features reduce complexity for beginners while maintaining full compatibility with advanced Arduino programming concepts and libraries.
- Project Complexity: For basic LED blinking and sensor reading projects, both boards perform identically. However, the Cytron Maker Nano shines in robotic projects requiring immediate feedback, audio output, or colorful visual indicators without additional hardware complexity.
The choice between platforms often comes down to specific project requirements and whether the integrated features justify the modest price premium for your particular application.
Practical Applications and Project Ideas
The Cytron Maker Nano excels in applications that benefit from integrated peripherals and educational-focused design. Through extensive testing across various project types, several application areas consistently demonstrate the board's strengths and practical advantages.
- Educational Robotics Projects: The board serves as an excellent foundation for educational robots with sensor applications. Built-in RGB LEDs provide immediate visual feedback for sensor readings, while the integrated buzzer enables audio cues for different robot states. These features prove invaluable in Line Following Robot Project implementations where students need clear feedback about robot behavior and sensor responses.
- Interactive Learning Demonstrations: STEM education environments benefit significantly from the board's immediate feedback capabilities. Programming concepts become more engaging when students can see colorful LED responses and hear audio feedback without additional hardware complexity. The Arduino Alvik setup guide approach works excellently with this platform.
- Home Automation Prototypes: The board's compact size and built-in indicators make it perfect for smart home device prototypes. Environmental monitoring systems, security alerts, and home automation controllers benefit from the integrated visual and audio feedback systems.
- Competition Robotics: Line Following Robot competitions and similar events benefit from the board's quick setup and reliable operation. The integrated features reduce component count and potential failure points while providing clear status indication during competition runs.
- STEM Workshop Projects: Educational workshops focused on Arduino robot for education applications find the Maker Nano board particularly effective. Reduced setup time means more hands-on programming and learning time, while built-in peripherals ensure every student has identical hardware capabilities.
The platform's Arduino compatibility ensures that existing educational curricula, tutorials, and project guides work without modification, making adoption seamless for educators and students already familiar with Arduino development.
Conclusion
The Cytron Maker Nano represents a thoughtful evolution in Arduino-compatible development boards that successfully addresses real-world needs in educational and maker environments.
Its integration of commonly required peripherals, modern connectivity options, and educational focus create a platform that genuinely enhances the development experience rather than simply adding complexity.
The board's strength lies not in revolutionary new features, but in the careful implementation of practical improvements that eliminate common friction points in Arduino project development.
Whether you're implementing Alvik robot projects, developing STEM learning kit curricula, or creating Arduino robot applications, this platform provides the tools needed for successful project completion.
The investment in this board extends beyond immediate project needs. Its compatibility with existing Arduino ecosystems, extensive educational resources, and focus on practical applications make it a valuable long-term addition to any maker's toolkit.
As educational robotics and STEM programs continue expanding, platforms like the Cytron Maker Nano provide essential bridges between theoretical concepts and hands-on implementation.


