3D Printing Process Explained: From Design to Print
Summary
Imagine holding a physical object that was created from nothing more than a digital file on your computer. What seemed like science fiction just decades ago is now as accessible as printing a document on paper.
The revolutionary world of 3D printing has transformed how we create, prototype, and manufacture everything from simple toys to complex aerospace components.
Whether you're curious about entering the world of additive manufacturing or simply want to understand how these remarkable machines transform digital dreams into tangible reality, the journey from computer screen to finished product involves a fascinating series of carefully orchestrated steps.
The magic begins with nothing more than an idea and a computer, but the path to a finished 3D printed object requires understanding several critical processes.
Each stage in the 3D printing process builds upon the previous one, creating a seamless workflow that turns imagination into reality.
From the initial design phase through the final finishing touches, every step plays a crucial role in determining the quality, functionality, and appearance of your finished creation.

What Is 3D Printing?
3D printing, also known as additive manufacturing, is a revolutionary technology that creates three-dimensional objects by depositing material layer upon layer according to digital instructions.
Unlike traditional manufacturing methods that cut, drill, or mold material into shape, 3D printing builds objects from the ground up, adding material only where needed.
The technology works by interpreting digital 3D models and translating them into physical objects through various printing methods.
The most common approach, Fused Deposition Modeling (FDM), melts plastic filament and extrudes it through a heated nozzle, depositing precise layers that fuse together to form solid objects.
This FDM 3D printing process has made desktop manufacturing accessible to hobbyists, educators, and professionals alike.
What makes 3D printing truly remarkable is its ability to create complex geometries impossible with traditional manufacturing.
Internal channels, moving parts within solid objects, and intricate lattice structures can all be printed in a single process without assembly.
This capability has revolutionized industries from healthcare to automotive, enabling rapid prototyping and custom manufacturing at unprecedented scales.
Now let’s look at the different steps of the 3D printing process.
Step 1: Designing a 3D Model

Think of this step as being the architect of your dreams. Every amazing 3D printed object you've ever seen started with someone sitting at a computer, sketching out their idea in the digital world.
This is where your creativity gets to run wild, but here's the thing – you can't just design anything and expect it to print perfectly. It's like baking a cake; you need to follow certain rules or you'll end up with a mess!
So what tools do you need for this digital sculpting? If you're just starting out, Tinkercad 3D printing design software is a good choice.
It's like digital LEGO blocks that anyone can use. Want something more professional? Fusion 360 is the go-to choice for engineers and designers. And if you're feeling artistic, Blender lets you create some truly stunning organic shapes.
However, designing for 3D printing is different from designing for a computer screen. You have to think like the printer.
Can your design actually be built layer by layer? Are your walls thick enough not to crumble? Do you have overhangs that will need support structures? It's like being both an artist and an engineer at the same time.
The CAD to 3D print process teaches you to balance your creative vision with physical reality. You might design the most beautiful spiral staircase, but if it's too thin or has impossible overhangs, your printer will just create a plastic mess instead of your masterpiece. This is where experience really pays off – you start thinking like a 3D printer.
Once your design is perfect, your CAD software exports it as an STL file for 3D printing. Think of this STL file as a detailed description of your object's surface – it's like a digital skin that tells the next software exactly what shape you want to create.
Step 2: Preparing the Model with Slicing Software

Now here's where the magic really happens, and honestly, this might be the most crucial step that many beginners underestimate.
Remember that STL file you just created? Well, your 3D printer can't actually read it. It's like trying to give driving directions by showing someone a photo of the destination. They need step-by-step instructions.
This is where 3D model slicing comes in. Slicing software like Cura, PrusaSlicer, or Bambu Studio takes your beautiful 3D model and literally slices it up like a loaf of bread. Imagine cutting your object into hundreds or even thousands of incredibly thin horizontal layers – that's exactly what this software does digitally.
But it doesn't stop there. The slicer becomes your printer's personal assistant, figuring out exactly how the print head should move, how fast it should go, what temperature to use, and where to put support structures.
It's like having a super-smart GPS that doesn't just tell you where to go, but also when to slow down, when to turn, and where to stop for gas!
Here's the key difference that confuses many people: your CAD software creates the STL file (the "what"), but your slicing software creates the G-code file (the "how").
The G-code is like a recipe with thousands of precise instructions: "move to this position, heat to this temperature, extrude this much plastic, move to the next position." Your printer follows these instructions blindly, so they better be perfect!
The beauty of modern slicing software is that it can automatically detect tricky overhangs and generate support structures. It's like having a smart construction foreman who knows exactly where to put scaffolding so your building doesn't collapse while being built.
Step 3: Setting Up the 3D Printer

Alright, now we're getting to the hands-on part. Preparing a 3D printer is a bit like tuning a musical instrument – everything needs to be just right, or your performance will be terrible.
And trust me, there's nothing more frustrating than watching a 20-hour print fail because you skipped the setup.
Let's talk about print bed levelling first, because this is where most beginners mess up. Imagine trying to write on a tilted desk – your pen would slide around and create a mess, right? The same thing happens with 3D printing.
Your print bed needs to be perfectly level and at exactly the right distance from the nozzle. Too close, and you'll scrape the bed; too far, and your plastic won't stick. Modern printers often have automatic levelling, but even then, you'll want to double-check it manually.
Next up is the extruder and nozzle configuration. Think of this as preparing your printer's "mouth" to eat the right food. Different materials need different temperatures – PLA likes it cooler, around 200°C, while ABS wants it hotter, around 250°C. A dirty nozzle is like trying to drink a milkshake through a clogged straw – nothing good will happen!
Filament loading and printing material preparation are surprisingly important. You need to make sure your filament feeds smoothly without tangles (imagine trying to knit with tangled yarn), and that it's dry – moisture can ruin prints by causing bubbles and poor surface quality.
3D printer calibration is your insurance policy against failed prints. This 3D printing setup tutorial approach might seem tedious, but spending 30 minutes on proper calibration can save you from wasting hours on failed prints. It's like checking your car's oil before a long road trip – a small investment that prevents big problems!
Step 4: Printing the 3D Object

This is it. The moment when all your digital work becomes physical reality! Printing a 3D object is honestly one of the most satisfying things you can watch.
There's something almost magical about seeing your printer start with an empty bed and gradually build your creation layer by layer.
How 3D printing works becomes crystal clear once you watch it happen. Using desktop 3D printers, the process starts with a warm-up period – just like your car needs to warm up on a cold morning. The nozzle heats up to melt the plastic, and the bed warms up to help the first layer stick properly.
Then comes the moment of truth: your printer starts following those thousands of G-code instructions we talked about earlier.
It's like watching a tiny robot artist that never gets tired, never makes mistakes (if you set it up right!), and works with incredible precision. Layer by layer, your object grows from the bed upward.
Modern steps in 3D printing include some pretty cool monitoring features. Many printers now have cameras so you can watch your print from anywhere, and sensors that can detect if something goes wrong. Some can even pause the print and send you a text message if there's a problem – how cool is that?
Here's something that might surprise you: printing a 3D object requires patience. A simple phone case might take 2-3 hours, while a detailed miniature figure could take 10-15 hours, and complex mechanical parts might run for days.
But here's the beautiful part – once you hit "print," you can literally walk away and let the machine do its thing. It's like having a tireless assistant working for you 24/7!
Step 5: Post-Processing the 3D Print

Congratulations! Your print is done but hold on – you're not finished yet. Post-processing of 3D prints is where good prints become great prints, and where beginners often separate themselves from experienced makers.
Think of it like developing photos in the old days – the real magic happened in the darkroom after taking the picture.
First things first: getting your print off the bed. This might sound simple, but there's actually a bit of technique involved.
You want to be gentle but firm – like removing a bandage. Too aggressive, and you might damage delicate features or leave marks on your beautiful print bed.
If your print had support structures, now comes the fun part of removing them. It's a bit like unwrapping a present, except you're the one who wrapped it! Some supports pop off easily, while others require patience and the right tools. I always keep a set of flush cutters and small pliers handy for this job.
Now for the really satisfying part: surface finishing. Even the best prints have visible layer lines – those tiny ridges that show where each layer was deposited.
Light sanding with fine-grit sandpaper can work wonders, transforming a obviously 3D printed part into something that looks injection molded. Start with coarser grits (like 220) and work your way up to finer ones (400, 600, or even higher) for glass-smooth finishes.
Materials Used in 3D Printing
Filament types in 3D printing offer an extensive range of properties and characteristics, enabling applications from simple prototypes to functional end-use parts.
Understanding material properties helps users select the optimal filament for specific applications and achieve desired performance characteristics.
- PLA (Polylactic Acid) remains the most popular choice for beginners due to its ease of printing, low odor, and biodegradable nature. Its low printing temperature and minimal warping make it ideal for detailed prints and colorful objects. However, PLA's lower heat resistance limits its use in applications requiring durability at elevated temperatures.
- ABS (Acrylonitrile Butadiene Styrene) offers superior strength and temperature resistance compared to PLA, making it suitable for functional parts and automotive applications. ABS requires higher printing temperatures and better ventilation due to potentially harmful fumes, but its impact resistance and chemical stability make it valuable for demanding applications.
- Advanced materials include PETG for chemical resistance, TPU for flexible applications, wood-filled filaments for aesthetic appeal, and metal-filled filaments for weight and appearance. Carbon fiber reinforced filaments provide exceptional strength-to-weight ratios, while water-soluble support materials enable complex geometries impossible with traditional supports.
Conclusion
The journey from digital concept to physical object through 3D printing represents one of the most accessible manufacturing revolutions in human history.
Understanding how you use a 3D printer effectively requires mastering each step of this process, from initial design considerations through final post-processing techniques.
This comprehensive 3D printing process empowers individuals and businesses to create custom solutions, rapid prototypes, and unique objects limited only by imagination and design skill.
As technology continues advancing, the barriers between professional and hobbyist capabilities continue diminishing, making sophisticated manufacturing accessible to anyone willing to learn these fundamental processes.
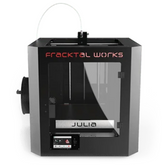
Robocraze is India’s one-stop shop for 3D printers & Accessories. Explore advanced, self-calibrating Bambu Lab machines; community-favourite Creality models from entry-level to pro; and homegrown Fracktal Works printers engineered for Indian needs.
Add filaments, spare parts, upgrades, and expert support under one roof—perfect for hobbyists, educators, and professionals launching or scaling their 3D printing journey.


