How to Install LibreELEC on Raspberry Pi 4
Summary
Of all the single-board computers available, the Raspberry Pi stands out for its versatility and affordability. While it can function as a desktop computer, its true potential shines when it's dedicated to a specific task.
One of the most popular projects is transforming it into a powerful home theater PC (HTPC). This is where the LibreELEC operating system comes in, providing a streamlined and efficient way to create a world-class media center.
This guide will walk you through the entire process.

What is LibreELEC?
LibreELEC, which stands for Libre Embedded Linux Entertainment Center, is a lightweight Linux-based operating system built from the ground up for a single purpose: to run the Kodi media center software. Think of it as a specialized tool designed to do one job exceptionally well.
Unlike a general-purpose OS like Windows or even Raspberry Pi OS, the LibreELEC OS gets rid of all non-essential components, such as web browsers, office suites, and system tools you wouldn't need on a media player.
This "Just enough OS" approach means that the LibreELEC distribution boots directly into the Kodi interface in a matter of seconds.
By minimizing background processes and overhead, it dedicates nearly all of the Raspberry Pi's processing power and memory to what matters most: delivering smooth, high-quality playback of your movies, TV shows, and music.
This efficiency is what allows even a small device like the Raspberry Pi 4 to handle demanding 4K video streams without stuttering, turning it into a media powerhouse that rivals many off-the-shelf streaming boxes.
Requirements Before Installing LibreELEC on the Raspberry Pi
Before you can turn your Raspberry Pi 4 into the ultimate media hub, you’ll need to gather a few essential components. Having the right hardware from the start ensures a smooth installation and optimal performance.
Hardware:
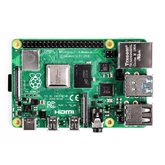
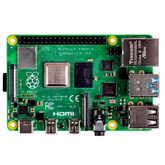
- Raspberry Pi 4: While you can run LibreELEC on Raspberry Pi models that are older, the Raspberry Pi 4 is highly recommended for its superior processing power and ability to handle 4K video playback. The 2GB RAM model is a great starting point, though even the 1GB version is sufficient for a dedicated HTPC.
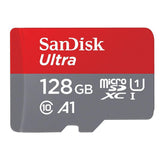
- microSD Card: A high-quality microSD card with at least 8GB of storage is necessary. A faster card (Class 10 or better) will result in quicker boot times and a more responsive interface.
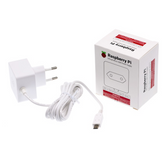
- Power Supply: Use the official Raspberry Pi 4 USB-C power supply or a reputable third-party equivalent to ensure stable power delivery.
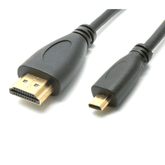
- Micro HDMI Cable: You will need a micro HDMI to standard HDMI cable to connect your Raspberry Pi 4 to a television or monitor.
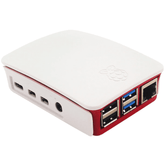
- Case (Recommended): A case will protect your Raspberry Pi from physical damage and can help with heat dissipation. Many cases are designed with passive or active cooling to prevent the processor from throttling during intense tasks like 4K video decoding.
- Input Devices: A USB keyboard and mouse are required for the initial setup. For everyday use, you might consider a dedicated media center remote or a wireless keyboard with a trackpad.
Software and Connections:
- Internet Connection: You'll need an internet connection (either via Ethernet or Wi-Fi) during the setup to download software and fetch media information.
- A Computer with an SD Card Reader: You will need a separate PC or Mac to download the LibreELEC software and write it to your microSD card.
How to Download LibreELEC for Raspberry Pi
There are two primary methods for downloading LibreELEC for Raspberry Pi, both of which are straightforward.
The first and most user-friendly method is to use the Raspberry Pi Imager. This official tool from the Raspberry Pi Foundation simplifies the process of flashing operating systems to a microSD card.
Within the imager's OS menu, you can navigate to the "Media Player OS" section, where you will find LibreELEC listed. Simply select it, and the imager will automatically download the correct version for your Raspberry Pi 4 and prepare it for installation.
Alternatively, you can perform a direct download from the official LibreELEC website. Navigate to the "Downloads" section and select the appropriate build for the Raspberry Pi 4. This will download a compressed file with a .img.gz extension.
This LibreELEC image file contains the entire operating system, and you will need a separate application to write it to your microSD card. This method gives you more control but requires an extra step compared to using the Raspberry Pi Imager.
Creating a Bootable SD Card for LibreELEC
Once you have the LibreELEC image file, the next step is to write it to your microSD card, creating a bootable drive. This process involves Installing LibreELEC to your Raspberry Pi's primary storage medium.
If you are using the Raspberry Pi Imager and selected LibreELEC from its menu, the tool will handle both the download and the flashing process seamlessly. You simply need to select your microSD card from the storage menu and click the "Write" button.
If you downloaded the image file manually, you will need a flashing utility like BalenaEtcher. This free tool is available for Windows, macOS, and Linux and features a simple three-step process:
- Select Image: Open Etcher and click "Flash from file." Navigate to where you saved the .img.gz file and select it.
- Select Target: Click "Select target" and choose your microSD card reader from the list of drives. Be extremely careful to select the correct drive, as this process will permanently erase all data on it.
- Flash: Click the "Flash!" button to begin writing the image to the card. The software will write the data and then verify it to ensure the process was successful.
Once the flashing is complete, the microSD card is ready.
Step-by-Step Guide to Installing LibreELEC on Raspberry Pi
With your bootable microSD card prepared, you are now ready to install LibreELEC on your Raspberry Pi. The main part of the installation process for LibreELEC happens on the Raspberry Pi itself.
1. Assemble Your Hardware
First, insert the newly flashed microSD card into the slot on the underside of your Raspberry Pi 4. Connect your keyboard and mouse to the USB ports. Then, connect the micro HDMI cable from the Pi to your TV or monitor. Do not plug in the power supply yet.
2. First Boot and Initial Setup
With everything else connected, plug in the USB-C power supply to boot up the device. The system will start, automatically resize the file system to use the entire space on your microSD card, and then reboot. After this brief restart, you will be greeted by the LibreELEC welcome wizard. This wizard streamlines the initial Setup of LibreELEC on the Raspberry Pi.
3. The Configuration Wizard
The wizard will guide you through a few essential settings:
- Language: The first screen prompts you to set your preferred language for the Kodi interface.
- Hostname: Next, you can set the network name for your device. The default, "LibreELEC," is fine for most users.
- Network Connection: The wizard will then ask you to connect to a network. If you have an Ethernet cable plugged in, it will connect automatically. Otherwise, select your Wi-Fi network from the list and enter the password.
- Services: The final step involves enabling remote services. It is highly recommended to enable Samba (SMB), as this will allow you to easily access the Raspberry Pi's folders from another computer on your network to transfer media files. You can also enable SSH for remote command-line access, which is useful for advanced troubleshooting.
After completing these steps, the wizard will close, and you will be taken to the main Kodi home screen, completing the process of setting up LibreELEC on the Raspberry Pi.
How to Add Media and Configure Kodi on LibreELEC
Now that you have a functional Kodi media center, it’s time to add your media library and customize the experience. The process to configure LibreELEC on your Raspberry Pi is handled entirely within the Kodi interface.
Adding Your Media Files
The first step is to tell Kodi where your movies, TV shows, and music are located.
- Navigate to the appropriate section on the main menu (e.g., "Movies").
- Select "Enter files section" and then "Add videos..."
- Click "Browse" to open the file source browser. Here you can point Kodi to your media. If you have an external hard drive connected via USB, it will appear in the list. If your files are on a network share, you can add that location using the "Add network location..." option and selecting the appropriate protocol (like Windows network (SMB)).
- Once you have selected the folder containing your media, click "OK."
Scraping Your Library
After you add a source, Kodi will ask you to set the content type (e.g., Movies, TV Shows). This tells Kodi's "scrapers" what kind of media is in the folder. The scraper then connects to online databases (like The Movie Database or The TVDB) to download metadata for your files. This includes:
- High-resolution cover art and posters.
- Plot summaries and cast information.
- Genre, ratings, and release dates.
This process transforms a simple list of files into a rich, visually appealing library that is easy to navigate.
Customizing the Experience
Kodi is highly customizable. You can go to Settings > Interface > Skin to change the entire look and feel of the interface. You can also explore the official Kodi repository via the "Add-ons" menu to install tools that add new features, such as weather forecasts, subtitle downloaders, and more.
Conclusion
From a simple, credit-card-sized computer, the Raspberry Pi 4 can be transformed into a remarkably capable and cost-effective home theater PC.
Thanks to the highly optimized LibreELEC operating system, this transformation is not only possible but also incredibly straightforward.
By stripping away unnecessary components and focusing purely on media playback, LibreELEC allows Kodi to perform at its absolute best.
The result is a fast, stable, and powerful media center that can handle everything from your old movie collection to modern 4K content, giving you a premium streaming experience without the premium price tag.


