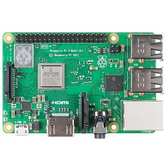
How to use Raspberry Pi
Summary
Unlock the potential of your Raspberry Pi with our comprehensive guide. Start with an introduction to the Raspberry Pi, its history, and its significance in the tech world. Learn how to set up your Raspberry Pi, choose the right model, and assemble the hardware components. Follow step-by-step instructions to install the operating system. Explore exciting projects and tutorials to expand your skills. Dive into programming and coding, and get valuable troubleshooting tips. Perfect for beginners and hobbyists, this guide will help you make the most of your Raspberry Pi. Click now to embark on your Raspberry Pi adventure!
Introduction to Raspberry Pi
The Raspberry Pi is a small, affordable computer that has revolutionized the world of hobbyist electronics, education, and improvement. Propelled in 2012 by the Raspberry Pi Foundation, the initial objective was to advance the educating of fundamental computer science in schools and creating nations. Over time, its utilize has extended distant past its introductory instructive reason.
History and Significance
The Raspberry Pi Foundation, a UK-based charity, created the primary Raspberry Pi to assist young individuals learn programming. The primary demonstrates, the Raspberry Pi Demonstrate B, was an moment victory due to its low taken a toll and flexibility. Since at that point, different adaptations have been discharged, counting the Raspberry Pi 4, which offers essentially more control and network choices.
Not at all like conventional computers, which are often expensive and overpowered for simple errands, the Raspberry Pi may be a single-board computer that provides fair sufficient computing control for a assortment of errands. This makes it perfect for DIY ventures, learning programming, and building custom gadgets. Its little measure and moo control utilization assist include to its request.
Setting Up Your Raspberry Pi
To set up your raspberry pi step involved are
- Choosing the right Raspberry Pi model
- Assembling the hardware components
- Connecting the peripherals
- Installing the operating system
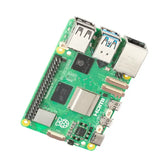
Experience faster computing with Raspberry Pi 5 4GB.
Choosing the Right Raspberry Pi Model
The Raspberry Pi comes in various models, each suited to different needs. The most common models include:
Raspberry Pi 5: The most recent and high-performance single-board computer with a 64-bit Arm Cortex-A76 CPU, dual 4Kp60 HDMI display output, and PCIe 2.0 x1 interface
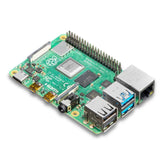
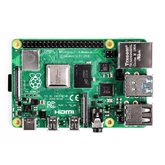
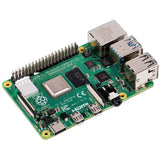
Raspberry Pi 4: effective adaptation, reasonable for requesting ventures.
Raspberry Pi 3 Show B+: A great all-around alternative for most ventures.
Raspberry Pi Zero W: A littler, less capable show perfect for compact ventures and IoT applications.
Explore the Best Raspberry Pi Boards with 1 year warranty
Buy Raspberry Pi 4 4GB Complete Kit – All-in-One Solution

Assembling Hardware Components
To assemble a Raspberry Pi, the following steps are to be followed
- Raspberry Pi board
- MicroSD card (at least 16GB)
- Power supply (5V micro USB for older models, USB-C for Pi 4)
- Keyboard and mouse
- HDMI cable and monitor
- Connecting Peripherals
Insert the MicroSD Card:
Install the operating system on the microSD card using a tool like the Raspberry Pi Imager. Insert the card into the Raspberry pi

Connect the Display:
Use an HDMI cable to connect the Raspberry Pi to a monitor or TV.
Attach the Keyboard and Mouse:
Plug in the USB keyboard and mouse.
Power Up:
Connect the power supply to the Raspberry Pi. The device should boot up and display the OS installation on the monitor.
Installing the Operating System
Raspberry Pi OS is the recommended operating system. To install it:
1. Download Raspberry Pi Imager from the Raspberry Pi website.
2. Install and Run the Imager: Follow the instructions to write Raspberry Pi OS to your microSD card.
3. Insert the SD Card and Boot: Place the SD card into the Raspberry Pi and power it on.
Follow the on-screen instructions to complete the setup.

Exploring Projects and Tutorials
One of the most exciting angles of owning a Raspberry Pi is the plethora of ventures you'll be able embrace. Here are a few prevalent extend thoughts:
Creating a Media Center
You can change your Raspberry Pi into a media center utilizing computer program like OSMC or Plex. This permits you to stream substance, play nearby media records, and more.
Building a Home Automation System
Utilize your Raspberry Pi to control lights, machines, and security frameworks. Stages like Domestic Right hand and OpenHAB make it simple to set up a shrewd domestic.
Setting Up a Web Server
Turn your Raspberry Pi into a web server utilizing program like Apache or Nginx. Usually a incredible way to have individual websites or test with web advancement
Programming GPIO Pins
The GPIO (Common Reason Input/Output) pins on the Raspberry Pi permit you to interact with external equipment. You'll connect LEDs, sensors, and other components to make intuitively ventures.
Example: Blinking LED
1. Connect an LED: Attach the long leg (anode) of the LED to a GPIO pin (e.g., GPIO 17) and the short leg (cathode) to a ground pin.
2. Write the Code:
   ```python

    import RPi.GPIO as GPIO

    import time


    GPIO.setmode(GPIO.BCM)

    GPIO.setup(17, GPIO.OUT)


    while True:

        GPIO.output(17, True)

        time.sleep(1)

        GPIO.output(17, False)

        time.sleep(1)

    ```
3. Run the Script: Save and run the script to see the LED blink on and off.
Programming and Coding with Raspberry Pi
Programming is one of the center exercises you'll lock in in along with your Raspberry Pi. The gadget underpins a few programming dialects, with Python being the most popular.
Python
Python is the default programming dialect for Raspberry Pi. It is flexible and easy to memorize, making it perfect for beginners.
Writing and Executing Code
1. Open Thonny Python IDE: It's pre-installed on Raspberry Pi OS.

2. Write a Simple Script:
print("Hello, Raspberry Pi!")
3. Run the Script:
Click the "Run" button in Thonny.
Scratch
Scratch could be a visual programming dialect perfect for instructing kids the nuts and bolts of programming. It employments a block-based interface to make intuitively stories, recreations, and movements.

Accessing GPIO Pins
To interact with GPIO pins, you can use libraries like `RPi.GPIO` in Python.
Example: Reading a Button Press
1. Connect a Button: Attach one side of the button to a GPIO pin (e.g., GPIO 18) and the other side to ground.
2. Write the Code:
    import RPi.GPIO as GPIO


    GPIO.setmode(GPIO.BCM)

    GPIO.setup(18, GPIO.IN, pull_up_down=GPIO.PUD_UP)


    while True:

        input_state = GPIO.input(18)

        if input_state == False:

            print('Button Pressed')

    ```
3. Run the Script:
The script will print "Button Pressed" when the button is pressed.
Troubleshooting and Tips
While working with Raspberry Pi, you might experience a few common issues. Here are a few investigating tips and assets:
Connectivity Problems
Wi-Fi Issues:
Guarantee your Wi-Fi accreditations are redress and the Pi is inside extend of the switch. Restarting the switch and Pi can offer help.
Bluetooth Issues:
Make sure Bluetooth is enabled on the Pi and the device you're pairing with.
Software Glitches
Update Your System:
Regularly update your Raspberry Pi OS to the latest version using:
bash sudo apt update
sudo apt upgrade
Check for Dependencies:
Ensure all necessary libraries and dependencies are installed for your projects.
Hardware Challenges
Power Supply:
Use a reliable power supply with the correct voltage and amperage for your Raspberry Pi model.
Peripherals:
Make sure all connected peripherals are compatible and functioning properly.
Further Learning and Community Support
Official Documentation:
The Raspberry Pi Foundation provides comprehensive documentation and tutorials.
Online Communities:
Forums like the Raspberry Pi Stack Exchange and Reddit's r/raspberry_pi offer community support.
Conclusion
The Raspberry Pi is a flexible and powerful tool for learning, development, and innovation. Whether you are a tenderfoot looking to begin your to begin with venture or an experienced engineer looking for unused challenges, the Raspberry Pi offers unending conceivable outcomes.
From setting up your gadget and investigating various projects to coding and troubleshooting, this direct gives the foundational information to assist you make the foremost of your Raspberry Pi. Plunge in, try, and connect the dynamic community of Raspberry Pi devotees who are pushing the boundaries of what's conceivable with this exceptional small computer.


