Installing Raspberry Pi OS on MicroSD Card
Summary
Explore the world of Raspberry Pi with our comprehensive guide on installing Raspberry Pi OS on a MicroSD card. Delve into the introduction, gaining insights into the versatile Raspberry Pi. Uncover the essential requirements and step-by-step instructions on downloading and installing Raspberry Pi Imager. Learn the intricacies of preparing the MicroSD card and choosing the right operating system. Follow our guide on writing the image to the MicroSD card and seamlessly booting up your Raspberry Pi. We've got troubleshooting tips to ensure a smooth setup. Don't miss the conclusion for a satisfying end to your Raspberry Pi adventure! Dive into the tech world now!
Introduction
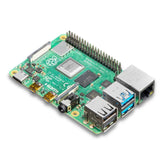
The Raspberry Pi is a series of small, affordable single-board computers that have become wildly popular among hobbyists, educators, and tech enthusiasts. With capabilities rivaling traditional desktop machines, the Raspberry Pi enables users to learn coding and electronics, build DIY projects, and perform a vast range of computing tasks.
To power up and operate a Raspberry Pi device, an operating system must be installed on a microSD card. The microSD card effectively serves as the Raspberry Pi's hard drive, allowing it to boot up and function. While several operating system options exist, the official Raspberry Pi OS (previously called Raspbian) offers the simplest out-of-the-box experience.
This article will provide a step-by-step guide on downloading, installing, and booting up Raspberry Pi OS on a Raspberry Pi from a prepared microSD card.

A Closer Look at the Raspberry Pi
The Raspberry Pi phenomenon has exploded in popularity due to its tiny form factor, affordability, and mighty capabilities. But what exactly is the Raspberry Pi and what can it do?
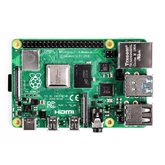
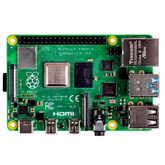
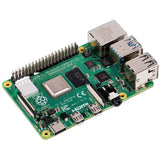
The Raspberry Pi is a series of single-board computers developed by the Raspberry Pi Foundation, a UK-based charity that aims to make computer science more accessible to people all over the world. These miniature boards pack surprising power into a platform not much larger than a credit card.

At the heart of every Raspberry Pi model is a System-on-a-Chip (SoC) from Broadcom that integrates a central processor (CPU), graphics processing unit (GPU), RAM, and other critical components. Different Pi models offer variations in specs, but even the affordable entry-level models can perform basic computing tasks like word processing, web browsing, and video playback.
More advanced capabilities unlocked by the Pi include:
- Coding with languages like Python and Scratch
- Building electronics circuits and hardware projects
- Setting up web servers or running databases
- Implementing home automation systems
- Programming DIY gaming machines and robots
This combination of accessibility, versatility, and customization has fueled the runaway success of the Pi. Makers, hobbyists, educators, developers, and tech enthusiasts have all found invaluable uses for the Raspberry Pi.
To tap into the possibilities offered by the Pi, you need to equip it with an operating system. That's where installing Raspberry Pi OS on a microSD card comes in.
Requirements
To install Raspberry Pi OS on a microSD card, you will need:
- A computer (Windows PC, Mac, or Linux) with an SD card reader or USB port
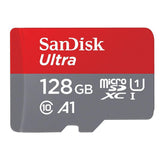
- A high quality 8GB (or larger) microSD card
- The Raspberry Pi Imager software
The Imager software provides a streamlined way to install Raspberry Pi OS and other operating system images on a microSD card. We will cover installing this program on different operating systems.
The computer is required for downloading the Imager and writing the OS image to the microSD card before booting up the Pi. Most laptops have built-in SD card readers, but you may need an external USB card reader for desktop PCs.
While 4GB cards are advertised as compatible, an 8GB or larger microSD card is recommended to provide ample storage space for the operating system, software, media files, and projects. Go with reputable brands like SanDisk or Samsung rather than cheap low-quality cards. With the required equipment and software in hand, you are ready to install.
Downloading and Installing Raspberry Pi Imager
Raspberry Pi Imager is available for Windows, macOS, and Ubuntu Linux. Here are specific instructions for getting and installing the Imager on each platform:

Windows
- Open a web browser on your Windows PC and go to the [official Raspberry Pi Imager page](https://www.raspberrypi.com/software/).
- Click on the "Windows" button under the Imager section to download the latest Windows installer.
- When the download completes, run the installer (.exe file) and follow the on-screen prompts to install Raspberry Pi Imager.
- Launch Raspberry Pi Imager once installation completes.
macOS
1. Open a browser window on your Mac and navigate to the [Raspberry Pi Imager page](https://www.raspberrypi.com/software/).
2. Click the "macOS" button below the Imager section to download the latest macOS package file (.dmg).
3. Locate the downloaded .dmg package in Finder and double-click to mount it.
4. Drag the Raspberry Pi Imager icon into your Applications folder to install.
5. You can now launch Raspberry Pi Imager from the Applications folder.
The macOS installation process is equally user-friendly. The .dmg file mounts itself as a virtual drive, and you simply drag the Imager to your Apps. Launch it any time from the Applications folder or Launchpad.
Linux
- Open the terminal on your Ubuntu machine and run: ``` sudo apt update sudo apt install rpi-imager ```
- This will update package repositories and install the latest Raspberry Pi Imager package.
- You can then launch Imager from the Applications menu.
Linux users can quickly install Imager from the default Ubuntu repositories using the apt package manager. Updating apt ensures you grab the newest release before installing.
Raspberry Pi Imager is now installed and ready to write operating system images to microSD cards on all major platforms.
Preparing the MicroSD Card
Before writing Raspberry Pi OS to the microSD card, we need to get the card ready for installation.
- Take your microSD card and insert it into your computer's SD card reader or a connected external USB card reader.
- Launch Raspberry Pi Imager.
- In Imager, click the "CHOOSE OS" button and select "Misc utility images" then choose "SD Card Formatter".
- Click "WRITE" and follow the steps to format your inserted microSD card using the SD Card Formatter.
Formatting the card erases any existing data and prepares a blank slate for installing the Raspberry Pi OS. The card will now show the full capacity available.
Some key points about the formatting process:
- Be absolutely certain to choose the correct card if multiple drives show up in Imager. Formatting the wrong disk can potentially erase important data.
- High quality cards from reputable vendors should format reliably. Avoid unreliable budget cards which may fail to format properly.
- The full card capacity may not be available to the operating system later due to space reserved for formatting, but this is normal.
With the blank canvas prepared, we can move on to selecting our operating system image.
Choosing the Operating System
Raspberry Pi Imager provides a selection of various operating system images that can be installed on the microSD card. Here are some of the available options:
- Raspberry Pi OS - The official operating system based on Debian Linux. Offered in three versions: 1) Desktop - with full GUI, 2) Lite - runs a command line interface, and 3) Full - has additional software. This is the recommended option for most users. -
- LibreELEC and OSMC - Media center distributions ideal for transforming a Pi into a low-powered home theater PC.
- RetroPie - Transforms your Pi into an all-in-one retro gaming console capable of emulating classic games and platforms.
- Ubuntu - A desktop version of the popular Linux distribution.
- Windows 10 IoT Core - A version of Windows 10 for compact embedded devices.
- RISC OS - A unique lightweight operating system designed specifically for Raspberry Pi boards.
Several other niche OS images are also available. The wealth of options caters to the diverse needs of Raspberry Pi users.
For general everyday use, especially for beginners, **Raspberry Pi OS Desktop** is highly recommended. Its Debian core provides broad software compatibility and Raspbian offers robust performance tuned for the Pi's hardware.
To install it:
- In Raspberry Pi Imager, click "CHOOSE OS"
- Select "Raspberry Pi OS (other)"
- Choose "Raspberry Pi OS (32-bit)"
This will give you the standard Desktop image with desktop GUI environment. Now the OS selection process is finished.
But how does the Imager actually install the chosen operating system to the SD card? Read on to find out.
Writing the Image to the MicroSD Card
With the microSD card formatted and OS image selected, we can now write Raspberry Pi OS to the card:
- With your prepared microSD card inserted, click the "CHOOSE SD CARD" button in Imager.
- Select your microSD card from the list. **Warning:** Make absolutely sure you choose the correct target drive to avoid accidentally erasing data from the wrong disk.
- Click "WRITE" to begin writing the Raspberry Pi OS image to the microSD card.
- A progress bar will track the writing process. Wait for the process to fully complete.
- Once finished, Imager will inform you that the data was written successfully. The microSD card now contains the Raspberry Pi OS and is ready to boot up your Pi.
You can safely remove the microSD card from your card reader.
So what exactly happens during the writing process?
When you click "WRITE", the Imager software takes the Raspberry Pi OS image file and copies all the data from it byte by byte onto the microSD card.
This includes the Linux kernel, Raspberry Pi firmware, desktop environment, applications, and all supporting operating system files. The end result is an exact clone of the official OS release ready for your Pi to boot from.
Depending on the speed of your card reader and SD card, the writing process can take up to 10-20 minutes. Once successfully completed, the microSD can then be inserted into the Pi to boot up.
Booting the Raspberry Pi
To boot your Raspberry Pi from the prepared microSD card:

- Insert the microSD card into the microSD card slot on your powered-off Raspberry Pi board.
- Connect your Pi to a monitor via HDMI, along with a mouse and keyboard.
- Supply power to the Pi either via a micro USB power supply or by plugging it into a power bank.
- The Raspberry Pi will now boot up, initially displaying colorful splash screens as it loads the operating system from the microSD card.
- After a minute or two, you will be greeted with the Pixel desktop environment and can start using your Raspberry Pi computer!
With boot successfully completed, the full capabilities of the Raspberry Pi are now at your fingertips! You can start coding Python, building hardware projects, and doing anything else your creativity compels you to with your pocket-sized computer.
Key advantages of booting your Pi from the microSD card include:
- Portability - The OS lives on the removable card rather than onboard storage, allowing you to boot anywhere.
- Recoverability - If the OS becomes corrupted, simply reflash the SD card to easily restore operations.
- Versatility - Different OS microSD cards allow the same Pi board to serve different functions.
- Security - The SD card OS can be wiped to erase sensitive data when repurposing or disposing of your Pi.
But what if you hit snags trying to initially boot up? Let's look at some potential troubleshooting tips.
Troubleshooting
In some cases, you may encounter issues while attempting to boot up the Raspberry Pi from the prepared microSD card. Here are some potential solutions:
- Corrupted installation: Rarely, the operating system image may become corrupted when writing to the microSD card, preventing booting. Reformat the card using Imager and write the OS image again.
- Improper insertion: Double check that the microSD card is properly inserted in the microSD slot on the Pi. Push the card in until you feel it click into place.
- Underpowered: If you see colorful artifacts or a blank screen, your Pi may be underpowered. Use an official Raspberry Pi power supply or high quality power bank rated at 2.5A minimum.
- Monitor issues: Verify your monitor is on the correct input channel for HDMI input from the Pi. Try connecting a different monitor if available.
- BIOS boot settings: If your Pi displays "No bootable device" or similar, you may need to enable booting from external media in the UEFI settings. Consult your motherboard manual.
- Corrupted boot files: In rare cases, critical boot files on the SD card may have errors. Reformat and reinstall the operating system image.
- Faulty SD card slot: Very rarely, the microSD card slot itself may be damaged, preventing booting even with a good card and image. Try a different Pi board if possible.
Don't hesitate to seek help from the Raspberry Pi forums if your troubleshooting attempts are unsuccessful. The active community is eager to assist!
Conclusion
Installing the official Raspberry Pi OS on a microSD card provides the simplest way to get up and running with a Raspberry Pi board. Raspberry Pi Imager streamlines the installation process, allowing even beginners to easily write compatible operating systems images to a microSD card.
Booting up "Raspbian" from the prepared card gives you access to a complete Debian-based desktop environment optimized to harness the Pi's hardware capabilities. You can then tap into the Pi's potential for learning coding, creating DIY electronics projects, teaching computer skills, and anything else you can conceive.
The vibrant Raspberry Pi community offers boundless resources to help expand your abilities with the Pi. And the modular nature of the microSD card loaded with the OS allows you to safely shutdown, transport, and boot up your Pi however you need. With the power of a complete computer now available from a device smaller than a deck of cards, innovative possibilities abound.
So grab your Raspberry Pi board, prep a microSD card with Raspberry Pi OS, and start exploring the wonderland of computing experiences this diminutive platform provides! The world of the Pi awaits.
Excerpt
Frequently Asked Questions
1. Does Raspberry Pi run on SD card?
The Raspberry Pi is a single-board computer that has become incredibly popular among individuals of all levels, from hobbyists to educators and professionals. A noteworthy feature of this versatile device is its ability to operate on an SD card. This compact yet robust storage mechanism enables seamless switching between various operating systems without requiring any reformatting or partitioning of internal drives. Furthermore, utilizing an SD card as the main data source can significantly enhance the performance and speed of your Raspberry Pi system. Whether you're interested in creating a media center, home automation project, or delving into programming options, incorporating an SD card with your Raspberry Pi opens endless possibilities while maintaining user-friendly simplicity.
2. How to boot Raspberry Pi from micro SD?
Ensure optimal performance of your Raspberry Pi by properly booting it from a micro SD card. Start by installing the desired operating system onto the card and inserting it into the device. Connect to power using a suitable adapter or USB cable, then wait for the green LED light to stop flashing and turn solid - this indicates successful completion of the boot process. If this does not occur within several minutes, troubleshoot any connections and consider trying with an alternative micro SD card if necessary. A reliable and high-quality micro SD is crucial for smooth functioning of your Raspberry Pi.
3. Can Raspberry Pi corrupt SD card?
The Raspberry Pi, a credit-card-sized computer, has become increasingly popular among technology enthusiasts for its versatility and affordability. However, one concern that users often have is whether or not it can corrupt their SD card. The answer to this question is both yes and no. Like any electronic device, the Raspberry Pi has the potential to cause damage if not used properly. If proper precautions are taken and best practices are followed when using an SD card with a Raspberry Pi, there should be no issues of corruption occurring. This includes safely ejecting the SD card before removing it from the device and avoiding physical damage to either the board or the SD card itself.
4. What do you need to install Raspberry Pi OS?
You need a Raspberry Pi board, a microSD card (min. 8GB recommended), a computer to download software, and Raspberry Pi Imager or another image writer. A power supply compatible with your Raspberry Pi model is also essential, along with optional peripherals like a keyboard, mouse, and monitor for setup.
5. How do you use Raspberry Pi Imager to write the OS?
First, download and install Raspberry Pi Imager on your computer. Open the software, select the desired OS from the menu, choose your microSD card, and click "Write." The Imager will format the card and install the OS. Once complete, safely eject the card and insert it into your Raspberry Pi.
6. What file systems are supported on the microSD card?
Raspberry Pi OS supports FAT32 and ext4 file systems on the microSD card. FAT32 is typically used for compatibility during the initial setup, while ext4 is used for the operating system. Ensure your microSD card is properly formatted before installation for optimal performance.
7. What size microSD card is best for Raspberry Pi OS?
A microSD card with at least 16GB is recommended for Raspberry Pi OS, but 32GB or larger is ideal for better performance and storage. This allows for more applications, updates, and data without running out of space. Always choose a high-quality card for longevity and speed.
8. How do you verify if the OS was installed successfully?
To verify successful installation, insert the microSD card into your Raspberry Pi and power it on. If you see the Raspberry Pi logo and are taken to the setup screen, the OS is installed correctly. If the screen remains blank or shows errors, the installation may need to be redone.
9. Can you install Raspberry Pi OS without a monitor?
Yes, you can install Raspberry Pi OS without a monitor by enabling "headless" mode. Use Raspberry Pi Imager to configure SSH access and set up Wi-Fi credentials before writing the OS. After booting, you can access your Raspberry Pi remotely via SSH from another computer.
10. How to enable SSH during OS setup?
To enable SSH during OS setup, use Raspberry Pi Imager to write the OS image to your microSD card. In the settings, toggle the SSH option to enable it. You can also place an empty file named "ssh" (without an extension) into the boot partition of the card. This allows remote access once the Pi is powered on.
11. How to fix boot errors after installing Raspberry Pi OS?
To fix boot errors, check the power supply first; insufficient power can cause issues. If the OS doesn’t boot, try re-imaging the microSD card or using a different card. Ensure all connections are secure. If errors persist, consult online forums for troubleshooting specific error messages.
12. What’s the difference between Lite and Desktop versions?
The Lite version of Raspberry Pi OS is a minimal installation without a graphical user interface (GUI), designed for command-line use and efficient resource management. The Desktop version includes a GUI, making it user-friendly and more suitable for general desktop tasks. Choose based on your intended use case.
13. How to clone or back up an SD card image?
To clone or back up an SD card image, use software like Win32 Disk Imager or dd command on Linux. Insert the microSD card, select the destination where you want to save the image, and initiate the cloning process. This creates an exact copy of your OS and files, ensuring your data remains safe.


