Build a Real-Time Weather Monitoring System Using Arduino
Summary
Weather affects nearly every aspect of our lives, from what we wear to how we plan our day. While we often check weather apps on our phones, have you ever wondered how that data is collected?
The answer lies in sophisticated monitoring systems that track temperature, humidity, pressure, and air quality in real time.
Today, you can build your own weather monitoring system right at home using Arduino, a few sensors, and some basic electronics knowledge.
This project combines hardware and software to create a functional weather monitoring system using Arduino that rivals commercial weather stations.
Whether you're interested in environmental science, IoT projects, or simply curious about how weather data flows from sensors to your screen, this guide will walk you through every step of building an effective weather monitoring system that connects to the internet.

What is a Real-Time Weather Monitoring System?
A weather monitoring system is an integrated setup that continuously measures atmospheric conditions and makes that data accessible instantly.
Unlike traditional weather stations that require manual readings, a real-time system automates the entire process—from sensor data collection to display and storage.
The magic happens through interconnected components working in harmony. Sensors detect environmental parameters like temperature and humidity.
A microcontroller processes this raw data. Internet connectivity allows you to access readings from anywhere. The result? You gain instant visibility into weather patterns without stepping outside.
What makes a real time weather monitoring system particularly valuable is its ability to track trends over time. You might notice that humidity spikes in the afternoon or temperature drops dramatically after sunset.
These patterns become clear when you have continuous, timestamped data streaming into your system.
The smart weather monitoring system approach leverages IoT principles, creating what's sometimes called an IoT-based weather monitoring system.
This means your Arduino doesn't just record data—it communicates with cloud platforms, sends alerts when thresholds are crossed, and allows remote monitoring from anywhere with an internet connection.
Components Required for Arduino Weather Monitoring System
Building a functional weather monitoring system project requires careful component selection. Here's what you'll need:
Microcontroller and Connectivity
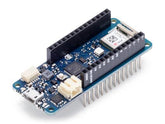
- Arduino board (MKR WiFi 1010 or Arduino Uno with WiFi shield)
- WiFi module for internet connectivity
- USB cable for programming and power
Environmental Sensors
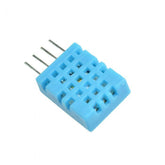
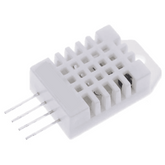
- DHT11 or DHT22 sensor for temperature and humidity readings
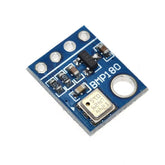
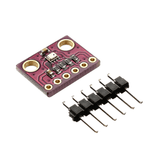
- BMP180 or BMP280 barometric pressure sensor
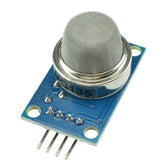
- MQ135 gas sensor for air quality detection
- Light sensor (optional but recommended for complete environmental data)
Hardware Components
- Breadboard or PCB board for circuit assembly
- Jumper wires for connections
- Resistors (10kΩ pull-up resistors for sensors)
- LED indicators for system status
- Power supply (5V adapter or USB power)
Optional Components
- Real-time clock module for accurate timestamping
- LCD display for local data viewing
- Rain gauge sensor for precipitation tracking
- Anemometer for wind speed measurement
When sourcing components, ensure sensor compatibility with your Arduino board's voltage levels. Most Arduino boards operate at 5V, while some sensors require 3.3V. Quality matters here—reliable sensors ensure accurate weather monitoring devices readings, which is crucial for any best weather monitoring system setup.
Circuit Diagram

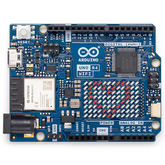
The circuit diagram transforms individual components into a cohesive system. The Arduino UNO R4 WiFi occupies the central position, with sensors arranged around a breadboard.
Connection Overview:
- Green wires: Data signals from sensors to Arduino pins
- Red wires: Positive voltage (VCC) supplying 5V power
- Black/Brown wires: Ground (GND) connections
Sensor Connections:
- BMP180: Uses I2C protocol (SDA/SCL lines) for communication
- DHT11: Single data line to digital pin 2
- MQ135: Analog output to pin A0, converting pollutant levels to voltage
- Rain Sensor: Digital output to pin 3, sends HIGH/LOW based on moisture detection
All sensors share common power rails through the breadboard for stable voltage supply. This configuration allows independent sensor operation while Arduino orchestrates simultaneous data collection.
Arduino Code for Real-Time Weather Monitoring
Your Arduino weather monitoring system relies on well-structured code that orchestrates sensor readings, WiFi communication, and data display. The code consists of several critical components working in concert.
Library Integration and Setup
The sketch begins by importing libraries that handle sensor communication, WiFi functionality, and web server operations.
The DHT library manages temperature and humidity sensor communication, while the BMP library interfaces with the pressure sensor. WiFi libraries establish internet connectivity and create a local web server.
Sensor Initialization and Calibration
During setup, the code initializes each sensor, verifies communication is established, and records baseline readings for calibration purposes. This ensures accurate measurements from the first reading onward.
Core Sensor Reading Function
A function polls all sensors at regular intervals—typically every few seconds. Temperature values are read in Celsius then optionally converted to Fahrenheit.
Humidity comes as a percentage value. Pressure readings convert from Pascals to millibars for easier interpretation. The air quality sensor reading converts analog values to an Air Quality Index scale.
WiFi Connection Routine
The Arduino connects to your network by scanning for your SSID and transmitting the stored password.
Upon successful connection, the board obtains an IP address and displays it on any connected display or serial monitor. Connection status persists throughout operation, with automatic reconnection if the link drops.
Web Server and Data Delivery
A lightweight HTTP server runs on the Arduino, listening for browser requests. When you visit the Arduino's IP address, the server sends an HTML dashboard displaying current readings.
The interface updates dynamically through JavaScript that requests fresh data every few seconds, eliminating the need to refresh the page manually.
Here's a simplified code structure:
#include
#include
#include
#include

DHT dht(PIN, DHT11);
Adafruit_BMP085 bmp;
WebServer server(80);

void setup() {
  Serial.begin(9600);
  dht.begin();
  bmp.begin();
  connectToWiFi();
  server.on("/", handleRoot);
  server.on("/data", handleSensorData);
  server.begin();
}

void loop() {
  server.handleClient();
  delay(1000);
}
Connecting the Weather Monitoring System to IoT Platforms
Once your hardware operates reliably, connecting to IoT platforms transforms it into a truly networked weather monitoring station.
Popular platforms like ThingSpeak, Blynk, and Adafruit IO accept sensor data via HTTP requests or MQTT protocol.
The connection process involves creating an account on your chosen platform, obtaining an API key, and modifying your Arduino code to send data to the platform's servers.
Instead of storing readings locally, your Arduino periodically transmits temperature, humidity, and pressure values to the cloud.
This approach enables several advanced features.
- Historical data accumulates on the platform's servers, allowing you to analyze weather monitoring networks patterns across weeks or months.
- Mobile apps developed by these platforms let you monitor conditions from anywhere. Some platforms trigger alerts when values exceed user-defined thresholds.
- IoT weather monitoring architectures often implement database storage, allowing sophisticated queries and reporting. You might ask questions like "What was the average humidity during July afternoons?" The platform instantly retrieves this information from stored records.
How to Monitor Weather Data Online
With your IoT-based weather monitoring system connected to the cloud, accessing your data becomes remarkably simple.
Most platforms offer web dashboards displaying real-time readings through graphs and gauges. You log in from any computer, tablet, or phone to check current conditions.
Mobile applications extend this capability further. Push notifications alert you when specific conditions occur—perhaps when temperature drops below freezing or humidity exceeds 80 percent.
Graphical representations show weather monitoring trends over hours, days, or weeks, making patterns immediately obvious.
Some platforms enable data sharing with others. You might invite family members to view readings or contribute your weather monitoring devices measurements to citizen science projects.
Communities collaborating across multiple weather stations create comprehensive environmental monitoring networks that rival official weather services in coverage density.
Remote access proves invaluable for property monitoring. Vacation homeowners track temperature to prevent pipe freezing. Farmers monitor humidity for irrigation decisions. Gardeners check conditions remotely before heading outside.
Advantages of an Automatic Weather Monitoring System
An automatic weather monitoring system eliminates the inconsistency of manual observations. Human operators tire, forget readings, or take measurements at inconsistent times.
- Automated systems capture data 24/7 with perfect consistency, building comprehensive datasets that reveal true environmental patterns.
- Hyper-local accuracy: Captures exact conditions at your location, missing from distant commercial stations
- Cost-effectiveness: $50-$100 vs. $200-$5,000+ for commercial equipment
- Customization: Easily add sensors (soil moisture, UV index, wind speed) as needs evolve
- Educational value: Teaches electronics, programming, web development, and environmental science
- Real-time decisions: Enables immediate responses (delaying irrigation, optimizing HVAC, event planning)
- Automation integration: Communicates with IoT devices for intelligent workflows
The best weather monitoring system meets specific needs at accessible price points.
Applications of Weather Monitoring Systems
The applications of weather monitoring system technology span virtually every sector of modern society, from traditional fields like agriculture to emerging areas like smart city management.
- In agriculture, precision farming techniques rely heavily on localized weather data to optimize crop production while minimizing resource consumption. Farmers use temperature measurements to predict frost events that could damage sensitive crops, deploying protective measures hours before danger arrives.
- Marine and aviation sectors have critical applications of weather monitoring systems where safety depends directly on accurate atmospheric information.
- Shipping companies monitor sea conditions including wind speed, humidity, and atmospheric pressure to route vessels away from dangerous weather and optimize fuel consumption.
- Aviation facilities maintain weather monitoring stations at airports to track visibility, wind shear, and precipitation that affect takeoff and landing decisions.
- Urban planning and smart weather monitoring system deployment increasingly shape how cities develop and operate. Municipal planners use distributed weather monitoring networks to identify urban heat islands—areas where concrete and asphalt create significantly higher temperatures than surrounding regions—guiding decisions about tree planting locations, green roof installations, and cooling center placement.
- Environmental research benefits enormously from weather monitoring devices deployed across varied landscapes, as climate scientists study long-term temperature and precipitation trends to model climate change impacts.
- Disaster management agencies deploy automatic weather monitoring systems in vulnerable areas to provide early warning of extreme events, with flood-prone regions benefiting from rainfall monitoring that triggers evacuation alerts when accumulation exceeds critical thresholds.
Challenges and Improvements in IoT Weather Monitoring Systems
Despite their numerous advantages, IoT weather monitoring systems face several technical and practical challenges that builders and users should understand
Connectivity Issues:
- Rural areas lack reliable WiFi
- Solutions: Long-range extenders, LoRa modules (several kilometers range), cellular data
Power Supply:
- Remote stations need autonomous operation
- Solar panels with rechargeable batteries provide sustainable solutions
- Sleep modes reduce consumption between measurements
Sensor Accuracy:
- Hobbyist sensors: ±1-2°C, ±3-5% humidity, ±1-2 mbar pressure
- Professional instruments: ±0.1°C but 10-20× more expensive
- Regular calibration against reference stations necessary
Environmental Protection:
- Weatherproof enclosures with radiation shielding and ventilation
- Balance protection with measurement accuracy
Security: Use HTTPS, authentication tokens, firmware updates
Future Improvements: AI forecasting, sensor miniaturization, 5G connectivity, distributed networks
Cost to Build an IoT-Based Weather Monitoring System using Arduino
Building your own weather monitoring system using Arduino offers significant cost advantages compared to purchasing commercial weather stations with similar capabilities.
The total component cost typically ₹2,139 if you buy fro Robocraze, depending on quality preferences and whether you already own basic tools and supplies.
Component Breakdown:
- Arduino UNO Ek R4 WiFi (Made in India): ₹1,339
- BMP180 Barometric Pressure Sensor: ₹38
- DHT11 Temperature and Humidity Sensor: ₹52
- MQ135 Air Quality Sensor: ₹99
- Rain Sensor with module: ₹45
- Breadboard and jumper wire assortment: ₹301
-
USB cable and 5V power adapter: ₹265
- Total: ₹2,139
Compared to commercial weather stations offering similar multi-parameter monitoring, which often cost ₹15,000 to ₹4,00,000 or more, the Arduino-based approach delivers substantial savings of 70-85% while offering customization flexibility and educational value that pre-built solutions cannot match.
For enthusiasts and educational institutions looking to source reliable components at competitive prices with excellent support, Robocraze offers comprehensive Arduino starter kits and individual sensors suitable for weather monitoring system projects.
Robocraze provides convenient Cash on Delivery options eliminating upfront payment concerns, free shipping on orders above ₹499 reducing total costs, fast delivery so you can start building without lengthy waits, and easy return policies that protect against defective components.
Conclusion
Building a real-time weather monitoring system using Arduino demonstrates that advanced environmental sensing is now accessible to students, hobbyists, and small organizations.
Whether motivated by education, agriculture, or citizen science, Arduino-based systems deliver reliable performance while teaching valuable interdisciplinary skills.
The advantages of weather monitoring system implementations extend from personal curiosity to professional applications in environmental monitoring, disaster management, and smart city development.
As IoT technology advances, today's DIY projects lay foundations for tomorrow's intelligent automation systems.


