Build a Fingerprint Scanner System with Raspberry Pi 5
Summary
Biometric security has become an essential part of modern access control systems, and building your own fingerprint authentication system with Raspberry Pi is easier than you might think.
Whether you want to create a secure door lock, an attendance tracker, or simply explore Biometric Technology, the Raspberry Pi 5 offers the perfect platform for this exciting project.
With its enhanced processing power and GPIO capabilities, the Raspberry Pi 5 makes interfacing with biometric sensors straightforward and efficient.
This guide will walk you through creating a fully functional biometric security system using Raspberry Pi 5 that can recognize and verify fingerprints with impressive accuracy.

Components Required for This Project
Before diving into the build, gather all the necessary components to ensure a smooth assembly process. Here's what you'll need for your Raspberry Pi 5 biometric project:
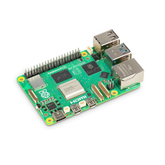
- Raspberry Pi 5 Board: The latest model with improved processing capabilities and GPIO pins
- R307 Fingerprint Sensor Module: A UART-based optical fingerprint detection sensor capable of storing multiple fingerprints
- Jumper Wires: Female-to-female jumper wires for making connections between the sensor and Raspberry Pi
- Breadboard (Optional): Useful for organizing connections during prototyping
- Power Supply: A reliable 5V power adapter rated at least 3A for the Raspberry Pi 5
- MicroSD Card: At least 16GB with Raspberry Pi OS installed
- Monitor, Keyboard, and Mouse: For initial setup and programming
- 5V Relay Module (Optional): If you plan to build a Raspberry Pi based fingerprint door lock system
The R307 sensor is particularly popular because it offers excellent reliability, can store hundreds of fingerprints in its onboard memory, and communicates easily through UART serial communication.
Make sure your sensor comes with the necessary cable for connecting R307 fingerprint sensor to Raspberry Pi.
Circuit Diagram to Interfacing Fingerprint Sensor with Raspberry Pi
The circuit diagram illustrates a complete fingerprint authentication system with Raspberry Pi that includes a fingerprint module, LCD display for visual feedback, control buttons, and status indication.
Understanding this wiring configuration is essential for successfully building your biometric security system using Raspberry Pi 5.

Fingerprint Module Connections
The R307 fingerprint sensor connects to the Raspberry Pi through a USB-to-Serial converter module, which simplifies the connecting R307 fingerprint sensor to Raspberry Pi process. The fingerprint module has four essential connections:
- VCC (Pin 1): Connects to the 5V power supply through the USB-to-Serial adapter
- TX (Pin 2): Transmits data from the sensor, connected to the RX pin of the USB-to-Serial converter
- RX (Pin 3): Receives data to the sensor, connected to the TX pin of the USB-to-Serial converter
- GND (Pin 4): Ground connection completing the circuit
The USB-to-Serial adapter bridges the fingerprint module to the Raspberry Pi, allowing straightforward communication without requiring direct GPIO serial configuration.
This approach is particularly useful for how to connect fingerprint sensor to Raspberry Pi 5 as it provides galvanic isolation and stable voltage levels.
LCD Display Integration
A 16x2 LCD module (LM016L) is integrated into the system to provide real-time feedback during fingerprint detection and verification operations. The LCD connects to multiple GPIO pins on the Raspberry Pi:
- RS (Register Select): Connected to GPIO pin 4
- E (Enable): Connected to GPIO pin 6
- Data pins D0-D7: Connected to GPIO pins 7, 8, 9, 10, 11, 12, 13, and 14
- RW (Read/Write): Connected to GPIO pin 5
- VSS and VDD: Ground and power supply connections
- Contrast adjustment: Controlled through potentiometer RV1 (10kΩ) connected to pin 3
The LCD displays user prompts such as "Place Finger," "Fingerprint Matched," or "Access Denied," providing immediate visual confirmation during the enroll and verify fingerprints on Raspberry Pi process.
Control Button Interface
Four pushbutton switches provide manual control for the Raspberry Pi 5 biometric project, each connected to dedicated GPIO pins with proper debouncing:
- Enroll/OK Button: Connected to GPIO 10 (Pin 21) - initiates fingerprint enrollment or confirms selections
- Delete Button: Connected to GPIO 9 (Pin 23) - removes stored fingerprint templates from memory
- Increment Button: Connected to GPIO 11 (Pin 25) - scrolls through menu options or fingerprint IDs
- Decrement Button: Connected to GPIO 8 (Pin 27) - navigates backward through options
Each button connects between its respective GPIO pin and ground, utilizing the Raspberry Pi's internal pull-up resistors to maintain a HIGH state when not pressed. When a button is pressed, it pulls the GPIO pin LOW, triggering the corresponding function.
Status Indication
A red LED (D1) with a 150Ω current-limiting resistor (R1) connects to GPIO 26 (Pin 37) to provide visual status indication. This LED can signal various states during fingerprint recognition project operation:
- Slow blinking during idle state
- Rapid blinking during fingerprint scanning
- Solid illumination when authentication succeeds
- Quick flashes to indicate errors or failed matches
The resistor limits current flow to protect both the LED and the GPIO pin from excessive current draw, which is crucial for Setting Up Raspberry Pi 5 for Fingerprint Recognition systems.
Power Distribution
The Raspberry Pi receives power through its USB-C connector (5V, minimum 3A recommended), and all peripheral components draw power from the Pi's regulated supply.
The 5V pins (Pins 2 and 4) power the LCD backlight and provide reference voltage, while the 3.3V pins (Pins 1 and 17) power the logic-level components.
Multiple ground pins (Pins 6, 9, 14, 20, 25, 30, 34, 39) ensure proper ground distribution across all components, maintaining signal integrity for the initialized fingerprint Sensor.
This comprehensive circuit design creates a robust platform for Interface Fingerprint Sensor with Raspberry Pi, allowing complete control over enrollment, deletion, and verification processes while providing clear user feedback through both the LCD display and LED indicator.
The modular design makes it easy to expand into applications like a Raspberry Pi based fingerprint door lock system by adding relay modules to the available GPIO pins.
Steps to Build a Fingerprint Scanner System with Raspberry Pi 5
Building your Fingerprint Scanner with Raspberry Pi involves several stages, from initial setup to enrollment and verification. Follow these steps carefully for the best results.
Setting Up Raspberry Pi 5 for Fingerprint Recognition
Start by ensuring your Raspberry Pi 5 has the latest version of Raspberry Pi OS installed. Boot up your Pi and open a terminal window.
The first step in Setting Up Raspberry Pi 5 for Fingerprint Recognition involves enabling the serial interface, which is disabled by default.
Open the Raspberry Pi configuration tool by typing sudo raspi-config in the terminal. Navigate to Interface Options, then select Serial Port.
When asked if you want the login shell to be accessible over serial, select No. When asked if you want the serial port hardware to be enabled, select Yes.
This configuration allows you to use the UART pins for communication with the sensor without interference from the console.
After exiting the configuration tool, reboot your Raspberry Pi with sudo reboot. Once it restarts, verify that the serial port is available by checking if /dev/serial0 exists using the command ls -l /dev/serial0.
Installing Required Libraries
To communicate with the initialized fingerprint Sensor, you'll need to install fingerprint libraries on Raspberry Pi OS. Python provides excellent libraries for working with fingerprint modules, making the development process much smoother.
Update your system packages first:
sudo apt-get update
sudo apt-get upgrade
Install Python and pip if they're not already available:
sudo apt-get install python3-pip
Install the pyfingerprint library, which provides a simple interface for R307 sensors:
sudo pip3 install pyfingerprint
This library handles all the low-level communication protocols, allowing you to focus on the logic of your application. It includes functions for enrolling fingerprints, searching for matches, and managing the sensor's internal database.
Enrolling Fingerprints
The enrollment process is where you teach the sensor to recognize specific fingerprints. To enroll and verify fingerprints on Raspberry Pi, you'll need to create a Python script that captures a finger image multiple times and stores a template in the sensor's memory.
Create a new Python file called enroll.py and write code that initializes the serial connection to the sensor, prompts the user to place their finger on the scanner, captures the image, converts it to a template, and stores it at a specific location in the sensor's memory.
The typical enrollment process requires scanning the same finger twice to ensure accuracy and create a reliable template.
During enrollment, the sensor captures the unique patterns of ridges and valleys on the fingertip, converts this information into a mathematical template, and stores it in a specific memory location identified by an ID number.
This ID becomes the identifier for that particular fingerprint, which you can associate with a person's name or access level in your application.
Creating a Verification System
Once fingerprints are enrolled, you can create a verification script that scans a finger and checks if it matches any stored template. This is the core of your Fingerprint Scanner with Raspberry Pi security system.
Write a Python script called verify.py that continuously monitors the sensor for finger placement, captures the fingerprint when detected, searches the sensor's database for a match, and displays the result indicating whether the fingerprint was recognized and which ID it corresponds to.
For a Raspberry Pi 5 DIY security project, you might want to add additional functionality such as logging access attempts with timestamps, triggering actions when specific fingerprints are detected, or sending notifications when unauthorized access is attempted.
The modular nature of Python makes it easy to extend your basic verification system with these features.
Building Advanced Features
Your fingerprint authentication system with Raspberry Pi can be expanded into practical applications.
For a biometric attendance system using Raspberry Pi, you could create a database that logs each verified fingerprint with a timestamp, associates fingerprints with employee or student names, and generates attendance reports.
The system could display the person's name on an LCD screen or send the data to a cloud database for centralized tracking.
If you're interested in building a door lock system, integrate a relay module that controls an electromagnetic lock.
When a fingerprint recognition project verifies an authorized fingerprint, the relay activates, unlocking the door for a predetermined time before automatically locking again. This creates a practical and secure access control solution for your home or office.
Conclusion
Building a fingerprint-based security system demonstrates how accessible biometric technology has become for makers and hobbyists.
Through this project, you've learned to interface hardware sensors, manage biometric data, and create practical security applications.
The Raspberry Pi 5's enhanced capabilities make it an ideal platform for exploring Biometric Technology and implementing real-world authentication solutions.
Whether you expand this into an attendance tracker, a secure door lock, or an access control system, the fundamentals you've learned here provide a solid foundation for countless biometric applications.


