Raspberry Pi 5 OS Installation Guide: Complete Setup from Scratch
Summary
If you want to unlock the full potential of your Raspberry Pi 5, you'll need to install an operating system first.
Unlike traditional computers that come with pre-installed software, the Raspberry Pi 5 arrives as a blank slate, giving you complete control over what runs on your device.
Setting up your Pi might seem daunting at first, but with the right guidance, you'll have your mini-computer up and running in less than an hour.

Getting Started with Raspberry Pi 5
The Raspberry Pi 5 is a significant leap forward in single-board computing, offering improved performance and enhanced connectivity options compared to its predecessors.
Before diving into the installation process, it's essential to understand that your Raspberry Pi requires an operating system to function, and this OS needs to be installed on a storage device like a microSD card or SSD.
The good news is that the Raspberry Pi Foundation has streamlined this entire process through their official tool called Raspberry Pi Imager, which handles everything from downloading the operating system to configuring initial settings.
This eliminates the need for manual image downloads and complex command-line operations that were once necessary.
What You'll Need Before Installing the OS
Before you begin the Raspberry Pi 5 setup guide, gather all the necessary electronic components to ensure a smooth installation experience. Having everything ready beforehand will save you time and frustration during the setup process.
Essential Hardware Components:
- MicroSD card (minimum 16GB, but 32GB or 64GB recommended for better performance)
- MicroSD card reader for connecting the card to your computer
- Computer running Windows, macOS, or Linux to prepare the installation media
- USB keyboard and mouse for initial setup
- Micro HDMI cable to connect to your monitor or TV
- USB-C power supply (official Raspberry Pi 5 power supply recommended)
- Monitor or TV with HDMI input
Optional but Recommended:
- Ethernet cable for wired network connection during setup
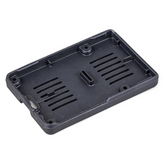
- Raspberry Pi 5 case for protection and cooling
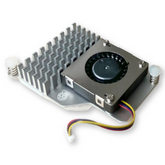
- Active cooling solution for intensive workloads
Choosing the Right Operating System for Raspberry Pi 5

Selecting the best OS for Raspberry Pi 5 depends on your intended use case and experience level. Raspberry Pi OS (formerly called Raspbian) is the official operating system and the recommended choice for most users, especially beginners.
Raspberry Pi OS Variants:
- Raspberry Pi OS Full: Includes desktop environment and recommended software suite, ideal for general use and beginners
- Raspberry Pi OS with Desktop: Basic desktop environment without extra applications, good for intermediate users
- Raspberry Pi OS Lite: Command-line only interface for advanced users and headless projects
For the Raspberry Pi 5 OS 64-bit installation, selecting the 64-bit version is recommended as it takes full advantage of the Pi 5's improved processor capabilities.
The Imager tool always displays the recommended version at the top of the operating system list, making it easy to choose the right option.
Alternative Operating Systems:
- Ubuntu (various flavors available)
- LibreELEC or OSMC for media center applications
- RetroPie for retro gaming enthusiasts
- Specialized Linux distributions for specific purposes
Downloading and Installing Raspberry Pi Imager

Getting the Raspberry Pi Imager onto your computer is the first practical step in your installation journey. This official tool simplifies the entire process of preparing your installation media.
Installation Steps:
- Navigate to raspberrypi.com/software in your web browser
- Click the appropriate download button for your operating system (Windows, macOS, or Linux)
- Run the downloaded installer file
- Follow the on-screen prompts to complete installation
Alternative Installation for Linux Users:
- Open a terminal window
- Run the command: sudo apt install rpi-imager
- Wait for the package manager to complete the installation
Once installed, launch the application by clicking the Raspberry Pi Imager icon from your applications menu.
The interface presents you with three main buttons that guide you through each essential step: Choose Device, Choose OS, and Choose Storage. These Raspberry Pi Imager settings make the process intuitive even for first-time users.
Flashing Raspberry Pi OS onto microSD Card

Understanding how to flash OS on SD card properly ensures your Raspberry Pi 5 boots correctly on the first attempt. This process writes the operating system image to your storage device and prepares it for use.
Step-by-Step Flashing Process:
- Insert your microSD card into your computer's card reader
- Launch Raspberry Pi Imager
- Click "Choose Device" and select Raspberry Pi 5 from the list
- Click "Choose OS" and select your preferred operating system
- Click "Choose Storage" and carefully select your microSD card
- Click "Next" to proceed to customization settings
Important OS Customization Settings:
When prompted to apply OS customization, click "Edit Settings" to configure:
- Set a hostname for your Pi on the network
- Create your username and password
- Configure Wi-Fi credentials (SSID and password)
- Set your timezone and keyboard layout
- Enable SSH for remote access if needed
These Raspberry Pi Imager settings save significant time during the first boot by eliminating the need to manually configure these essentials later.
After configuring your preferences, confirm your selections and click "Yes" to begin writing the OS image.
The process typically takes 5-10 minutes depending on your card's speed. Once complete, safely eject the microSD card—it's now ready to install Raspberry Pi OS on your Pi 5.
Booting Raspberry Pi 5 for the First Time

Preparing to boot Raspberry Pi 5 for the first time requires careful attention to the connection sequence. Proper setup ensures a smooth first boot experience.
Connection Sequence:
- Ensure your Raspberry Pi is completely unpowered before starting
- Insert the prepared microSD card into the card slot on the underside of the Pi board
- Connect your USB keyboard and mouse to any available USB ports
- Connect your micro HDMI cable to HDMI port 0 (the one closer to the USB-C power port)
- Connect the other end of the HDMI cable to your monitor or TV
- Connect an Ethernet cable if you prefer wired connectivity (optional if Wi-Fi was configured)
- Finally, connect the USB-C power supply to your Raspberry Pi 5
What Happens During First Boot:
- The green status LED lights up, indicating power and boot activity
- Boot messages appear on screen within 30-60 seconds
- The Raspberry Pi logo displays during initialization
- System loads the desktop environment or configuration wizard
The moment you plug in the power, your Pi immediately begins booting—there's no power button on the board itself. The entire boot process for the Raspberry Pi 5 complete setup takes approximately one to two minutes on first boot.
Initial Setup Wizard and Configuration Steps

The Raspberry Pi 5 bootloader setup process continues automatically once the hardware initialization completes. If you didn't configure OS customization settings during the imaging process, you'll be greeted by the Raspberry Pi Configuration Wizard.
Configuration Wizard Steps:
- Country Selection: Determines keyboard layout, time zone, and language settings
- User Account Creation: Set up your username and password for system access
- Wi-Fi Configuration: Connect to your wireless network by entering credentials
- Software Updates: Option to update system software to the latest version
The setup wizard prompts you to update your system software to ensure you have the latest security patches and features.
This initial update can take several minutes depending on your internet connection speed and the number of available updates. It's highly recommended to complete this update during the initial setup rather than postponing it.
Post-Setup Desktop Environment:
After the wizard completes, your Raspberry Pi will reboot automatically. You'll be presented with the full desktop environment featuring:
- Taskbar at the top with application menu and system tray
- Default Raspberry Pi wallpaper
- Pre-installed applications accessible from the menu system
- File manager, web browser, and productivity tools ready to use
Setting Up Wi-Fi, SSH, and Updates

Configuring connectivity features is essential for the complete Raspberry Pi 5 OS installation experience. These settings enable both local and remote access to your Pi.
How to Setup Wi-Fi and SSH on Raspberry Pi 5:
Connecting to Wi-Fi After Initial Boot:
- Click the network icon in the system tray at the top-right of the screen
- Select your wireless network from the available networks list
- Enter your Wi-Fi password when prompted
- Wait for the connection to establish (indicated by the network icon)
Enabling SSH for Remote Access:
- Open the Raspberry Pi Configuration tool from the Preferences menu
- Navigate to the Interfaces tab
- Toggle SSH to "Enabled"
- Click OK to save the changes
For security purposes, always change the default password if you enable SSH, as leaving default credentials creates a significant security vulnerability.
SSH allows you to remotely access your Raspberry Pi from other computers on your network, which is particularly useful for headless operation.
Keeping Your System Updated:
Regular updates ensure optimal performance and security when you install OS on Raspberry Pi 5. Open a terminal window and run these commands:
- sudo apt update - Refreshes the package list from repositories
- sudo apt upgrade - Installs all available updates
These commands should be run regularly—ideally weekly—to maintain a secure and stable system. The update process may take anywhere from a few minutes to half an hour depending on how many packages require updating.
Install OS on SSD or USB Drive (Optional)
For users seeking faster performance and increased reliability, learning how to prepare SD card for Raspberry Pi alternatives opens up new possibilities. The Raspberry Pi 5 supports booting directly from USB-attached storage devices including SSDs and USB flash drives.
Benefits of Using SSD or USB Storage:
- Significantly faster read and write speeds compared to microSD cards
- Improved reliability for long-term use
- Better performance for disk-intensive applications
- Ideal for databases, file servers, and development environments
Installation Process for USB/SSD Boot:
- Connect your USB storage device or SSD to your computer
- Launch Raspberry Pi Imager
- Select Raspberry Pi 5 as your device model
- Choose your desired operating system
- Select the USB storage device as your target (instead of microSD card)
- Complete OS customization settings as you would for microSD installation
- Write the image to your USB device
- Safely eject the USB device when flashing completes
Booting from USB Storage:
- Connect the USB storage device to one of the USB 3.0 ports (blue ports) on your Raspberry Pi 5
- Power on your Pi without a microSD card inserted
- The Pi will automatically detect and boot from the USB device
- Enjoy noticeably faster boot times and improved application performance
This method to install Raspberry Pi OS using Raspberry Pi Imager on USB storage is the preferred choice for power users and production deployments.
Conclusion
Setting up your Raspberry Pi 5 from scratch opens the door to endless possibilities in computing, from learning programming and electronics to building sophisticated automation systems and media centers.
By following this comprehensive guide, you've successfully navigated the entire installation process—from selecting the right operating system and preparing your storage media to configuring your system for optimal performance.
The beauty of the Raspberry Pi ecosystem lies in its accessibility; what once required advanced technical knowledge can now be accomplished by anyone willing to follow clear, step-by-step instructions.
As you continue your journey with the Pi 5, remember that the active community, extensive documentation, and continuous software improvements ensure you'll always have support and resources available for your projects.


