Raspberry Pi Pico Programming with MicroPython
Summary
If you've been curious about the world of electronics and programming but felt intimidated by complex hardware and low-level languages, you're in the right place. The barrier to entry for creating your own smart devices has never been lower, and a huge reason for that is the rise of accessible microcontrollers. Today, we're diving into one of the most exciting players in this space: the Raspberry Pi Pico.
In this walkthrough, I’ll guide you through my experience of getting started with Raspberry Pi Pico.We'll cover what this little board is, why MicroPython is the perfect language for it, and a step-by-step guide to get you from a brand-new Pico to a blinking LED and beyond.
Let's get hands-on and find out if the Raspberry Pi Pico is the perfect starting point for your next project.

What is the Raspberry Pi Pico?
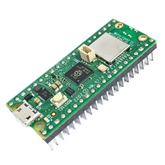
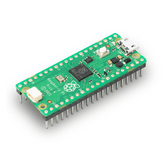
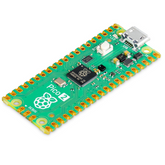
For years, the Raspberry Pi name has been synonymous with single-board computers-tiny, affordable machines that run a full-fledged operating system like Linux. The Raspberry Pi Pico, however, is different. It’s not a computer; it's a microcontroller.
Think of a microcontroller as a single chip with a processor, memory, and input/output peripherals all built-in. It’s designed to do one thing and do it well, whether that’s reading a sensor, flashing a light, or controlling a motor. This is where the Pico shines.
At the heart of the Pico is the RP2040, a custom-designed chip from Raspberry Pi that features:
- A dual-core Arm Cortex-M0+ processor, which is powerful enough for a wide range of applications.;
- A generous amount of on-chip RAM.
- A rich set of peripherals, including 26 multi-function General Purpose Input/Output (GPIO) pins. These pins are your gateway to the physical world, allowing you to connect LEDs, buttons, sensors, and more.
Unlike its larger Raspberry Pi siblings, the Pico doesn’t run an operating system. Your code runs directly on the metal, which makes it extremely fast and efficient. It's built for physical computing projects where you need real-time control and direct hardware access. This makes it a fantastic choice for robotics, smart home devices, and a whole universe of other Raspberry Pi Pico projects.
Raspberry Pi Pico Programming using Micro-Python: Step-by-Step Guide
We'll be using the Thonny IDE, which is a beginner-friendly Python editor with built-in support for interacting with microcontrollers.
What You’ll Need
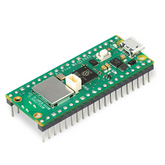
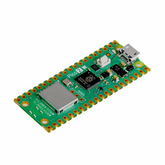
- A Raspberry Pi Pico or Pico W
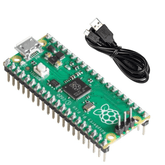
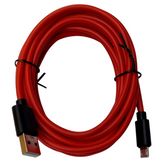
- A micro-USB cable;
- A computer (Windows, macOS, or Linux)
Step 1: Install Thonny IDE

Before we do anything with the hardware, let’s get our software ready. Thonny is an Integrated Development Environment (IDE) specifically designed for Python beginners. The reason I love it for the Pico is that it comes with everything you need to communicate with the board out of the box.
Head over to the Thonny website (thonny.org) and download the installer for your operating system.
Run the installer and follow the on-screen instructions. It’s a straightforward process.
Once installed, open Thonny. You'll be greeted with a clean, simple interface. This is where we'll write our code and send it to the Pico. Using the Thonny IDE Raspberry Pi Pico combination is one of the smoothest experiences for getting started.
Step 2: Flash MicroPython to Pico
Out of the box, your Pico is a blank slate. We need to install MicroPython on it so it can understand our Python code. This process is surprisingly easy thanks to the drag-and-drop UF2 file format.
- Download the Firmware: Go to the official Raspberry Pi documentation or the MicroPython website and download the correct UF2 file for your Pico board (Pico or Pico W).
- Enter BOOTSEL Mode: This sounds technical, but it’s simple. Press and hold the small white BOOTSEL button on your Pico. While holding it, plug the micro-USB cable into the Pico and then into your computer.

- Copy the File: Once connected, your computer will detect the Pico as a new USB mass storage device, likely named "RPI-RP2". Now you can release the BOOTSEL button.
- Flash it: Drag and drop the .uf2 MicroPython file you downloaded onto this new drive. The drive will automatically disappear, and your Pico will reboot.
That’s it! You now have a Pico running MicroPython. This Flash MicroPython to Pico step is a one-time setup for your board.
Step 3: Connect Thonny to Your Pico
Now, let's connect our IDE to the board.
- In Thonny, go to the bottom-right corner of the window. Click on the interpreter selection menu (it might say something like "Python 3.x.x").
- From the list, select "MicroPython (Raspberry Pi Pico)".
- Thonny will automatically detect the Pico connected to your computer. The shell window at the bottom should now show a MicroPython prompt, indicating you are connected and ready to go.
Step 4: Your First Script - The Hardware "Hello, World!"
The classic first program is printing "Hello, World!". In the world of microcontrollers, the equivalent is blinking an LED. The Pico has a tiny onboard LED we can control.
In the main editor window in Thonny, type the following code:
  from machine import Pin
import time

led = Pin("LED", Pin.OUT)

while True:
    led.toggle()
    time.sleep(1)
Let me give you a step-by-step explanation of the code:
- from machine import Pin: This line imports the Pin class, which lets us control the hardware pins on the Pico.
- import time: This imports the time library, which we need for adding delays.
- led = Pin("LED", Pin.OUT): This creates a Pin object. We're telling MicroPython that we want to control the onboard "LED" and that it should be an output pin (we're sending a signal out to it).
- while True:: This creates an infinite loop, so our program runs forever.
- led.toggle(): This is the magic. It flips the state of the LED—if it's on, it turns off, and if it's off, it turns on.
- time.sleep(1): This tells the program to pause for 1 second.
Click the green "Run" button in Thonny. You'll be prompted to save the file. You can save it to your computer or directly to the Pico. Save it to the Raspberry Pi Pico and name it main.py. Naming it main.py tells the Pico to run this script automatically every time it powers on.
Look at your Pico. The onboard LED should now be blinking once every second! You've just run your first Raspberry Pi Pico MicroPython program.
Step 5: Exploring Pico GPIO MicroPython
The real power of the Pico comes from its General Purpose Input/Output (GPIO) pins. These are the rows of pins along the sides of the board. You can use them to control external components like LEDs, buttons, and sensors.
For this, you'll need an external LED and a resistor (around 330 ohms is good).
- Connect the longer leg (anode) of the LED to GPIO pin 15.
- Connect the shorter leg (cathode) to the resistor, and the other end of the resistor to a ground (GND) pin.
Now, modify your code slightly:
  from machine import Pin
import time

# We're now using GPIO pin 15 instead of the onboard LED
led = Pin(15, Pin.OUT)

while True:
    led.toggle()
    time.sleep(0.5)
Run this code, and you should see your external LED blinking! This simple example is the foundation of almost all hardware projects. By understanding Pico GPIO MicroPython control, you can interface with countless electronic components.
Conclusion
The combination of its low cost, solid performance, and the simplicity of Raspberry Pi Pico MicroPython programming creates an experience that is both rewarding and fun.
We’ve walked through the entire process, from setting up the hardware to writing and running code that interacts with the physical world. Whether you're a student learning to code, a hobbyist building a home automation gadget, or an engineer prototyping a new product, the Pico is an outstanding tool.


