Interfacing the L89HA Multi-GNSS Module with Arduino
Summary
If you’ve ever tinkered with electronics, you know the thrill of bringing a project to life. But adding real-world context, like knowing exactly where your project is on the globe, is a game-changer.
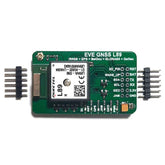
This is where GNSS technology comes in, and today, we're diving deep into a powerhouse module that has seriously impressed me: the L89HA Multi-GNSS Breakout Module.
For a long time, the go-to for hobbyists was a simple GPS module. It worked, but getting a quick and accurate satellite lock could be a test of patience, especially in tricky spots like dense cities.
I’ve been on the hunt for a more robust solution, something that could keep up with modern demands. That hunt led me to the L89HA.
This isn't just another GPS receiver. It’s a full-blown multi-constellation beast packed into a tiny breakout board.But does all that power translate into a complicated setup? That’s what I wanted to find out.
In this walkthrough, I’ll take you through my first-hand experience interfacing this module with a classic Arduino.
We'll cover everything from the hardware hookup to the code that makes it all sing. Let's get our projects on the map!

What is the L89HA Multi-GNSS Breakout Module?
So, what exactly sets the L89HA breakout module apart from the sea of other location sensors? In a word: options.
Think of it not just as a GPS receiver, but as a global navigator that can listen to multiple satellite systems at the same time. This is what we call a multi-constellation GNSS receiver.
While a standard GPS module only communicates with the US-based Global Positioning System, the L89HA can simultaneously track:
- GPS (USA)
- GLONASS (Russia)
- BeiDou (China)
- Galileo (Europe)
- QZSS (Japan)
This is a huge advantage. By having more satellites to talk to, the module can get a location fix (known as Time to First Fix, or TTFF) significantly faster and maintain a more stable and accurate signal, even in environments where the sky is partially obstructed.
But here’s a feature that particularly stands out, especially for users in and around India: its native IRNSS support.
IRNSS (Indian Regional Navigation Satellite System), also known as NavIC, provides highly accurate positioning for the Indian subcontinent. Having a module that supports it out of the box is a fantastic bonus.
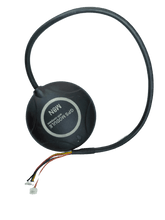
The breakout board itself is designed for convenience. It takes the tiny L89HA module and places it on a PCB with all the necessary support circuitry.
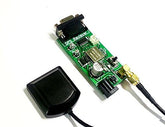
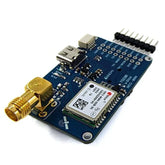
You get clearly labeled pins for power and communication, and usually a U.FL connector for an external active antenna, which is crucial for getting the best possible signal.
For any maker looking for a serious GNSS module for Arduino, the L89HA is a top-tier contender that promises professional-grade performance in a hobbyist-friendly package.
List of Components
Alright, let's get our hands dirty. The best way to understand a component is to build something with it.
This part of the walkthrough is a detailed guide to creating a functional L89HA Arduino Interface. We'll go from a pile of parts to a working system that prints your real-time coordinates.
What You'll Need
First, let's gather our tools. There’s nothing fancy required here, just some standard components from the maker toolkit.
- Arduino Board: An Arduino Uno, Nano, or any similar microcontroller will work perfectly. I’ll be using an Uno for this guide.
- L89HA Multi-GNSS Breakout Module: The star of our show.
- GNSS Antenna: Most L89HA breakouts require an external active antenna. Make sure you have one with the correct connector (usually U.FL or SMA).
- Breadboard and Jumper Wires: For creating our circuit without any soldering.
- Arduino IDE: Ensure you have the latest version installed on your computer.
Circuit Diagram for Interfacing L89HA Breakout Module with Arduino

The connection between the Arduino and the L89HA is surprisingly straightforward. We'll use a serial connection to receive data from the module.
The module continuously sends out location information, and our Arduino just needs to listen in.
The communication happens over a protocol called UART. The key is to connect the transmitter (TX) of the module to the receiver (RX) of the Arduino, and vice versa.
However, to keep the Arduino's main hardware serial port free for uploading code and printing debug messages, we'll use the SoftwareSerial library to create a second, virtual serial port on other digital pins.
The Code
With the hardware wired up, it's time for the software. The L89HA outputs data in a standard format called NMEA sentences. These are comma-separated text strings that look a bit cryptic at first, like this:
$GPGGA,123519,4807.038,N,01131.000,E,1,08,0.9,545.4,M,46.9,M,,*47
While you could write code to parse these NMEA sentences manually, there’s a much easier way. We'll use a fantastic library called TinyGPS++.
This library does all the heavy lifting, converting the raw NMEA data into easy-to-use variables for latitude, longitude, speed, altitude, and more.
It turns a complex task into just a few lines of code, making this Arduino GPS tutorial section a breeze.
1. Install the Library:
Before we start coding, open the Arduino IDE, go to Sketch > Include Library > Manage Libraries, and search for "TinyGPSPlus". Install the library by Mikal Hart.
2. The Arduino Sketch:
Now, copy and paste the following code into a new sketch in your Arduino IDE. This sketch sets up the Arduino GNSS system, listens for data from the L89HA, and prints the parsed information to the Serial Monitor.
#include
#include

// The serial connection to the L89HA module
static const int RXPin = 10, TXPin = 11;
static const uint32_t GPSBaud = 9600;

// The TinyGPS++ object that parses the NMEA data
TinyGPSPlus gps;

// The software serial port
SoftwareSerial ss(RXPin, TXPin);

void setup() {
  // Start the hardware serial port for debugging
  Serial.begin(9600);

  // Start the software serial port for the L89HA
  ss.begin(GPSBaud);

  Serial.println("L89HA GNSS Reader");
  Serial.println("-----------------");
  Serial.println("Waiting for satellite fix...");
}

void loop() {
  // This sketch displays information every time a new sentence is correctly encoded.
  while (ss.available() > 0) {
    if (gps.encode(ss.read())) {
      displayInfo();
    }
  }

  // If no GPS data is received for 5 seconds, check for a wiring issue.
  if (millis() > 5000 && gps.charsProcessed() < 10) {
    Serial.println("No GPS data received: check wiring.");
    while(true);
  }
}

void displayInfo() {
  Serial.print("Location: ");
  if (gps.location.isValid()) {
    Serial.print(gps.location.lat(), 6);
    Serial.print(",");
    Serial.print(gps.location.lng(), 6);
  } else {
    Serial.print("INVALID");
  }

  Serial.print("  Date/Time: ");
  if (gps.date.isValid() && gps.time.isValid()) {
    Serial.print(gps.date.month());
    Serial.print("/");
    Serial.print(gps.date.day());
    Serial.print("/");
    Serial.print(gps.date.year());
    Serial.print(" ");
    if (gps.time.hour() < 10) Serial.print("0");
    Serial.print(gps.time.hour());
    Serial.print(":");
    if (gps.time.minute() < 10) Serial.print("0");
    Serial.print(gps.time.minute());
    Serial.print(":");
    if (gps.time.second() < 10) Serial.print("0");
    Serial.print(gps.time.second());
  } else {
    Serial.print("INVALID");
  }

  Serial.print("  Satellites: ");
  if (gps.satellites.isValid()) {
    Serial.print(gps.satellites.value());
  } else {
    Serial.print("INVALID");
  }

  Serial.println();
}
Project Ideas
Now that you have a working GPS system, the possibilities are endless. This setup forms the foundation for countless exciting Arduino projects:
- Vehicle Tracker: Log the location data to an SD card or transmit it over the internet to build your own Arduino location tracking device.
- GPS-Synchronized Clock: Use the hyper-accurate time data from the satellites to build a clock that never needs setting.
- Geocaching Device: Create a handheld gadget that guides you to specific GPS coordinates.
- Weather Balloon Tracker: Equip a high-altitude balloon with this setup to track its flight path.
Conclusion
After spending time with the L89HA, I can confidently say it lives up to the hype. It transforms what used to be a finicky part of a project into a reliable, powerful, and easy-to-use asset.
The days of waiting anxiously for a GPS lock are over. The module's multi-constellation support provides a fast, stable, and accurate position that opens up a new world of possibilities for our Arduino creations.
We’ve walked through the entire process, from understanding what makes the L89HA special to the nuts and bolts of the wiring and the elegance of the TinyGPS++ library.
The barrier to entry for adding high-quality location awareness to your projects has never been lower.
So, what will you build? Whether you’re creating a simple tracker or a complex autonomous vehicle, the L89HA module provides the robust positioning data you need.
I hope this guide has demystified the process and inspired you to integrate this incredible technology into your next project.


