How to Make a Raspberry Pi Security Camera - Easy Setup Guide
Summary
Building your own home security camera might sound like a project reserved for tech experts, but with the Rspberry Pi, it's more accessible than ever.
This guide will walk you through the process of transforming the Raspberry Pi into a powerful surveillance device, giving you peace of mind without a hefty price tag or complicated subscription plans.

Project Overview
This Raspberry Pi project focuses on a straightforward goal: to connect a camera to the device, install specialized software, and configure it to stream and record video.
By the end of this guide, you will have a fully functional surveillance cam based on a Raspberry Pi that you can access from any computer or smartphone on your home network.
The system will be capable of continuous recording, but its real power lies in its ability to detect motion, record only when activity occurs, and even send you notifications.
This intelligent approach saves storage space and ensures you are only alerted to important events, making your home surveillance both smart and efficient.
List of Components Needed Before Getting Started
Before you begin, you will need to gather a few key components. Having everything on hand will make the setup process smooth and enjoyable.
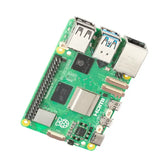
- Raspberry Pi Board: Any recent model will work, but a Raspberry Pi 4 or 5 is recommended for the best performance. The Raspberry Pi Zero 2 W is a great, compact option for smaller, more discreet camera placements. There are many Raspberry Pi boards to choose from, so pick one that fits your budget and needs.
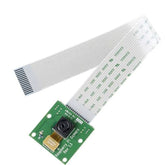
- Camera: You have two main options here. The official Raspberry Pi Camera Module connects directly to the board's dedicated camera port and offers excellent performance. Alternatively, a standard USB webcam is a simple plug-and-play option that is also fully supported.
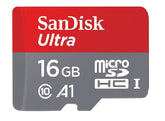
- MicroSD Card: A high-quality card is crucial for reliability. A 16GB or 32GB Class 10 card is a good starting point for the operating system and initial recordings.
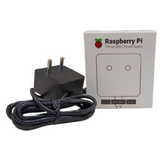
- Power Supply: Use the official power supply for your specific Raspberry Pi model to ensure it receives stable and sufficient power.
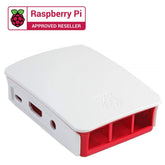
- Case (Optional but Recommended): A case will protect your device from dust and physical damage. Many cases also include options for mounting the camera module.
- Computer with an SD Card Reader: You will need this to flash the operating system onto the microSD card.
Setting Up Your Raspberry Pi
The initial setup involves preparing the microSD card with the necessary software. We will be using a "headless" setup, meaning you will not need a separate monitor, keyboard, or mouse connected to the Raspberry Pi.
- Download Raspberry Pi Imager: This is the official tool from the Raspberry Pi Foundation that makes installing an operating system incredibly simple. Download and install it on your main computer.
- Flash the Operating System: Insert your microSD card into your computer's card reader. Open Raspberry Pi Imager and select your Pi model. For the operating system, choose "Raspberry Pi OS Lite (64-bit)" as it provides a minimal base without a desktop environment, which is perfect for a dedicated server task like a security camera.
- Pre-configure the OS: Before you write the OS to the card, click the gear icon in the imager to access advanced options. Here, you can set a hostname for your device, enable SSH (which allows remote access), and, most importantly, configure your Wi-Fi network credentials. This allows the Pi to automatically connect to your network on its first boot.
- First Boot and Connection: Once the imager has finished, eject the microSD card, insert it into your Raspberry Pi, and power it on. After a few minutes, it should connect to your Wi-Fi network. You can find its IP address by checking your router's list of connected devices.
- Update the System: Using a terminal application on your computer (like Terminal on macOS or PuTTY on Windows), connect to your Pi via SSH with the command ssh your_username@<Your_Pi_IP_Address>. Once logged in, run the following commands to ensure your system is up to date: sudo apt update and sudo apt upgrade -y.
Installing the Camera Module or USB Webcam
- Using the Raspberry Pi Camera Module: First, ensure the Pi is powered off. Gently pull up the tabs on the camera port (labeled CSI) on the Pi board. Insert the camera's ribbon cable with the blue tab facing the Ethernet port, then push the tabs back down to secure it. Power the Pi back on. Connect via SSH and run sudo raspi-config. Navigate to "Interface Options," select "Legacy Camera," and enable it. After a reboot, your camera is ready. You can test it with the command raspistill -o test.jpg to take a test photo. This confirms that your setup of one of the many Raspberry Pi Cameras is working.
- Using a USB Webcam: This method is even simpler. With the Pi powered on, just plug the USB webcam into any available USB port. The system should automatically detect it. You can verify this by running the command lsusb in the terminal, which will list all connected USB devices.
Choosing the Right Software
To transform your hardware into a surveillance system, you need the right software. While several options exist, the easiest and most feature-rich choice for beginners is MotionEyeOS.
However, rather than replacing our entire operating system, we will install motionEye on top of the Raspberry Pi OS we've already set up. This gives us a powerful web-based interface to manage our camera.
Installation Process for Making Raspberry Pi Security Camera
This is where your hardware becomes a smart camera. We will be installing motionEye, a web-based front-end for the popular motion software. This is the core of the Raspberry Pi security camera setup.
- Step 1: Install Dependencies: First, we need to install the software packages that motionEye relies on to function. Connect to your Pi via SSH and run the following commands:
sudo apt install ffmpeg libmariadb3 libpq5 libmicrohttpd12 motion
sudo apt install python3-pip python3-dev libssl-dev libcurl4-openssl-dev libjpeg-dev zlib1g-dev
- Step 2: Install motionEye: Now, use the Python package installer, pip, to install the motionEye application itself: pip install motioneye
- Step 3: Prepare Configuration Files: Create the necessary directory and copy the sample configuration file to get started:
sudo mkdir -p /etc/motioneye
sudo cp /usr/local/share/motioneye/extra/motioneye.conf.sample /etc/motioneye/motioneye.conf
- Step 4: Access the Web Interface: With the installation complete, you can now access the motionEye web interface. Open a web browser on your computer and navigate to http://<Your_Pi_IP_Address>:8765. You will be greeted by a login screen. The default username is admin with no password. Your camera feed should appear automatically.
-
Step 5: Secure and Configure Your Camera: The first thing you should do is click the person icon in the top-left corner and set a strong password for the admin account. Now you can explore the settings panels. Here you can change video resolution, set a custom frame rate, and, most importantly, enable motion detection. This turns your device into a smart motion detection camera. You can adjust sensitivity, define motion-trigger areas, and set up notifications to be sent via email when motion is detected. This powerful software transforms your simple hardware into a complete Raspberry Pi Based CCTV system. The completion of this MotionEyeOS Raspberry Pi installation on your OS creates a fantastic Raspberry Pi camera project. You now have your own Raspberry Pi surveillance camera.
Conclusion
By following these steps, you have successfully built a versatile and powerful home surveillance camera.
You have taken a handful of affordable components and assembled them into a system that offers features found in expensive commercial products.
The real value of this project extends beyond cost savings; it lies in the control and privacy it affords you. Your video data stays on your network by default, and you have complete authority over how the system operates.
This project serves as a perfect illustration of the power of DIY electronics, turning a simple, educational computer into a practical and effective tool for securing your home.


