Explore 5 Must-Try Raspberry Pi Projects in 2025 for Beginners
Summary
Ready to explore Raspberry Pi project ideas for beginners in 2025?? From AI-powered finger counting to smart home automation, these latest DIY Raspberry Pi projects will level up your tech skills and spark your creativity. Whether you're a beginner or a coding pro, get hands-on with fun, practical, and innovative builds. Let’s dive in and start making!
Project 1: Finger Counting Project Using Raspberry Pi

Introduction:
Experience the power of technology with this Finger Counting Raspberry Pi Project! This Raspberry Pi based project uses computer vision to count fingers in real time. It's a fun and practical application of machine learning and image processing.
Concept and Purpose:
The concept involves utilizing image processing and machine learning to detect and count fingers using a camera feed. The purpose is to demonstrate the capabilities of real-time computer vision for innovative applications in education and entertainment.
Components and Tools Needed:
- Raspberry Pi
- Camera
- Python with OpenCV and MediaPipe libraries
Connections:
No additional hardware is required for this Raspberry project. Simply connect a USB camera to your Raspberry Pi and run the Python script.
Code:
import cv2
import numpy as np

# Start video capture
cap = cv2.VideoCapture(0)

while True:
    ret, frame = cap.read()
    hsv = cv2.cvtColor(frame, cv2.COLOR_BGR2HSV)

    # Create a mask for skin detection
    lower_skin = np.array([0, 20, 70], dtype=np.uint8)
    upper_skin = np.array([20, 255, 255], dtype=np.uint8)
    mask = cv2.inRange(hsv, lower_skin, upper_skin)

    # Find contours
    contours, _ = cv2.findContours(mask, cv2.RETR_TREE,
cv2.CHAIN_APPROX_SIMPLE)
    if contours:
	max_contour = max(contours, key=cv2.contourArea)
	hull = cv2.convexHull(max_contour, returnPoints=False)
	defects = cv2.convexityDefects(max_contour, hull)

	if defects is not None:
	    finger_count = defects.shape[0] + 1 # Count fingers
            cv2.putText(frame, f"Fingers: {finger_count}", (50, 50),
			cv2.FONT_HERSHEY_SIMPLEX, 1, (0, 255, 0), 2)

 cv2.imshow("Finger Counter", frame)

 if cv2.waitKey(1) & 0xFF == ord('q'):
     break

cap.release()
cv2.destroyAllWindows()
Conclusion
This beginner-friendly Raspberry Pi project is an excellent introduction to electronics and programming with Raspberry Pi.
Project 2: Home Automation Project using Raspberry Pi

Introduction:
Transform your home into a smart haven with the Raspberry Pi Home Automation Project! Control lights, fans, and appliances through a web interface or voice commands.
Concept and Purpose:
The Raspberry Pi smart home projects demonstrate how to use Raspberry Pi for IoT-based home automation, enabling users to remotely control devices via a simple web application.
Components and Tools Needed:
- Raspberry Pi
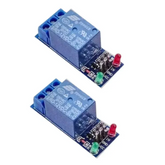
- Relay module
- Electrical appliances (e.g., light bulb)
- Flask (Python library)
Connections:
- Connect a relay module to GPIO pin 18.
- Attach the relay to the appliance to control.
Code:
from flask import Flask, render_template, request
import RPi.GPIO as GPIO

# Setup
app = Flask( name )
GPIO.setmode(GPIO.BCM)
GPIO.setup(18, GPIO.OUT) # Pin 18 for controlling the relay

@app.route('/')
def home():
return render_template('index.html')

@app.route('/turn_on')
def turn_on():
GPIO.output(18, GPIO.HIGH) # Turn on the appliance
return render_template('index.html', message="Appliance Turned ON")

@app.route('/turn_off')
def turn_off():
    GPIO.output(18, GPIO.LOW) # Turn off the appliance
    return render_template('index.html', message="Appliance Turned OFF")

if name == ' main ':
  app.run(host='0.0.0.0', port=5000, debug=True)
Conclusion
This Raspberry Pi IoT project provides a foundational understanding of IoT and how Raspberry Pi can be used to create a smart home setup.
Project 3: Smart Surveillance Camera Using Raspberry Pi

Introduction:
Secure your space with the Smart Surveillance Camera Raspberry Pi project. This Raspberry Pi based system streams video and detects motion, notifying you instantly.
Concept and Purpose:
The project helps you to build your own security system with Raspberry Pi, which focuses on real-time video streaming and motion detection, offering an affordable and customizable surveillance solution. Components and Tools Needed:
- Raspberry Pi
- USB Camera
- Python with OpenCV
- (Optional) PIR motion sensor
Connections:
Connect a USB camera to your Raspberry Pi. Optionally, integrate motion sensors for advanced functionality.
Code:
import cv2
import RPi.GPIO as GPIO
import time

# Set up GPIO
GPIO.setmode(GPIO.BCM)
PIR_PIN = 17 # Set the GPIO pin for motion sensor
GPIO.setup(PIR_PIN, GPIO.IN)

# Initialize camera
camera = cv2.VideoCapture(0) # Use the first available camera

while True:
    if GPIO.input(PIR_PIN): # If motion is detected
        print("Motion Detected!")

        # Start video capture
        ret, frame = camera.read()
        if ret:
            # Display the captured frame
            cv2.imshow("Surveillance Feed", frame)

        # Wait for 3 seconds before taking another image
        time.sleep(3)
    else:
        print("No motion detected.")
        time.sleep(1) # Check every second for motion

    # Break loop when 'q' is pressed
    if cv2.waitKey(1) & 0xFF == ord('q'):
        break

camera.release()
cv2.destroyAllWindows()
GPIO.cleanup()
Conclusion
This Raspberry Pi 4 project is a cost-effective way to enhance security at home or in the workplace. It is easy to set up and extend with additional features like alerts.
Project 4: DIY Traffic Light Project

Introduction:
Learn how traffic lights work by building your own system using Raspberry Pi. This project is perfect for understanding GPIO control. This is the best Raspberry Pi project for beginners
Concept and Purpose:
The project uses LEDs to simulate traffic lights, teaching the basics of GPIO programming and timing control.
Components and Tools Needed:
- Raspberry Pi
- LEDs (Red, Yellow, Green)
- Resistors (220 ohms)
- Breadboard and jumper wires
Connections:
- Connect LEDs to GPIO pins 18, 23, and 24 using resistors.
- Power the circuit with the Raspberry Pi.
Code:
import RPi.GPIO as GPIO
import time

# Set up GPIO
GPIO.setmode(GPIO.BCM)

# GPIO pins for LEDs
red_pin = 18
yellow_pin = 23
green_pin = 24

# Set up LEDs as output
GPIO.setup(red_pin, GPIO.OUT)
GPIO.setup(yellow_pin, GPIO.OUT)
GPIO.setup(green_pin, GPIO.OUT)

def traffic_light_sequence():
    while True:
	GPIO.output(red_pin, GPIO.HIGH) # Turn Red on
	time.sleep(3) # Wait for 3 seconds

	GPIO.output(red_pin, GPIO.LOW) # Turn Red off
	GPIO.output(yellow_pin, GPIO.HIGH) # Turn Yellow on
	time.sleep(1) # Wait for 1 second

	GPIO.output(yellow_pin, GPIO.LOW) # Turn Yellow off
	GPIO.output(green_pin, GPIO.HIGH) # Turn Green on
	time.sleep(3) # Wait for 3 seconds

	GPIO.output(green_pin, GPIO.LOW) # Turn Green off
	GPIO.output(yellow_pin, GPIO.HIGH) # Turn Yellow on
	time.sleep(1) # Wait for 1 second

	GPIO.output(yellow_pin, GPIO.LOW) # Turn Yellow off

try:
    traffic_light_sequence()
except KeyboardInterrupt:
    pass
Conclusion
This beginner-friendly Raspberry Pi project is an excellent introduction to electronics and programming with Raspberry Pi.
Project 5: Air Quality Monitoring using Raspberry Pi

Introduction:
Stay informed about the air you breathe with the Air Quality Monitoring
Project. Use sensors and a Raspberry Pi to measure and display air quality in real time.
Concept and Purpose:
The project measures temperature, humidity, and air quality, offering insights into environmental conditions for health and safety purposes.
Components and Tools Needed:
- Raspberry Pi
- DHT11 sensor
- Resistors (10k ohms)
- Jumper wires
Connections:
- Connect a DHT11 sensor to GPIO pin 4.
- Use a 10k resistor between the data pin and VCC.
Code:
import Adafruit_DHT
import time

# Set up the DHT11 sensor
DHT_SENSOR = Adafruit_DHT.DHT11
DHT_PIN = 4 # GPIO pin where the sensor is connected

# Read the temperature and humidity from the DHT11 sensor
def read_air_quality():
    humidity, temperature = Adafruit_DHT.read(DHT_SENSOR, DHT_PIN)
    if humidity is not None and temperature is not None:
	print(f'Temperature: {temperature}C Humidity: {humidity}%')
    else:
	print("Failed to retrieve data from the sensor")
while True:
    read_air_quality() # Read and display air quality data
    time.sleep(2) # Update every 2 seconds
Conclusion
This project is a great way to monitor and understand your environment. It is easy to implement and has practical applications.
Conclusion
These latest cool Raspberry Pi projects for 2025 are just the beginning of what you can create! Whether you're exploring AI, IoT, or home automation, each project helps you develop hands-on skills and bring ideas to life. So, grab your Raspberry Pi, experiment, and innovate—because the future of tech is in your hands!
Excerpt
Frequently Asked Questions
1. What is Raspberry Pi?
Raspberry Pi is a small, affordable computer that can be used for programming, electronics projects, and various DIY tech innovations. It’s widely used for learning, prototyping, and even real-world applications in AI, IoT, and robotics.
2. What projects can I do with Raspberry Pi?
You can build a variety of projects, including home automation systems, AI-powered applications, smart surveillance cameras, weather stations, gaming consoles, and more. The possibilities are endless!
3. Who is the authorized seller of Raspberry Pi in India?
Robocraze is an authorized seller of Raspberry Pi in India. Robocraze offer genuine Raspberry Pi boards, kits, accessories, and components at competitive prices. Buying from an authorized seller ensures product authenticity, warranty, and proper customer support. You can purchase Raspberry Pi products from Robocraze's website with fast and free delivery option.
4. Do I need prior coding experience to try these Raspberry Pi projects?
Not at all! These projects are beginner-friendly, and you can follow the step-by-step guides to learn as you go. Basic Python knowledge will be helpful but not mandatory.
5. Can I use a different Raspberry Pi model for these projects?
Yes! Most projects work with various Raspberry Pi models, but performance may vary. Ensure your board supports the required libraries and hardware connections.
6. What additional components do I need for these projects?
Each project has its own set of components, like cameras, sensors, or LEDs. The blog lists all the necessary tools, so you can gather them before getting started.
7. Can I modify or expand these projects?
Absolutely! These projects are great starting points, and you can enhance them by adding new features, improving functionality, or integrating other technologies.
8. Where can I find the full code for these projects?
The blog includes sample code for each project, but you can also check GitHub, Raspberry Pi forums, or official documentation for additional resources and support.
9. What are some easy Raspberry Pi projects for beginners?
Easy Raspberry Pi projects for beginners include creating a weather station, setting up a media center with Kodi, or building a retro gaming console. Other fun ideas are personal web servers and home automation systems. These projects help you learn basic coding and hardware skills while having fun.
10. What can I build with Raspberry Pi?
With Raspberry Pi, you can build various projects, such as DIY home automation systems, smart mirrors, media centers, and retro gaming consoles. Additionally, you can create your own web server, security camera system, or even a personal cloud server. The possibilities are endless, limited only by your imagination!
11. Is Raspberry Pi good for IoT projects?
Yes, Raspberry Pi is excellent for IoT projects. Its versatile GPIO pins enable you to connect various sensors and devices. You can use it for smart home automation, environmental monitoring, or even remote-controlled systems. The extensive community support and forums make troubleshooting easier, enhancing your IoT experience.
12. Can Raspberry Pi run AI models?
Yes, Raspberry Pi can run lightweight AI models. While it’s not as powerful as dedicated hardware, it can manage basic machine learning tasks. With software like TensorFlow Lite or Edge Impulse, you can create projects like image recognition or voice assistants effectively. It’s a great way to experiment with AI on a budget.
13. What coding language is used for Raspberry Pi?
Raspberry Pi supports multiple programming languages, including Python, Java, and C++. Python is particularly popular due to its simplicity and the vast number of libraries available, making it ideal for beginners. Depending on your project, you can choose the language that best suits your needs and expertise.
14. How to power Raspberry Pi for projects?
To power your Raspberry Pi, use a Micro USB or USB-C power supply that provides at least 5V and 2.5A (3A or 5A for newer models). Some projects may require external power supplies, especially when using additional peripherals. Always ensure your power source is reliable to maintain stable operation during your projects.
15. Are Raspberry Pi projects beginner-friendly?
Yes, many Raspberry Pi projects are beginner-friendly. Numerous online tutorials and resources cater to newcomers, guiding you through each step. Projects like setting up a media center or basic home automation can be tackled even without extensive technical knowledge. It's a great way to dive into electronics and programming!


