Connecting a Camera Module to Raspberry Pi
Summary
Explore the world of Raspberry Pi camera modules in our latest blog! From sourcing components to configuring compatibility firmware, we guide you through each step. Learn the art of fastening the camera module, ensuring a secure setup. Dive into verification and calibration processes for optimal performance. Unleash the full potential of your camera with our expert insights. Whether you're a beginner or a seasoned Pi enthusiast, this blog is your gateway to capturing breathtaking moments. Don't miss out on transforming your Raspberry Pi into a powerful imaging tool! Read on and revolutionize your DIY projects today.
Introduction
The Raspberry Pi, that diminutive green circuit board no larger than a credit card, has precipitated a computing revolution. By condensing functionality of a traditional desktop PC into a tiny form factor board, the Raspberry Pi foundations enabled a wave of innovation in IT, IoT, machine vision, and multifarious spheres. This accessible single-board computer sports modern hardware capabilities like quad-core processors, connectivity interfaces such as WiFi, Bluetooth, and USB ports, combined with generalized input-output (GPIO) pins that engender seamless integration with external sensors, robotics, and more. The Raspberry Pi runs various Linux distributions that cement its versatility with software packages for productivity, media centers, coding and electronics projects galore.
One particularly sought-after accessory for the Raspberry Pi is the dedicated camera module, which bolts onto the main computer board and furnishes high definition video recording capabilities. For machine vision projects, home security solutions, wildlife camera traps, or other photography requirements, the aptly named Pi Camera module is an economical choice. The sensor supports up to 12 megapixels resolution for vibrant imaging. Connecting the module does require some configuration tweaks and installing additional software packages. This guide will elucidate the process for harmonizing a camera with one’s Raspberry Pi.
Check Out our Wide Range of Raspberry Pi Kits.
Procuring Components and Pre-Requisites

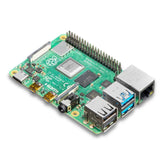
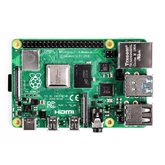
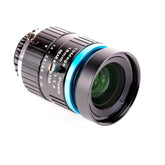
To commence with affixing and synchronizing a camera module, one must amass the requisite components and meet fundamental preconditions. First is obviously access to a Raspberry Pi single board computer itself - for the Pi Camera we recommend one of the more modern iterations like the Pi 4 Model B or Pi 400. The latest Pi HQ model flaunts a 12.3MP sensor with backside illumination technology optimized for superior low light capture. You could also still opt for an 8MP Raspberry Pi camera for adequate performance at lower cost. Also confirm that your chosen module is indeed interoperable with your Pi board through checking vendor documentation before purchase.
Additionally you will need a microSD card loaded with a compatible Linux based operating system. Most users select the official Raspberry Pi OS distro, formerly known as Raspbian, as it includes device drivers and optimizations specifically for Raspberry Pi hardware. An active internet connection is also ideal, whether through Ethernet or WiFi, for simplistically fetching additional packages to bolster the camera’s SDK later on. With the fundamental equipment secured, you can now prep the Pi for attaching and integrating the camera module component.
Check out: Official Raspberry Pi AI Camera – Advanced Imaging with IMX500!
Configuration and Compatibility Firmware
As the Raspberry Pi ecosystem supports such a motley cornucopia of third party peripherals, accessories and “HATs”, the default software image does not activate every potential hardware combination automatically. Thus one must first enable the Camera Serial Interface, or CSI, to sanction optical attachments to interface with the Pi’s graphics pipeline and provide access to the hardware accelerated video encoding, decoding, image processing and general capture capabilities.
Navigate to the global configuration menu from Preferences, then forthwith traverse to the Interfaces tab. Here toggle the “Camera” option to enabled, then click OK to commit this system setting change. On next reboot, the Pi will recognize the CSI port and ensconced camera module. For reinforcements, install additional software libraries like Python Picamera and OpenCv through the command line, either wget downloading precompiled binaries or using PIP / APT package managers. Picamera enables intuitive control of camera parameters, while OpenCv bolsters computer vision capabilities.
Fastening the Camera Module
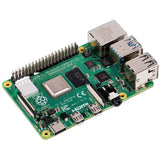
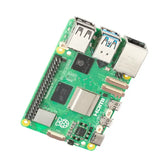
With configuration and OS customization deployed, physically connecting the camera module to the Raspberry Pi board is straightforward. Unlike peripherals affixed through the USB ports, the Raspberry Pi provisioned a special CSI connector exclusively for interfacing camera modules to optimize bandwidth allocation, prioritize visualization pipelines and reduce CPU overhead. This truncated connector is situated between the Ethernet and HDMI ports, distinguishable by its paired copper plates devoid of any cables or pins.
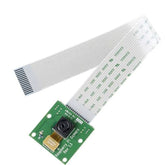
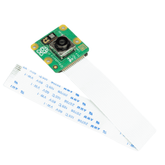
To properly conjoin the components, gently clasp the pale blue plastic ribbon cable extruding from the camera module and orient it such that the metal pads syncs with those within the CSI receptacle. While carefully aligning both ends such that all pins correlate accurately, gently insert the ribbon cable while using thumbs to provide counter-pressure on the camera module edge. Continue gradually pressing the cable into the socket until it seats securely, the locks fastening with a characteristic ‘click’ audibly indicating the port has closed. The camera is now vaulted to the Raspberry Pi main board and prepared for practical utilization.
Verification and Calibration

With the connection finally established either by the provided friction lock or some supplementary adhesion if required, verify that the system recognizes the newly affixed module through some terse diagnostic tests. To prompt the Pi to probe and confirm the camera’s availability, enter “vcgencmd get_camera” in the terminal prompt, which should return ‘supported=1 detected=1’ if prospering. One can also dispatch exploratory captures with “raspistill -o test.jpg” to garner test imagery verifying end-to-end operation.
If the module ribbon cable was pressed slightly askew during insertion, or the parent Raspberry Pi board itself is alignment, subtle artifacts may arise - slightly oblique angle, blurred edges, color channels offset generating rainbow effects, etc. Thus the Raspberry pi camera module may require minor positional calibration and mechanical adjustment after initial trials to refine image quality. Tweaking settings in Picamera configuration file can also compensate for subtle cable defects or texture abnormalities they induce. Overall though connecting the module should impart visible functionally promptly.
Unleashing the Camera’s Potential
With a fully operational camera module now accessible to the Raspberry Pi system, one can commence development of computer vision projects, surveillance systems, time lapses nature photography expeditions and manifold more imaging use cases. The sensor supports resolutions up to 4080x3040 enabling vibrant 12+ megapixel photos and 4K video recording at reasonable 30fps rates. One can configure parameters like ISO levels, exposure values, contrast adjustment, shutter speed, video encoding and resolution through intuitive Picamera Python package controls. Automating complex time lapses or triggering the camera module remotely is also simplified via GPIO pins signaling events detections to snap photos automatically.
Applications for the Raspberry Pi Camera span from home automation tools like scanning QR codes or detecting hand gestures, to environmental monitoring solutions that identify endangered species, vehicles or persons. The RGB color sensing capabilities combined with machine learning image classification models through OpenCV empowers the Pi camera as part of smart embedded vision platforms. Engineers even utilize stereoscopic and panoramic stitching of multiple Pi camera feeds to architect 3D depth sensing capabilities at low cost. Community forums proffer suggestions and code samples to elevate the abilities of this versatile camera even further.
Conclusion
In conclusion, adequately outfitting and connecting a Raspberry Pi camera module bestows multimedia capture superpowers to the diminutive Pi board. The dedicated CSI port accelerates storage, processing and analysis of imaging data for computer vision exploits. While mostly plug-and-play, ensuring ideal configuration, mechanic alignment and additional libraries like Picamera unlock the immense potential of this accessory. With resolution up to 12 megapixels and support for 4k video recording, one can implement security monitoring systems, construct wildlife camera traps, develop product quality assurance mechanisms for factories through surface defect identification and much more with robust image classifiers. The Raspberry Pi camera emphatically bolsters possibilities and catalyzes innovating implementations far beyond its miniscule price tag. We welcome you to explore more Pi camera resources and project inspirations on our website.


