How to Install RetroPie on Raspberry Pi 5
Summary
Building your own retro gaming console has never been more exciting than it is today with the Raspberry Pi 5. In this comprehensive walkthrough, I'll take you through every step of transforming your Pi 5 into the ultimate gaming machine using RetroPie.
Whether you're looking to relive your childhood gaming memories, create a family entertainment center, or simply dive into the world of retro gaming emulation, this guide will walk you through the entire process from start to finish.
The Raspberry Pi 5's enhanced processing power makes it an ideal platform for RetroPie, delivering smooth gameplay across multiple gaming systems that previous generations could only dream of running effectively.
By the end of this guide, you'll have a fully functional retro gaming system capable of emulating everything from classic arcade games to more demanding console titles.

What is RetroPie?
After working with various retro gaming solutions over the years, I keep coming back to RetroPie for one simple reason: it transforms your Raspberry Pi into a comprehensive gaming machine that rivals commercial retro consoles.
RetroPie stands as one of the most versatile and powerful retro gaming platforms available today, built on top of several open-source projects including EmulationStation, RetroArch, and various standalone emulators.
What initially drew me to RetroPie was its incredible versatility - this remarkable platform provides users with access to dozens of gaming systems, from classic consoles like the NES and SNES to arcade machines, handheld systems, and even some newer consoles like the PlayStation Portable.
Originally developed as a collection of scripts and emulators, RetroPie has evolved into a comprehensive gaming ecosystem that supports multiple controller types, save states, cheats, and even online multiplayer functionality.
For retro gaming enthusiasts, RetroPie offers an unmatched combination of authenticity and modern convenience.
The platform includes features like automatic game scraping for box art and metadata, customizable themes, and advanced video filtering options that can make classic games look better than ever before on modern displays.
Things You Need Before Installing RetroPie
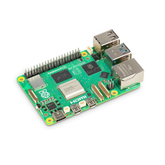
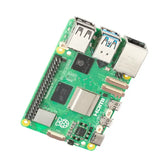
There are certain components that are absolutely essential for a successful Raspberry Pi 5 RetroPie setup. Let me share the exact hardware requirements that will give you the most reliable results, along with some hard-earned wisdom about what works and what doesn't.
Essential Hardware Components:
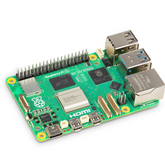
- Raspberry Pi 5 (4GB or 8GB RAM recommended for optimal performance)
- MicroSD Card (minimum 32GB, Class 10 or better - 64GB+ recommended for extensive game libraries)
- Official Raspberry Pi 5 USB-C power supply (27W minimum for stable operation)
- Micro HDMI to HDMI cable for video output
- USB keyboard and mouse for initial setup and configuration
- Game controller (Xbox, PlayStation, or compatible USB controller)
Highly Recommended Additions:
- Active cooling solution (fan or heatsink - the Pi 5 runs significantly hotter than previous models)
- Quality case with proper ventilation
- External USB storage for ROM collections and save files
- Ethernet cable for stable internet connection during setup
After burning through several cheaper power supplies in previous projects, I cannot stress enough how crucial the official power adapter is for this project.
The Pi 5's increased power requirements mean that inadequate power will cause frustrating crashes during intensive emulation sessions, particularly with more demanding systems like PlayStation or N64 games.
The active cooling solution isn't optional if you plan to run demanding emulators - I learned this lesson during extended gaming sessions that ended with thermal throttling bringing frame rates to a crawl.
How to Install RetroPie on Raspberry Pi 5
Setting up RetroPie on the Raspberry Pi 5 requires a manual installation approach since there's currently no pre-built RetroPie image specifically designed for the Pi 5.
This process initially caught me off guard, but I've since mastered the technique and can guide you through every step to avoid the common pitfalls that can derail your installation.
Step 1: Install Raspberry Pi OS Foundation
The first step requires us to install a fresh Raspberry Pi OS as the foundation for our RetroPie build.
- Download the official Raspberry Pi Imager from raspberrypi.com and install it on your computer.

- Insert your microSD card and launch the Imager tool.
- From there, first Click on “Choose Device”

- From there, choose Raspberry 5 (if that’s the device that you’re using)

- Next, click on “Choose Storage”

- Then select the microSD card that you’ve inserted
- Finally, click the “Choose OS”

- Choose "Raspberry Pi OS (64-bit)" from the operating system menu. I specifically recommend the 64-bit version for optimal performance with the Pi 5's architecture.

(NOTE: Before writing the image, click the gear icon to configure advanced options. Enable SSH for remote access, set up your Wi-Fi credentials, configure your username and password, and establish your locale settings. This preparation step saves considerable setup time during the first boot.)
Finally, remove the SD card from your laptop and put it into the Raspberry Pi 5, and we’re ready for the next step.
Step 2: Initial System Preparation
After flashing and inserting the SD card into your Pi 5, connect your peripherals and power on the device. The first boot will complete using the credentials you configured. Once logged in, the critical first step is updating your system packages:
sudo apt update && sudo apt upgrade -y
This update process is absolutely essential and prevents compatibility issues during RetroPie installation. Based on the video demonstration, this step can take some time, so it's perfect for a coffee break while the system updates.
Step 3: Install Required Dependencies
Next, ensure that Git is installed on your system, as we'll need it to download the RetroPie installation files:
sudo apt install git lsb-release
Git should already be installed on most Raspberry Pi OS installations, but this command ensures we have everything needed for the next steps.
Step 4: Download and Install RetroPie
Now comes the core installation process. Navigate to your home directory and clone the official RetroPie setup repository:
cd
git clone --depth=1 https://github.com/RetroPie/RetroPie-Setup.git
cd RetroPie-Setup
chmod +x retropie_setup.sh
These commands download the RetroPie setup scripts and make them executable. The --depth=1 flag ensures we only download the latest version without the entire Git history, saving time and storage space.
Step 5: Run the RetroPie Setup Script
Launch the RetroPie setup script with administrator privileges:
sudo ./retropie_setup.sh
The setup script will present you with a menu interface. If you're installing the 64-bit version as recommended, you might see a message about unofficial support - select "OK" to proceed. From the main menu, select "Basic Install" to install all core RetroPie components.
This installation process typically takes 30-60 minutes depending on your internet connection speed and SD card performance. During my testing, I found this is another perfect opportunity for an extended break while the system handles the heavy lifting.
Step 6: Configure System Settings
Once the basic installation completes, you'll return to the setup script menu. Navigate to "Configuration and Tools" and select "Autostart" to configure EmulationStation to launch automatically when your Pi boots. Choose the first option to enable this feature.
While still in the Configuration menu, I recommend enabling the "Bash welcome tweak" which displays additional system information during login. This feature proves helpful for troubleshooting and system monitoring.
Step 7: Final System Configuration
Exit the setup script and perform a system reboot to complete the installation:
sudo reboot
Your Raspberry Pi 5 should now boot directly into the EmulationStation interface, indicating successful RetroPie installation. If you encounter any issues during boot, the SSH access you configured earlier allows for remote troubleshooting and configuration adjustments.
Adding and Managing Game ROMs in RetroPie
Proper ROM management is crucial for maintaining an organized and enjoyable gaming experience.
The quality and organization of your game library directly determine how much you'll actually use your RetroPie system.
Setting Up ROM Directory Structure
RetroPie automatically creates the necessary directory structure during installation, but understanding this layout helps with organization.
ROM files are stored in /home/pi/RetroPie/roms/ with separate subdirectories for each gaming system.
Transferring ROMs via Network
My preferred method for adding ROMs is through SCP (Secure Copy Protocol) over the network. First, find your Pi's IP address through the RetroPie menu under "Show IP" or by running hostname -I in the terminal.
From your computer, use this command structure to transfer ROM files:
scp -r /path/to/your/roms/* pi@YOUR_PI_IP:~/RetroPie/roms/
This method allows you to transfer entire ROM collections efficiently while maintaining proper directory structure.
Alternative Transfer Methods
For users preferring USB transfer, RetroPie supports USB ROM loading. Insert a USB drive formatted as FAT32 or NTFS with a folder structure matching the RetroPie ROM directories. The system will automatically detect and copy files when the drive is inserted.
Game Metadata and Artwork
Once your ROMs are in place, use the built-in scraper to download game metadata, box art, and screenshots.
Access the scraper through the main RetroPie menu, select your preferred source (ScreenScraper or TheGamesDB), and let the system automatically enhance your game library with visual elements and information.
This process can take substantial time for large collections but dramatically improves the visual appeal and navigation experience of your game library.
Optimizing Performance on Raspberry Pi 5 RetroPie Setup
The Raspberry Pi 5's enhanced capabilities open up new possibilities for retro gaming, but proper optimization ensures you get the maximum performance from your system.
After extensive testing with various emulators and configurations, I've identified the key areas that make the biggest difference in gaming performance.
GPU Memory Configuration
Unlike previous Raspberry Pi models, the Pi 5 uses unified memory architecture, but you can still optimize GPU memory allocation. Edit /boot/firmware/config.txt and add:
gpu_mem=128
This allocation provides sufficient GPU memory for EmulationStation and most emulators without unnecessarily restricting system RAM.
Overclocking Considerations
The Pi 5's default clock speeds are generally sufficient for most retro gaming applications, but specific demanding systems may benefit from careful overclocking. Add these lines to your config.txt for moderate performance gains:
over_voltage=4
arm_freq=2600
Always ensure adequate cooling when overclocking, as thermal throttling will negate any performance benefits.
Emulator-Specific Optimizations
For demanding systems like N64, configure emulator cores through RetroArch. Access the RetroArch menu during gameplay (typically Hotkey + X), navigate to Quick Menu > Core Options, and adjust settings like:
- Video threaded rendering: Enable for better performance
- Frame delay: Reduce input lag on faster systems
- Rewind: Disable for performance-critical games
Different emulator cores perform better with different games - lr-mupen64plus-next generally provides better compatibility, while lr-parallel-n64 offers superior performance when configured correctly.
System-Level Performance Tuning
You can disable unnecessary services to free up system resources:
sudo systemctl disable bluetooth
sudo systemctl disable wifi-powersave
For ethernet-connected systems, disabling WiFi and Bluetooth can provide minor performance improvements and reduce potential interference.
Storage Performance
Use high-quality microSD cards (Class 10 or better) and consider moving frequently accessed ROMs to USB 3.0 storage for faster loading times.
The Pi 5's USB 3.0 ports provide significantly better throughput than previous generations, making external storage more viable for large collections.
Conclusion
Looking back on this comprehensive journey through installing RetroPie on the Raspberry Pi 5, the transformation from a simple single-board computer to a powerful retro gaming machine continues to amaze me.
The Pi 5's enhanced performance capabilities have opened up gaming possibilities that were previously impossible on earlier Raspberry Pi models, making systems like Dreamcast, PSP, and even some PlayStation 2 games playable with proper configuration.
The manual installation process, while requiring more steps than the traditional pre-built image approach, actually provides better understanding of the system's components and offers more flexibility for customization.
This knowledge proves invaluable when troubleshooting issues or implementing advanced configurations that enhance the gaming experience beyond basic emulation.
The skills gained from this RetroPie installation extend far beyond retro gaming, providing valuable experience with Linux system administration, network configuration, and embedded computing concepts that apply to numerous other Raspberry Pi projects and computing scenarios.


