How to Assemble the ACEBOTT QE028 SharkBot Smart Car Kit
Summary
Building your first smart car kit can feel like opening a door to endless possibilities in robotics and programming.
The ACEBOTT QE028 SharkBot Smart Car Kit offers an excellent entry point for beginners and enthusiasts alike who want to explore the world of intelligent vehicles.
This comprehensive guide will walk you through every step of assembling your SharkBot, ensuring you have a smooth and rewarding building experience.

Meet the ACEBOTT QE028 SharkBot Smart Car Kit
The ACEBOTT QE028 SharkBot Smart Car Kit is designed as an educational robotics platform that combines hands-on assembly with practical programming.
Built around a robust controller board, this kit serves as an ideal introduction to intelligent transportation systems and autonomous vehicle concepts.
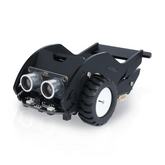
The SharkBot features a sleek, compact design that houses various sensors and electronic components, making it perfect for learning about robot navigation, obstacle avoidance, and basic automation principles.
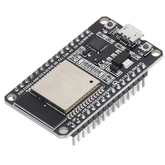
What controller board does the SharkBot use? The kit is powered by an ESP32-based controller board, which means you get the benefit of a widely supported platform with extensive documentation and community resources.
This compatibility opens up countless possibilities for customization and learning, as you can leverage the vast Arduino ecosystem for your projects.
Similar to the ACEBOTT QE027 ESP32 Transportation STEM Kit, the SharkBot utilizes ESP32 technology to deliver powerful performance and connectivity features.
The SharkBot's modular design encourages experimentation. Whether you're a student diving into STEM education, a hobbyist exploring robotics, or a teacher looking for classroom-ready projects, this kit provides a solid foundation.
The car's chassis accommodates multiple sensors, including line-following sensors and obstacle detection modules, while status indicators provide visual feedback during operation.
What's Inside the SharkBot Smart Car Kit Box
When you open your ACEBOTT QE028 SharkBot Smart Car Kit, you'll find a carefully organized collection of components designed to make assembly straightforward.
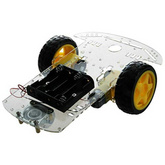
The package includes the main chassis platform, which serves as the foundation for your smart car. This sturdy base is pre-drilled with mounting holes that align perfectly with other components.
The kit contains four DC motors with matching wheels, providing your SharkBot with reliable movement capabilities. Each motor comes with its own mounting bracket and screws, ensuring secure attachment to the chassis.
You'll also find a motor driver board that manages power distribution to the motors, allowing for precise speed and direction control.
Electronic components form the brain of your SharkBot. The ESP32-based controller board sits at the heart of the system, coordinating all sensors and outputs.
The kit also includes infrared sensors for line tracking and obstacle detection, ultrasonic sensors for distance measurement, and all necessary connecting wires and cables.
Can beginners assemble the SharkBot car kit without prior experience? Absolutely. The kit includes detailed documentation and all components are clearly labeled.
The snap-fit and screw-based assembly requires only basic tools like a small Phillips screwdriver, making it accessible even if you've never built a robot before.
Additional items in the box include the battery holder (batteries typically sold separately), mounting standoffs, screws of various sizes, a USB cable for programming, and an instruction manual with diagrams.
Everything you need to build and program your SharkBot comes neatly packaged, eliminating the frustration of hunting for compatible parts.
Easy Steps to Assemble the ACEBOTT QE028 SharkBot Smart Car Kit
Step 1: Connect the Motor Lines

The first step in bringing your SharkBot to life involves establishing the critical connection between the motors and the controller board.
This wiring ensures that your robot can receive movement commands and execute them properly, much like how you would assemble ACEBOTT QE027 projects with their intelligent transportation modules.
- Locate the assembled SharkBot base unit, which should already have the motors and basic electronics mounted on the chassis
- Identify the two Dupont connector lines (ribbon cables) included in your kit—these are pre-terminated cables designed for quick, secure connections
- Find the motor driver connection points on the controller board, typically marked with labels like M1 and M2 or Motor A and Motor B
- Connect the first Dupont line to the left motor terminal, ensuring the connection is firm and fully seated
- Connect the second Dupont line to the right motor terminal with the same attention to secure placement
- Route the cables neatly along the chassis edges to prevent them from interfering with the wheels or other moving parts
- Double-check that all connections are properly aligned with the pin headers—misaligned connections can prevent your SharkBot from functioning correctly
- Verify that the polarity matches the instruction manual to ensure proper motor rotation direction
Status indicators on the controller board may illuminate once connections are made, signaling successful power distribution to the motor circuits.
Step 2: Install the Wheels

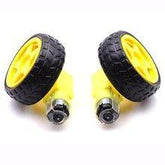
With the motor connections established, it's time to add the wheels that will give your SharkBot mobility. The wheel installation process is straightforward but requires attention to ensure smooth operation.
- Take the two wheels included in your kit—these are specifically designed to fit the motor shafts
- Locate the motor shafts extending from each side of the chassis; you should see the copper columns (M3*55) already installed as spacers
- Align the first wheel with the motor shaft on one side, making sure the wheel hub's internal groove matches the shaft's D-shape or flat edge
- Press the wheel firmly onto the shaft until you hear or feel a click, indicating it's fully seated
- Repeat the process for the second wheel on the opposite side
- Once both wheels are installed, give each one a gentle spin to verify they rotate freely without wobbling or rubbing against the chassis
- Check that both wheels are at the same depth on their respective shafts to ensure balanced movement
- Ensure no wires are caught between the wheels and chassis that could impede rotation
The wheels should spin smoothly with minimal resistance, allowing your SharkBot to move efficiently across various surfaces.
Step 3: Install the Battery

Power is essential for autonomous operation, and the battery installation step ensures your SharkBot can run independently.
The kit uses standard AAA batteries for convenient replacement and accessibility, similar to the battery systems found in the ACEBOTT Transportation STEM Kit educational series.
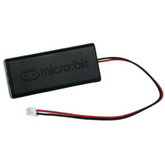
- Locate the battery holder compartment on the assembled chassis—this is typically positioned at the center or rear for optimal weight distribution
- Prepare two AAA batteries (the kit requires AAA batteries, though they are not included in the package )
- Check the polarity markings inside the battery holder, usually indicated by "+" and "-" symbols or spring contacts
- Insert the first AAA battery into its designated slot, ensuring the positive end aligns with the positive terminal
- Insert the second AAA battery, again matching the polarity markings carefully
- Verify that both batteries are seated securely and making good contact with the terminals
- If your kit includes a power switch, ensure it's in the "OFF" position before proceeding to prevent accidental activation
- Double-check the voltage requirements match your batteries to avoid damaging the electronics
The SharkBot features real-time battery level display functionality, so you can monitor power levels and prevent unexpected shutdowns during operation.
Step 4: Assemble the Car Body

This step adds the protective and aesthetic body panels to your SharkBot, transforming it from exposed electronics into a polished robot car. The acrylic body parts provide structural integrity while showcasing the internal components.
- Gather the five acrylic body parts included in your kit. These are laser-cut panels designed to fit together precisely
- Locate the M38 round head screws (four pieces) and the M355 copper columns (two pieces) along with your Phillips screwdriver
- Remove the protective adhesive film from both sides of each acrylic panel to reveal the clear or colored finish
- Position the bottom acrylic panel over the assembled chassis, aligning the pre-drilled holes with the mounting points
- Insert the M3*55 copper columns through the designated holes to create standoffs between chassis layers
- Place the side body panels on each side of the chassis, ensuring they slot into their designated positions
- Position the top acrylic panels, which may include cutouts for sensors or the ultrasonic module
- Secure all panels using the M3*8 round head screws, tightening them evenly with the screwdriver to prevent stress on the acrylic
- Work systematically around the car body, ensuring each screw is snug but not over-tightened (acrylic can crack under excessive force)
- Verify that all panels are flush and properly aligned, with no gaps or misalignments
- Check that the assembled structure is stable and all mounting points are secure
The assembled body protects the electronic components while providing mounting points for future expansions through the I2C and servo ports.
Step 5: Install the Ultrasonic Module

The final assembly step involves mounting the ultrasonic sensor, which gives your SharkBot the ability to detect obstacles and navigate autonomously.
This sensor is crucial for implementing obstacle avoidance and distance measurement functions, similar to the intelligent transportation features found when you assemble ACEBOTT QE027 educational kits
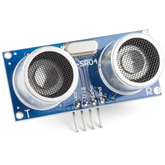
- Locate the ultrasonic module in your kit. It's the component with two circular "eyes" that act as the transmitter and receiver
- Identify the designated mounting position at the front of the assembled SharkBot chassis, typically on the upper front panel
- The module usually comes with its own bracket or mounting slots integrated into the acrylic body panels
- Align the ultrasonic module with the mounting holes, ensuring the sensor faces forward for optimal detection range
- If your kit includes mounting screws for the sensor, insert them through the module's mounting holes and into the chassis
- Tighten the screws gently. Ultrasonic sensors contain delicate components that can be damaged by excessive force
- Connect the ultrasonic module's cable to the designated port on the controller board, usually marked as "Ultrasonic" or "HC-SR04"
- The connection typically uses a 4-pin connector with wires for VCC (power), GND (ground), TRIG (trigger), and ECHO (echo)
- Ensure the connector is oriented correctly. Reversing the polarity can damage the sensor or prevent proper operation
- Test the sensor alignment by checking that both transducers face directly forward without obstruction
With the ultrasonic module installed, your SharkBot is fully assembled and ready for programming. The 4-way line tracking and obstacle avoidance capabilities create an interactive learning platform for exploring robotics and autonomous navigation.
Conclusion
Assembling the ACEBOTT QE028 SharkBot Smart Car Kit is a journey into understanding how modern robotic systems work. From mounting motors to wiring sensors and programming intelligent behaviors, each step builds your knowledge and confidence. With your SharkBot now complete, you're ready to explore programming challenges, experiment with different sensors, and perhaps even compete in robot competitions.


