Why Micro:bit is Ideal for Beginners
Summary
Have you ever wanted to build your own game, create a digital gadget, or simply understand how the technology around you work?
The BBC micro:bit is a small, pocket-sized computer designed to help you do just that. It was created specifically for beginners, making the journey into programming and electronics fun, engaging, and easy to understand. It’s a programmable device packed with features like sensors, lights, and buttons that you can control with code.
This blog will explore why the micro:bit is the perfect starting point for anyone looking to bring their digital ideas to life.

What You Need to Start with Micro:bit
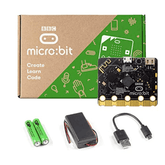
The reason the micro:bit development board is ideal for beginners is because it is very simple to start with. Here’s what you’ll need to get up and running:
1. The micro:bit Board
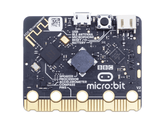
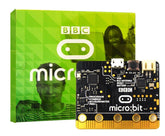
First things first: you’ll need the BBC micro:bit board, obviously! It’s a tiny, lightweight device that fits in the palm of your hand. If you don’t have one yet, they’re easy to find online or at most electronics stores.
2. A Power Source
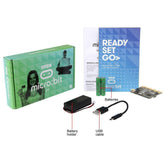
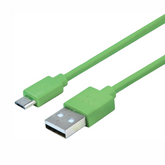
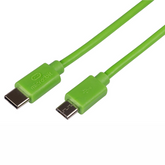
It can be powered in a couple of ways. You can use a USB cable to connect it directly to your computer, or pop in a pair of AAA batteries with a battery pack for portable projects. Either way, you’re good to go.
3. A Computer or Tablet
You’ll need a computer, a laptop, or even a tablet to write and upload your code. It works with most modern browsers, so there’s no need to install complicated software. Just head to the official micro:bit website and you’ll find everything you need right there.
4. Internet Connection
While you don’t need to be online all the time, an internet connection helps when you’re starting out, especially for accessing tutorials, downloading code editors, or joining the vibrant community.
5. Accessories (Optional)
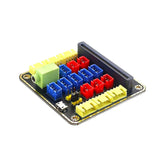
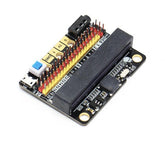
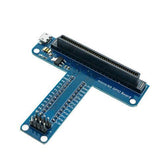
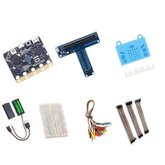
Want to take things up a notch? There are loads of micro:bit accessories available, like sensors, LEDs, and expansion kits. But don’t worry—you can do a lot with just the single board computer itself.
That’s it! No fuss, no steep learning curve. With these basics, you’re ready to start experimenting, learning, and creating. In the next section, we’ll look at how to set up your development board and write your very first program.
What is MakeCode?

One of the best things about Microsoft MakeCode for micro:bit is how easy it is to start programming it, even if you’ve never written a line of code before. The Microsoft MakeCode is the go-to starting point for your programming journey and to explore the applications of micro:bit in real-world scenarios.
MakeCode is a browser-based editor designed to make programming approachable and fun. Its colourful, drag-and-drop blocks will feel familiar if you’ve ever used Scratch or similar tools. You simply snap together blocks to create your program without worrying about typos or complicated syntax.
But MakeCode isn’t just for beginners. As you get more confident, you can switch to JavaScript or even MakeCode Python within the same editor. This means you can see how your block-based code translates into real text-based code, and even start editing it directly. It’s a smooth way to level up your skills without switching platforms.
Here’s how you can do micro:bit programming:
Block Programming:
Drag and drop colourful blocks to build your program. It’s visual, intuitive, and perfect for learning the basics.
JavaScript:
For those ready to dive a bit deeper, you can switch to JavaScript and edit your code directly. This is great for understanding how programming languages work behind the scenes.
MakeCode Python:
MakeCode also offers a Python mode, letting you write code using Python-like syntax. This is a great stepping stone before moving to full MicroPython.
No matter your experience level, MakeCode makes it easy to start simple and grow your skills at your own pace. Whether you prefer snapping blocks or typing micro:bit code, there’s a path for you to bring your ideas to life in programming.
Step-by-Step Setup for Microsoft MakeCode
Getting your micro:bit up and running with Microsoft MakeCode is a straightforward process. Here’s how you can get started, step by step:
1. Connect Your micro:bit to Your Computer
Use a micro-USB cable to connect your micro:bit to your computer. Once plugged in, it will show up as a USB drive called “MICROBIT” on your computer.
2. Open the MakeCode Editor
Launch your web browser and go to the official MakeCode editor at makecode.microbit.org. You don’t need to install anything—everything runs in your browser. If you’re on Windows 10, you can also use the MakeCode app for an even smoother experience.
3. Start a New Project
4. Build Your Program with Blocks
Drag and drop blocks from the toolbox into the coding area. For example, you can use the “show icon” block to display a heart on the micro:bit’s LED grid, or the “on button pressed” block to make something happen when you press a button on the device. Blocks snap together like puzzle pieces, making it easy to see how your program flows.
5. Test Your Code in the Simulator
Before sending your code to the micro:bit, try it out in the built-in simulator on the MakeCode website. This lets you see how your program will work without needing to upload it each time.
6. Download and Transfer to micro:bit
When you’re happy with your program, click the purple “Download” button. This will save a file (ending in. hex) to your computer. Drag and drop this file onto the MICROBIT drive, just like you would with a USB flash drive. The micro:bit coding board will automatically restart and run your new program.
7. Go Portable (Optional)
If you want to use your micro:bit away from your computer, unplug the USB cable and connect a battery pack (with two AAA batteries). Your program will keep running wherever you take it.
With these steps, you’ll have your running custom code in no time.
How to Power and Connect the Micro:bit via USB

Powering and connecting your micro:bit is a breeze, especially if you’re using a USB cable. Here’s how you can do it:
Step 1: The simplest way to power your development Board is by connecting it directly to your computer with a micro-USB cable. Plug the small end of the cable into the USB port, and the other end into a USB port on your computer. As soon as you connect, your micro:bit will turn on automatically—no need for batteries.
Step 2: When connected, it will show up on your computer as a removable drive called “MICROBIT.” This means you can easily transfer programs to it, just like copying files to a USB flash drive. On micro:bit v1, you’ll see a yellow LED light up on the back. On micro:bit v2, both a yellow and a red LED will light up, indicating power and data connection.
Step 3: When powered by USB, you don’t need to use the battery pack. The USB connection provides enough power for all basic functions, including running code, lighting up the LEDs, and using the built-in sensors.
Step 4: When you’re finished, simply unplug the USB cable from either the computer or the development board. The device will remember the last program you uploaded, so the next time you power it up, it will start running that program automatically
Comparing Microbit with Arduino

When choosing a beginner-friendly platform for learning electronics and programming, Micro:bit and Arduino are often the top contenders. Both are powerful in their own right, but they cater to different audiences and project needs.
It is designed with education in mind, making it approachable for children and absolute beginners with its built-in sensors, LEDs, and support for block-based coding.
Arduino, on the other hand, is a flexible platform favored by hobbyists and engineers for its modular hardware and deeper programming capabilities.
| Feature | Micro:bit | Arduino |
|---|---|---|
| Design | User-friendly, colourful, compact; built-in LED matrix, buttons, sensors | Modular; requires add-on shields for sensors and displays |
| Programming | Block-based (MakeCode), Python, JavaScript | C/C++ (Arduino IDE); text-based only |
| Target Audience | Children, beginners, educators | Hobbyists, advanced students, engineers |
| Ease of Use | Excellent for beginners; ready out of the box | Requires basic electronics knowledge; more setup needed |
| Built-in Features | LEDs, accelerometer, compass, buttons, Bluetooth | Depends on board; usually needs external modules |
| Community Support | Strong educational focus, lots of beginner resources | Massive global community, extensive libraries and tutorials |
| Cost | Affordable, especially for educational kits | Varies; base boards are cheap, but add-ons can increase cost |
| Project Types | Education, simple gadgets, learning to code | Hobby projects, complex electronics, prototyping |
Simple projects for Micro:bit
The best way to learn is by doing, and the micro:bit coding board is perfect for jumping straight into projects. Here are a few ideas:
Digital Dice

Program the micro:bit to show a random number from 1 to 6 on the LED screen whenever you shake it. This project is a great introduction to using the accelerometer and random number generation.
Step Counter

Using the motion sensor, you can create your own fitness tracker that counts your steps. This teaches you how to use variables to store and update data.
Rock, Paper, Scissors Game

Create a game you can play against a friend. When you shake the device, it will randomly display an icon for rock, paper, or scissors.
Flashing Heart Animation

This is often the very first project for new users. It teaches the basics of using the LED screen to create simple animations, like a beating heart.
Conclusion
The BBC micro:bit is the ideal tool for anyone beginning their journey in learning electronics. It's simple design along with its powerful features lowers the barrier to entry for coding and electronics. By providing a clear path from simple block-based programming to advanced text-based languages, it allows learners to grow at their own pace.
The hands-on, project-based approach keeps students engaged and shows them that they can be creators, not just consumers, of technology. Whether you are a student or a curious individual, this device is the ideal starting point to build your problem-solving skills and explore your creativity.


