How to Program Arduino Uno Q Board? - Easy Steps
Summary
The Arduino Uno Q board represents the latest evolution in microcontroller development for makers and electronics enthusiasts. Learning to program this board opens doors to countless IoT and robotics projects.
This guide walks you through everything you need to know to get started, from understanding what the board is to writing and uploading your first sketch. By the end, you'll have the foundational knowledge to tackle your own Arduino projects with confidence.

What Is the Arduino Uno Q Board?
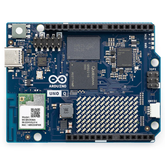
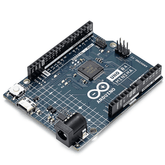
The Arduino Uno Q board is a microcontroller development board that serves as the brain for your electronics projects. It's built around the ATmega328P chip and comes equipped with digital and analog pins that allow you to interact with sensors, motors, LEDs, and countless other components.
Think of it as a tiny computer that can read inputs from the physical world and make decisions about what outputs to control.

The board measures just a few inches across but packs impressive functionality. It features 14 digital input/output pins, 6 analog input pins, a USB port for programming, and a power jack. The Arduino Uno Q setup process is straightforward, making it ideal for those just starting their electronics journey.
The real power lies in its simplicity combined with tremendous flexibility—you can build everything from a simple LED blinker to a complex home automation system.
One key advantage of the Arduino Uno Q board is its massive community support. Thousands of tutorials, libraries, and pre-written code examples exist online, meaning you rarely have to solve problems alone. The board also has a relatively low cost, making it accessible for students, hobbyists, and professionals alike.
Difference Between Microcontroller and Microprocessor
Before diving into programming, it's important to understand what makes an Arduino microcontroller different from a microprocessor. Many people use these terms interchangeably, but they serve fundamentally different purposes.
A microprocessor is the brain of your computer or smartphone. It's designed to execute complex calculations and run full operating systems like Windows or iOS.

Microprocessors have very limited built-in input/output capabilities and typically require external components to interact with the physical world. They consume significant power and generate considerable heat.
A microcontroller, on the other hand, is a complete computer on a single chip. It includes the processor, memory, and input/output pins all integrated together. Microcontrollers are designed specifically for controlling devices and reading sensors.
They consume very little power, generate minimal heat, and can operate independently without an operating system. The Arduino Uno Q runs a microcontroller, not a microprocessor.
| Feature | Microcontroller | Microprocessor |
|---|---|---|
| Complexity | Simple, task-specific | Complex, general-purpose |
| Power Consumption | Very low | High |
| Built-in I/O | Yes, extensive | Limited or none |
| Operating System | None required | Requires OS |
| Cost | Inexpensive | Expensive |
| Use Cases | Embedded systems, automation | Computing, smartphones |
This distinction explains why the Arduino Uno Q is perfect for projects where you need a dedicated device to perform specific tasks, like controlling a plant watering system or monitoring room temperature.
Arduino Uno Q vs Raspberry Pi
The Difference between Arduino Uno Q and Arduino Uno R3 comparison often extends to include other popular boards like the Raspberry Pi. While both are popular in maker communities, they serve different purposes and suit different projects.

The Arduino Uno Q is a microcontroller board optimized for real-time control and sensor reading. It excels at performing specific, repetitive tasks with minimal overhead. It has no operating system, boots instantly, and uses almost no power.
However, it lacks a display output and can't run complex software like web browsers or media players.
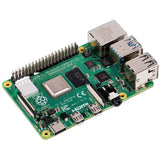
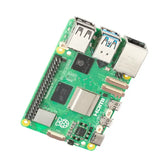
The Raspberry Pi, by contrast, is a single-board computer running a full Linux operating system. It's essentially a tiny laptop with GPIO pins attached. You can connect a monitor, keyboard, and mouse to it.
The Raspberry Pi handles complex computations and can run multiple programs simultaneously. However, this power comes at the cost of higher power consumption and longer boot times.
| Aspect | Arduino Uno | Raspberry Pi |
|---|---|---|
| Type | Microcontroller | Single-board computer |
| Operating System | None | Linux-based |
| Real-time Performance | Excellent | Fair |
| Power Consumption | Minimal (50–100mA) | Higher (500mA+) |
| Boot Time | Instant | Several seconds |
| Programming | C/C++ via Arduino IDE | Python, C++, others |
| Cost | $20–30 | $35–75 |
| Best For | Control and sensing | Computing tasks |
For a project requiring precise timing, low power consumption, or standalone operation, the Arduino Uno Q wins. For projects needing internet connectivity, media processing, or running multiple complex applications simultaneously, the Raspberry Pi is the better choice.
How to Program the Arduino Uno Q
Programming the Arduino Uno Q programming requires understanding the basic workflow: write code, compile it, upload it to the board, and test. Let's break this down into manageable steps.
Getting Started with Arduino IDE
The first step in your Step-by-step Arduino Uno Q setup guide is installing the Arduino Integrated Development Environment (IDE). Visit the official Arduino website and download the IDE for your operating system.
Installation takes just a few minutes and requires no additional configuration. The IDE is free and open-source, making it accessible to everyone.
Once installed, launch the IDE and you'll see a blank sketch with two functions already in place: setup() and loop(). The setup() function runs once when the board powers on, making it ideal for initialization tasks. The loop() function runs repeatedly, forming the main logic of your program.
Understanding Arduino Sketch Structure
An Arduino sketch follows a simple structure that makes it easy to understand:
- Variables and libraries are declared at the top
- setup() function initializes pins and serial communication
- loop() function contains the code that runs repeatedly
- Custom functions can be defined to organize your code
Here's a basic example structure:
#include

int ledPin = 13;

void setup() {
  pinMode(ledPin, OUTPUT);
  Serial.begin(9600);
}

void loop() {
  digitalWrite(ledPin, HIGH);
  delay(1000);
  digitalWrite(ledPin, LOW);
  delay(1000);
}
This simple sketch blinks an LED connected to pin 13, turning it on for one second and off for one second, continuously.
How to program Arduino Uno Q using Arduino IDE
The process of Upload code to Arduino Uno Q involves several specific steps:
Step 1: Connect Your Board
Connect your Arduino Uno Q setup to your computer using a USB cable. The board will power on automatically, and your computer should recognize it. If you're on Windows, you may need to install drivers, though modern versions of Windows handle this automatically.
Step 2: Select Your Board
In the Arduino IDE, navigate to Tools > Board and select "Arduino Uno Q" from the dropdown menu. If it doesn't appear, you may need to install the board package through the Boards Manager.
Step 3: Select the COM Port
Go to Tools > Port and select the COM port that corresponds to your connected board. On Windows, it typically appears as "COM3" or "COM4". On Mac and Linux, it shows as "/dev/ttyUSB0" or similar.
Step 4: Write Your Code
Type your sketch into the editor. The IDE provides syntax highlighting and helpful tooltips to assist you. Even if you make mistakes, the compiler will catch them and display helpful error messages.
Step 5: Verify Your Code
Click the checkmark button (or press Ctrl+R) to verify your code. The IDE compiles your sketch and checks for errors without uploading it to the board. This step catches most programming mistakes before they reach your hardware.
Step 6: Upload to the Board
Click the arrow button (or press Ctrl+U) to compile and upload your code to the board. You'll see a progress bar, and the board's built-in LED will blink rapidly during upload. Once complete, you'll see a "Done uploading" message.
Step 7: Monitor Your Results
Open the Serial Monitor (Tools > Serial Monitor) to view any debug information your sketch sends. This is invaluable for troubleshooting and understanding what your code is actually doing.
Common Programming Patterns
Most Arduino projects follow several common patterns. Understanding these makes learning new projects faster:
- Digital I/O: Reading buttons and controlling LEDs using digitalWrite() and digitalRead()
- Analog I/O: Reading sensors using analogRead() and controlling brightness with analogWrite() (PWM)
- Serial communication: Sending data to your computer or receiving commands using Serial.print() and Serial.read()
- Timing: Creating delays or measuring intervals using delay() and millis()
- Conditional logic: Making decisions based on sensor values using if-statements
- Loops: Repeating actions using for-loops and while-loops
Essential Libraries
The Arduino Uno Q programming ecosystem includes thousands of libraries that extend functionality. Some essential ones include:
- Wire.h: For I2C communication with sensors
- SPI.h: For Serial Peripheral Interface communication
- Servo.h: For controlling servo motors
- LiquidCrystal.h: For interfacing with LCD displays
Installing libraries is simple—use the Library Manager in the IDE (Sketch > Include Library > Manage Libraries) to search and install any library you need.
Conclusion
Learning to Program Arduino Uno Q opens up an exciting world of electronics and embedded systems. From understanding the difference between microcontrollers and microprocessors to mastering the Arduino IDE, you now have the foundational knowledge to start building your own projects.
The beauty of Arduino lies in its approachability combined with unlimited possibilities. Whether you're controlling home automation, building a weather station, or creating an obstacle-avoiding robot, your Arduino Uno Q board is ready to bring your ideas to life. Start small, build incrementally, and soon you'll be tackling increasingly complex projects with confidence.


