Guide to Setting Up a RadioLink Transmitter with Your RC Drone
Summary
Flying an RC drone demands a reliable connection between pilot and machine. The transmitter serves as your command center, translating stick movements into precise flight instructions.
Setting up this crucial link properly ensures responsive control, stable flight, and a safer flying experience that lets you focus on mastering aerial maneuvers rather than wrestling with technical issues.

Overview of Radiolink AT9S Pro 12CH 2.4GHz Transmitter
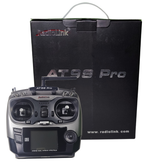
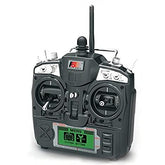
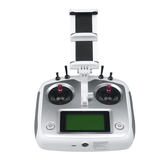
The Radiolink AT9S Pro Transmitter is a significant leap forward in accessible drone control technology. This 12-channel system operates on the 2.4GHz frequency band, offering interference-free communication with your aircraft across impressive distances.

What sets this RadioLink drone transmitter apart includes several standout features:
- Ergonomic design that fits comfortably in your hands during extended flight sessions
- Precision gimbals that respond to the subtlest stick movements
- Open-source firmware compatibility for extensive customization
- LCD screen displaying telemetry data including battery voltage and signal strength
- Support for multiple receiver protocols, making it versatile for various drone configurations
- Dual antenna system with frequency hopping technology that minimizes signal dropouts
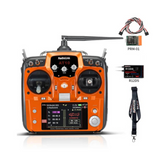
The transmitter comes bundled with the R9DS receiver, a compact module that weighs just a few grams yet packs sophisticated signal processing capabilities. This receiver supports both PWM and PPM output modes, giving you flexibility in how you connect it to your flight controller.
Whether you're building a racing quadcopter, a camera drone, or an autonomous platform, the AT9S Pro provides the foundation for precise control and reliable operation in demanding environments.
What You Need Before Starting the Setup
Before diving into the setup process, gathering the right components and tools saves time and prevents frustration. Your essential items include:
- RadioLink transmitter and receiver set (AT9S Pro with R9DS receiver)
- Fresh AA batteries for the transmitter
- RC drone with accessible flight controller featuring receiver ports
- Small screwdriver set for accessing battery compartments
- Appropriate cables and connectors (servo leads, Dupont wires, or JST connectors)
- Zip ties or double-sided tape for securing the receiver
- Fully charged LiPo battery for your drone to test after binding
- Computer or smartphone for referencing documentation
Your workspace deserves careful consideration as well. Choose a location away from other 2.4GHz devices like WiFi routers, Bluetooth speakers, or other active transmitters. Electromagnetic interference during the binding process can prevent successful pairing, leaving you frustrated and unable to proceed.
A clean, well-lit table with enough space to comfortably manipulate both transmitter and drone makes the entire process smoother and reduces the risk of dropping delicate components.
Before you start, check your flight controller's documentation to identify receiver connection points. Most modern flight controllers feature dedicated SBUS, PPM, or PWM inputs clearly labeled on the board, simplifying the physical connection process once binding is complete.
Binding RadioLink Transmitter and Receiver
The drone transmitter binding process establishes a unique communication link between your controller and aircraft. This pairing ensures your transmitter controls only your drone and not someone else's flying nearby. The binding procedure follows these essential steps:
Start by installing batteries in your transmitter and powering it on. Navigate through the menu system to locate the receiver binding function—typically found under system settings or model setup. The AT9S Pro displays clear on-screen instructions during this process, making it relatively straightforward even for beginners.

On the R9DS receiver, locate the small bind button, usually a recessed switch requiring a pin or paperclip to press. With the transmitter in binding mode, power up your drone while simultaneously holding down the receiver's bind button.
The receiver LED will begin flashing rapidly, indicating it's searching for a transmitter signal. When binding succeeds, the LED transitions to a solid light or slow blink pattern.
If initial binding fails, troubleshoot systematically:
- Power cycle both devices completely before retrying
- Ensure no other 2.4GHz devices are active nearby
- Verify the transmitter is truly in binding mode by checking the LCD display
- Check that the bind button is pressed firmly and continuously
- Try binding again from the transmitter menu, ensuring the correct protocol is selected
After successful binding, verify the connection by moving the transmitter sticks and watching for corresponding servo movements if you have any connected. The transmitter display should show telemetry data flowing from the receiver, confirming the wireless link is active.
This pair RadioLink receiver and transmitter step forms the foundation of your entire control system—take time to ensure it's done correctly before proceeding to calibration.
Calibrating Controls and Sticks for Accurate Response
Proper RadioLink transmitter calibration ensures your stick movements translate accurately into drone responses without delays or dead zones. Access the calibration menu on your AT9S Pro by navigating to the system settings.
The transmitter will guide you through centering each stick, then moving them to their full extents in all directions.

During the drone calibration process, follow this procedure for optimal results:
- Move each stick slowly and deliberately to its maximum positions—up, down, left, right, and diagonal corners
- Record your throttle stick reaching true zero at the bottom position to prevent unexpected motor spin-up during arming
- Note the numerical readouts displayed on the transmitter screen as reference values
- Verify all sticks return to center after moving them to extremes
- Test pitch, roll, and yaw axes separately for smooth, proportional response
This process maps the physical range of your gimbals to the digital output values sent to the receiver. Some transmitters allow sub-trim adjustments to fine-tune stick centering if your gimbals don't naturally rest at perfect center.
The AT9S Pro provides digital readouts showing precise stick positions as numerical values, making it easy to verify everything is properly calibrated.
After completing the calibration sequence, test each control axis to confirm smooth, proportional response across the entire range of motion. If you notice jumpy or erratic stick behavior, your gimbals may need physical adjustment or cleaning.
Dust and debris can accumulate inside the gimbal mechanisms, causing sticky spots or dead zones. The AT9S Pro features high-quality Hall-effect sensors that minimize these issues, but periodic maintenance ensures long-term precision in your control inputs.
Setting Up Flight Modes and Channels
Modern drones benefit from multiple flight modes that adjust handling characteristics for different situations. The AT9S Pro's 12-channel capacity provides ample flexibility for assigning these modes to switches and dials.
Access the channel assignment menu on your RadioLink RC transmitter guide display and systematically configure each channel.
Common flight modes you'll likely configure include:
- Stabilized mode (self-leveling) for beginners and casual flying
- Acro mode (manual) for skilled pilots performing tricks
- GPS-assisted modes if your flight controller supports autonomous navigation
- Return-to-home functions for safety and recovery
Assign your primary flight controls to channels 1 through 4, as these are standard mappings recognized by most flight controllers. Channel 1 handles throttle, while channels 2, 3, and 4 control roll, pitch, and yaw respectively.
Dedicate channel 5 to your flight mode switch, allowing quick transitions between stability modes during flight.
Configure auxiliary channels for additional features using the transmitter's menu system:
- Channel 6 for arming/disarming switches
- Channel 7 for camera tilt control
- Channel 8 for return-to-home activation
- Remaining channels for specialized functions like gimbal pan or video recording

The AT9S Pro allows mixing multiple switches onto a single channel, creating complex control schemes. For example, you might use a three-position switch for basic flight modes while a separate toggle enables an emergency failsafe override.
When setting up flight modes, ensure your channel assignments match your flight controller's configuration. Most modern flight controllers use software like Betaflight, INAV, or ArduPilot that require you to map receiver channels to specific functions.
Adjusting Throttle, Trim, and Endpoints
Fine-tuning throttle behavior separates smooth, controlled flights from jerky, unpredictable ones. The AT9S Pro offers throttle curve adjustments that modify how stick position translates to motor power. Understanding each adjustment type helps you optimize your flying experience:
Throttle Curves: These determine the relationship between stick position and motor power output. A linear curve provides proportional response, while custom curves can add extra control authority at hover or aggressive acceleration at high throttle. Experiment with different curves in a simulator before flying to find your preferred feel.
Trim Adjustments: These compensate for minor imbalances in your drone's build or component tolerances. If your aircraft drifts in one direction despite centered sticks, small trim adjustments on the transmitter counteract this tendency.
The AT9S Pro features digital trim buttons that make precise adjustments:
- Use trim buttons during flight to counteract drift
- Make small adjustments—large trim values indicate calibration problems
- Return trim to center before landing to maintain neutral stick feel
- Save trim settings in your model profile for consistency
Endpoint Adjustments: These limit how far your controls can move, preventing over-travel that might cause flight controller instability. If your drone feels twitchy or over-responsive, reducing endpoints for roll and pitch channels creates gentler control authority. Conversely, sluggish response benefits from increased endpoints, though most modern flight controllers handle this through their own rate settings.
The RadioLink transmitter setup process should include testing these adjustments in a safe environment before attempting flight. Connect your drone via USB to configuration software and observe how transmitter inputs affect the flight controller's interpretation. This desktop testing reveals issues before they become airborne problems.
Updating RadioLink Firmware
Keeping your transmitter firmware current ensures access to the latest features and bug fixes that improve performance. Visit the official RadioLink website to download the newest firmware version for the AT9S Pro. The RadioLink firmware update process requires careful attention to detail:
Before starting the update:
- Ensure your transmitter has fresh batteries or external power
- Back up your current model settings if your transmitter supports this
- Close any other software that might interfere with USB communication
- Read the official update instructions completely
The update process typically takes just a few minutes using the provided firmware utility. Connect your transmitter to a computer via USB cable, put it into bootloader mode as instructed, and run the update utility.
Progress displays on both your computer screen and the transmitter's LCD. Losing power during an update can brick the device, so use reliable power or fresh batteries.
After completing the update, perform these verification steps:
- Power cycle the transmitter completely
- Verify all functions work correctly through the menu system
- Check that your previously configured models still load properly
- Confirm stick calibration remains accurate and responsive
- Test binding to a receiver to ensure communication still functions
Receiver firmware can also be updated, though this requires a more complex process involving firmware flashing tools or connection through the transmitter. Unless you're experiencing specific issues that an update addresses, receiver firmware updates are less critical than transmitter updates.
Always consult official documentation before attempting receiver firmware modifications, as improper procedures can render your receiver non-functional.
Conclusion
Successfully setting up your RadioLink transmitter transforms a collection of electronic components into a cohesive flying system. The AT9S Pro's comprehensive features support everything from basic flight control to advanced telemetry and automation.
Taking time to properly bind, calibrate, and configure each aspect ensures reliable performance when you're focused on flying rather than troubleshooting.
Regular maintenance, firmware updates, and failsafe testing keep your system ready for every flight adventure ahead.


