Complete Soldering Process Explained: Easy Steps
Summary
Soldering is a fundamental skill in electronics that every hobbyist, technician, and engineer should master. Whether you're repairing a broken circuit board, assembling a new gadget, or working on your first DIY electronics project, understanding the soldering process is essential.
This comprehensive guide will walk you through everything you need to know about soldering, from the basic tools and techniques to the step-by-step procedures that will help you create strong, reliable connections every time.

What Is Soldering?
Soldering is a process used to join two or more metal components together by melting a filler metal called solder into the joint.
Unlike welding, which melts the base metals themselves, soldering uses a metal alloy with a lower melting point to create a strong electrical and mechanical bond without damaging the components.
The soldering activity involves heating the joint area with a soldering iron until it's hot enough to melt the solder. When the solder melts and flows into the joint, it creates a permanent connection that conducts electricity.
This technique is widely used in electronic circuit assembly, wire joining, and repairing electronic boards.
The key to successful soldering lies in understanding heat transfer. You don't heat the solder directly. Instead, you heat the components being joined, and they in turn melt the solder.
This ensures proper adhesion and creates what professionals call a "wetted" joint where the solder bonds molecularly with the metal surfaces.
Tools and Materials Required for Soldering
Before you begin any soldering work, gathering the right tools required for soldering is crucial for achieving professional results. Having quality equipment makes the learning process smoother and helps you develop proper techniques from the start.
Essential Soldering Tools
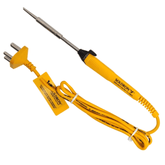
The soldering iron is your primary tool. For beginners, a basic 25-40 watt soldering iron with adjustable temperature control works perfectly for most electronics projects.
The best soldering temperature typically ranges between 300°C and 400°C (572°F to 752°F) for standard electronic components, though this varies depending on the solder type and component size.
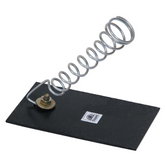
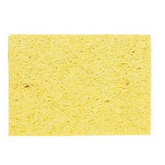
A soldering iron stand keeps your hot iron safe when not in use and usually includes a sponge or brass wire cleaner for tip maintenance. Speaking of which, knowing how to clean a soldering tip is vital. Regular cleaning prevents oxidation and ensures efficient heat transfer.
Solder and Flux
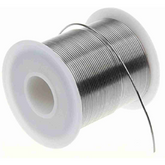
Solder wire comes in various compositions, but the most common for electronics is a tin-lead alloy or lead-free alternatives. The solder typically contains a flux core, which is essential for the process.
Understanding why flux is important in soldering helps you appreciate its role: flux removes oxidation from metal surfaces, improves solder flow, and helps create stronger bonds.
Supporting Tools
- Helping hands or PCB holders to secure your work
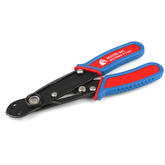
- Wire cutters and strippers for preparing components
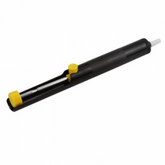
- Desoldering pump or wick for removing mistakes
- Safety glasses to protect your eyes from splashes
- Ventilation fan to remove harmful fumes
- Isopropyl alcohol and brushes for cleaning
Safety Equipment
Soldering safety precautions shouldn't be overlooked. An ESD protection in soldering setup, including an anti-static wrist strap and mat, prevents electrostatic discharge from damaging sensitive components. Proper ventilation is mandatory since solder fumes can be harmful when inhaled repeatedly.
Different Types of Soldering
Understanding the various types of soldering helps you choose the right approach for your specific project. Each method has its advantages and ideal applications.
Soft Soldering
This is the most common type in electronics work, using solder that melts below 400°C. Soft soldering is perfect for PCB soldering techniques and general electronic assembly.
The relatively low temperatures make it safe for heat-sensitive components like integrated circuits and transistors.
Hard Soldering
Also known as silver soldering or brazing, this technique uses higher temperatures and creates extremely strong joints. While not typically used in electronics, it's valuable for mechanical assemblies and jewelry making.
Wave Soldering
This automated industrial process involves passing circuit boards over a wave of molten solder. It's efficient for mass production but not practical for hobbyists or repair work.
Reflow Soldering
Common in modern electronics manufacturing, reflow soldering uses solder paste applied to PCB pads. The entire board is then heated in an oven, melting all solder joints simultaneously. This method is increasingly accessible to hobbyists with affordable reflow ovens.
Step-by-Step Soldering Process Explained
Now let's dive into the actual step-by-step soldering guide for beginners that will help you master this essential skill. Following these soldering steps carefully ensures consistent, professional results.
Preparation Phase

Understanding how to solder begins with proper preparation. Clean your workspace and ensure adequate lighting and ventilation.
Secure your circuit board or components using a helping hand or vice. This complete soldering guide emphasizes that a stable work surface prevents mistakes and improves safety.
Inspect your soldering iron tip. A clean, well-tinned tip is essential for efficient heat transfer. If the tip appears dark or oxidized, clean it with a damp sponge or brass wool, then apply fresh solder to coat the tip—this is called tinning.
Set your soldering iron to the appropriate temperature. For most basic soldering techniques with standard electronics components, start at 350°C (662°F) and adjust as needed. Allow the iron to heat fully, which usually takes 2-3 minutes.
Component Positioning

Insert the component leads through the correct holes in your PCB, ensuring proper orientation for polarized components like diodes and electrolytic capacitors.
Bend the leads slightly on the back side to hold components in place—this simple trick makes the process of soldering for beginners much easier.
The Soldering Process

This is where you learn how to do soldering easily by following the proper technique. The soldering process requires attention to each critical step:
- Heat the joint properly: Touch the soldering iron tip to both the component lead and the PCB pad simultaneously. This ensures both surfaces heat evenly, which is critical for creating strong joints. Hold the iron at approximately a 45-degree angle.
- Wait for heat transfer: Allow about one second for the joint to become hot enough to melt solder. You're heating the joint, not the solder directly. This is a fundamental principle that many beginners miss.
- Apply solder to the joint: Feed solder wire into the heated joint, not onto the iron tip. The hot joint should melt the solder, which will flow smoothly around the connection if the temperature is correct. Apply enough solder to form a small cone shape that covers both the pad and lead.
- Remove in proper sequence: Take away the solder wire first, then remove the iron. This sequence prevents the formation of solder "icicles" or peaks. The entire heating time should be 2-4 seconds—knowing how to make perfect solder joints means finding this balance between too little heat (cold joints) and too much (damaged components or lifted pads).
Cooling and Inspection
Allow the joint to cool naturally without blowing on it or moving the component. Disturbing the joint during cooling can create a "cold" or "disturbed" joint that looks grainy and may fail mechanically or electrically.
A good solder joint should be shiny, smooth, and volcano-shaped. It should completely cover the pad with a gentle concave fillet up the component lead. Learning how to know if your solder joint is good or bad comes with practice, but these visual indicators are reliable.
Post-Soldering Cleanup
After completing your soldering work, knowing how to clean a PCB after soldering is important for professional results. Use isopropyl alcohol (90% or higher) and a soft brush to remove flux residue. This prevents corrosion and makes your work look clean and professional.
Trim excess component leads with flush cutters, being careful not to stress the solder joints. Inspect your work under good lighting, looking for potential problems like solder bridges between adjacent pads, cold joints, or insufficient solder coverage.
Best Practices
Following best soldering practices ensures consistently good results. Keep these essential tips in mind throughout your work:
- Always tin your soldering iron tip before and after use to maintain optimal heat transfer
- Keep the tip clean throughout your work session by wiping it regularly on a damp sponge or brass cleaner
- Use the appropriate tip size for your work. Smaller tips for fine work, larger tips for ground planes and heavy connections
- Apply how to use a soldering iron knowledge by maintaining a steady hand and proper angle during the entire process
- Practice on scrap boards before attempting important projects to build muscle memory and confidence
- Take breaks during long sessions to maintain focus and prevent fatigue, which can lead to mistakes
Understanding the complete soldering process takes practice, but these fundamental techniques apply to everything from simple wire connections to complex multi-layer circuit boards.
Whether you're following a soldering process for beginners tutorial or tackling advanced work, these core principles remain the same.
Conclusion
Mastering the art of soldering opens up a world of possibilities in electronics, from simple repairs to creating your own custom circuits. While the process might seem intimidating at first, with the right tools, proper technique, and patience, anyone can develop this valuable skill.
Remember that even experienced professionals started as beginners, and every expert solderer has made countless mistakes along the way. The key is to learn from each joint you create, continually refine your technique, and always prioritize safety.
As you progress from basic connections to more complex projects, you'll find that soldering becomes second nature, allowing you to bring your electronic ideas to life with confidence and precision.


