Complete Guide to Install Windows 11 on Raspberry Pi 4
Summary
The idea of running a full desktop operating system on a tiny, affordable Raspberry Pi 4 probably sounds exciting.
However, Windows 11 OS wasn't officially designed for single-board computers, but with the right tools and a bit of patience, you can transform your Raspberry Pi into a Windows machine.
This guide walks you through every step needed to successfully install and run Windows 11 on your Raspberry Pi 4.

Can You Really Run Windows 11 on Raspberry Pi 4?
Yeah, it’s possible, but requires some workarounds since Microsoft doesn't officially support this hardware. The Raspberry Pi 4 uses an ARM-based processor—specifically the Broadcom BCM2711 with a quad-core Cortex-A72 CPU running at 1.5GHz.
While Windows 11 does have an ARM version typically found on devices like the Surface Pro X, 's not designed for the Pi's specific chip architecture.
Thanks to the dedicated developer community, tools like the Windows on Raspberry (WoR) installer and custom UEFI firmware make this installation possible.
The UEFI firmware replaces the Raspberry Pi's standard bootloader, creating a standardized boot environment that Windows can recognize and interact with.
The experience won't match a traditional PC. Understanding these limitations helps set realistic expectations:
- Performance varies significantly based on which RAM model you choose—the 8GB version handles multitasking far better than the 4GB model
- Basic productivity tasks like web browsing, document editing, and email management work reasonably well
- Resource-intensive applications including photo editing, video encoding, or modern gaming are largely impractical
- Boot times range from 2-4 minutes on microSD cards to 45-90 seconds on SSDs
- Application compatibility is limited to ARM64 native apps or x86 applications running through Windows' built-in emulation layer
Think of this project as an educational experiment rather than a replacement for your main computer.
The process gives you hands-on experience with firmware flashing, driver installation, and operating system deployment—skills that translate to professional IT environments.
What You'll Need Before Installing Windows 11 on Raspberry Pi 4

Before diving into the installation of Windows on Raspberry Pi, gather all necessary hardware and software components. Missing even one item can halt your progress midway through installation.
Essential Hardware Components
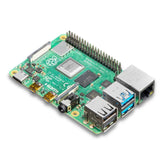
- Raspberry Pi 4 Model B: The Raspberry Pi 4 4GB version is the bare minimum, but the 8GB model is strongly recommended for acceptable multitasking
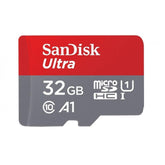
- Storage Device: Choose between a microSD card (32GB minimum, Class 10 or UHS-I rated) or preferably a USB 3.0 SSD (128GB recommended). SSDs offer 3-5x faster speeds, dramatically improving responsiveness
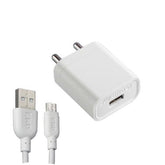
- Power Supply: Use the official Raspberry Pi 4 USB-C power adapter (5V/3A) or quality third-party equivalent. Insufficient power causes crashes and instability
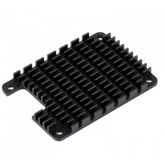
- Cooling Solution: Essential for sustained Windows use—options include aluminum heatsink cases or active cooling fans rated for 5V operation
- USB Card Reader: Necessary if using microSD cards for preparing the installation media on your Windows PC
Required Peripherals
- Display: Any monitor with HDMI input; Raspberry Pi 4 uses micro-HDMI ports
- Input Devices: USB keyboard and mouse (wired recommended for initial setup)
- Network Connection: Ethernet cable for most reliable installation, or compatible USB Wi-Fi adapter
Software Requirements
You'll need a Windows PC (Windows 10 or 11) to prepare the installation media, with at least 20GB of free space.
A stable broadband internet connection is essential since you'll be downloading the Windows 11 ARM image (approximately 4-6GB), driver packages (1-2GB), and UEFI firmware files (100-200MB).
System Requirements for Running Windows 11 on Raspberry Pi 4
Understanding the Raspberry Pi 4 hardware requirements helps set realistic expectations and prevents frustration from attempting to run Windows on inadequate hardware.
Minimum vs. Recommended Specifications
Minimum Configuration:
- Raspberry Pi 4 Model B with 4GB RAM
- 32GB microSD card (Class 10 or higher)
- Official 5V/3A power supply
- Passive cooling (heatsinks)
Recommended Configuration:
- Raspberry Pi 4 Model B with 8GB RAM
- 128GB USB 3.0 SSD
- Official Raspberry Pi power supply
- Active cooling with temperature-controlled fan
- Wired Ethernet connection
The difference between configurations is substantial. The 8GB RAM model allows running multiple browser tabs and background services without system crawling.
An SSD reduces application launch times from 15-30 seconds down to 3-8 seconds. Active cooling prevents thermal throttling—when CPU temperature exceeds 80°C, the Raspberry Pi automatically reduces clock speed by 30-50%, dramatically impacting performance.
Understanding Performance Limitations
For the Windows 11 on ARM PC experience, the Raspberry Pi 4 is entry-level computing power. The VideoCore VI GPU handles basic graphics but struggles with Windows' desktop composition and visual effects.
Thermal management becomes critical because Windows 11 pushes the Pi's CPU harder than typical Linux distributions. Without proper cooling, sustained CPU usage causes temperatures to reach 85°C within minutes.
A quality cooling solution maintains temperatures around 50-65°C under normal load, preserving consistent performance.
Download the Required Tools and Files
The WoR Raspberry Pi 4 installer is your primary tool for this project. Visit the official WoR (Windows on Raspberry) project on GitHub and download the latest stable release (typically 15-25MB).
This Windows application automates downloading, configuring, and writing everything needed to your storage device.
Why WoR installer is essential:
- Automatically downloads the correct Windows 11 ARM build compatible with Raspberry Pi
- Handles partition creation with proper UEFI boot structures
- Injects necessary drivers directly into the Windows installation
- Configures boot files and firmware in the correct sequence
- Provides error checking during the writing process
The Raspberry Pi 4 UEFI firmware bridges the gap between Raspberry Pi's hardware and Windows' expectations. Traditional PCs use UEFI (Unified Extensible Firmware Interface) as a standardized way to boot operating systems.
The Raspberry Pi normally uses its own proprietary bootloader, which Windows doesn't understand. The custom UEFI firmware provides ACPI tables that describe hardware components, boot manager compatibility, and storage controller interfaces that Windows recognizes.
The Raspberry Pi 4 Windows drivers package ensures Windows can use your Pi's hardware. Critical drivers include display drivers for the VideoCore VI GPU, network drivers for Ethernet, Wi-Fi and Bluetooth drivers, USB controller drivers, and audio drivers.
The WoR installer typically bundles these drivers and injects them during installation. Store all downloaded files in an organized folder on your Windows PC—the total download size ranges from 8GB to 15GB depending on your choices.
How to Prepare Your microSD Card or SSD
Proper Raspberry Pi 4 SD card preparation is critical for successful installation. Insert your microSD card into a card reader or connect your SSD to your Windows PC.
Open Disk Management (Windows+X, select Disk Management) to verify Windows recognizes the device and note the disk number to ensure correct selection in the WoR installer.
If the storage device was previously used with Linux or Raspberry Pi OS, delete all existing partitions in Disk Management to return the device to unallocated space. This prevents conflicts during installation.
Using the WoR Installer
Launch the WoR installer with administrator privileges (right-click, select "Run as administrator"). The installer presents a user-friendly interface:
Configuration Steps:
- Device Selection: Carefully select your microSD card or SSD by matching the capacity and disk number. Triple-check this selection—the installer completely erases the chosen device
- Operating System Selection: Choose "Windows 11" from the dropdown menu
- Device Model Selection: Select "Raspberry Pi 4" from the device list
- Language and Region: Select your preferred Windows installation language
- Download Options: If you haven't pre-downloaded files, the installer downloads the Windows 11 ARM image, UEFI firmware, and driver packages (45-90 minutes on typical broadband)
The Installation Process
Once configuration is complete, click "Install" to begin. The installer performs multiple operations:
- Phase 1 - Disk Preparation: Erases existing partitions, creates GPT structure, establishes 100MB FAT32 boot partition for UEFI firmware, and allocates remaining space for Windows (NTFS format)
- Phase 2 - Firmware Installation: Writes Raspberry Pi 4 UEFI firmware to boot partition and configures boot files
- Phase 3 - Windows Image Deployment: Extracts and writes Windows 11 ARM installation image to the Windows partition
- Phase 4 - Driver Injection: Injects Raspberry Pi 4 Windows drivers into Windows installation and configures hardware-specific settings
- Phase 5 - Verification: Verifies written files for integrity and checks partition structure
The entire process takes 30-60 minutes depending on storage device speed. Do not interrupt by closing the application, disconnecting the storage device, or shutting down your PC. When the installer displays "Installation Complete," safely eject the storage device using "Safely Remove Hardware" in Windows.
Step-by-Step: Installing Windows 11 on Raspberry Pi 4
Now comes the exciting part—actually installing Windows 11 on Raspberry Pi 4. This phase involves hardware assembly, first boot configuration, and system optimization.
Hardware Assembly and First Boot
Ensure your Raspberry Pi 4 is completely powered off. Handle the board carefully by its edges.
Assembly Sequence:
- Install Cooling Solution: Install heatsinks or attach your cooling fan, ensuring proper contact with CPU, RAM, and USB controller chips
- Insert Storage Device: For microSD cards, insert firmly until it clicks. For SSDs, connect to a blue USB 3.0 port (preferably the bottom-right port)
- Connect Display: Insert micro-HDMI cable into HDMI 0 (port closest to USB-C power) and connect to your monitor
- Attach Peripherals: Connect USB keyboard, mouse, and Ethernet cable if using wired networking
- Power Connection Last: Connect USB-C power supply—the board immediately begins booting
Understanding the First Boot Process
The Raspberry Pi 4 first boot Windows 11 process is considerably longer than subsequent startups. Patience during this phase prevents premature troubleshooting.
Boot Sequence Timeline:
- 0-30 seconds: Raspberry Pi logo appears—UEFI firmware is loading
- 30-90 seconds: UEFI splash screen appears, performing hardware initialization and memory testing
- 90-180 seconds: Windows logo appears with spinning circle animation—Windows Boot Manager loads the kernel
- 3-8 minutes: Screen may appear black or show loading animations while Windows performs first-time hardware detection and driver installation
- 8-15 minutes: Windows 11 setup screen displaying language selection appears
If boot takes longer than 20 minutes on SSD or 30 minutes on microSD, there may be an issue. However, patience is critical—the first boot involves substantial background activity.
Completing Windows Setup
Once the Windows setup screen appears, the familiar installation experience begins:
- Language and Region Configuration: Select your preferred language, time format, and keyboard layout
- Network Connection: Windows prompts you to connect. Ethernet typically connects automatically; Wi-Fi may not work if your Pi revision lacks compatible drivers
- Microsoft Account Setup: Enter Microsoft account credentials or create a new account
- Privacy Settings Configuration: Review and configure telemetry, location services, and diagnostic data preferences
- Finalizing Setup: Windows configures your account and prepares the desktop (3-7 minutes)
After reaching the desktop, verify hardware drivers. Open Device Manager (right-click Start button, select Device Manager) and look for yellow warning triangles indicating missing drivers.
Common issues include display adapter showing as "Microsoft Basic Display Adapter" instead of "Broadcom VideoCore," or Wi-Fi appearing as "Unknown Device."
Essential Performance Optimizations
Apply these Raspberry Pi 4 performance tweaks immediately after installation for acceptable performance:
Visual Effects Reduction:
- Right-click "This PC" → Properties → Advanced system settings
- Under Performance, click Settings
- Select "Adjust for best performance" to disable animations and transparency
- This improves responsiveness by 20-30%
Windows Search Service Management:
- Open Services (Windows+R, type "services.msc")
- Locate "Windows Search," right-click, select Properties
- Change Startup type to "Disabled" to prevent constant indexing
Startup Program Control:
- Open Task Manager (Ctrl+Shift+Esc) → Startup tab
- Disable unnecessary programs to reduce boot time and free RAM
Windows Update Temporary Suspension:
- Open Settings (Windows+I) → Windows Update → Advanced options
- Pause updates for 1-2 weeks during initial setup
- Re-enable once system is optimized
Power Plan Optimization:
- Control Panel → Power Options
- Select "High performance" to prevent CPU throttling
Page File Configuration:
- For 8GB systems, set fixed page file size of 4096MB
- For 4GB systems, set to 2048MB
- This prevents Windows from constantly resizing the page file
After optimization, restart your Raspberry Pi to apply changes and verify system stability. Monitor temperatures using UEFI firmware's hardware monitor (press Esc during boot) or third-party software. Temperatures should stabilize below 70°C during normal desktop use with proper cooling.
Conclusion
Installing Windows 11 on Raspberry Pi 4 is an impressive achievement in community-driven hardware compatibility. While performance won't rival traditional PCs, this project offers valuable learning opportunities and demonstrates the versatility of single-board computers.
You've successfully transformed affordable hardware into a unique Windows machine through firmware modifications, custom drivers, and persistence.
This experience provides you with the practical knowledge about operating system installation, UEFI firmware, hardware drivers, partition management, and system optimization that applies beyond just Raspberry Pi projects.
The skills developed—from understanding ARM architecture to troubleshooting boot issues—translate directly to professional IT environments and personal computing projects.


