Setting Up the Raspberry Pi AI Hat Step-by-Step Tutorial
Summary
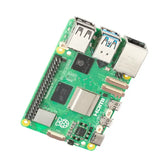
The Raspberry Pi 5 is a remarkably powerful single-board computer, but demanding artificial intelligence workloads can push its CPU to its limits.
While the Pi 5's processor is more than capable for many tasks, it isn't optimized for the highly parallelized computations required for modern AI, which can lead to slow performance and high CPU usage.
This is where the Raspberry Pi AI HAT+ comes in.
This add-on board is specifically designed to offload those intensive AI tasks to a dedicated Neural Processing Unit (NPU), dramatically accelerating performance and freeing up the Pi's CPU for other operations.
It transforms the Raspberry Pi 5 into a power-efficient edge AI powerhouse.
In this guide, we’ll walk you through the detailed process of setting up this device.

What is the Raspberry Pi AI Hat+?
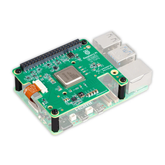
The Raspberry Pi AI HAT+ is an add-on board designed to transform a Raspberry Pi 5 into a powerful and efficient artificial intelligence machine.
It features a built-in neural network accelerator, enabling high-performance AI processing directly on the device without needing cloud connectivity.
The AI HAT+ is built around Hailo's AI accelerator technology and connects to the Raspberry Pi 5 using its PCIe interface for high-speed communication.
Note that it is not a standalone device. It requires a Raspberry Pi 5 to operate.
Step-by-step Guide to Set Up Raspberry Pi AI Hat with Pi 5
Step 1: Software Prerequisites
Before you install the hardware, you must update your Raspberry Pi 5's software and firmware to ensure compatibility.
1. Update Your System: Open a terminal window and run the following command to update your package lists and upgrade all your installed packages to their latest versions:
sudo apt update sudo apt full-upgrade
2. Update Raspberry Pi Firmware: The AI HAT+ requires a firmware version dated December 6, 2023, or later.
a. First, check your current firmware version with this command:
sudo rpi-eeprom-update
b. If the date is earlier than December 6, 2023, you need to update it. Open the Raspberry Pi Configuration tool:
sudo raspi-config
c. In the configuration tool, navigate to Advanced Options > Bootloader Version and select Latest.
d. Exit raspi-config, then apply the firmware update by running:
sudo rpi-eeprom-update -a
e. Finally, reboot your Raspberry Pi for the changes to take effect:
sudo reboot
Step 2: Hardware Installation
Now you can physically connect the AI HAT+ to your Raspberry Pi 5.
1. Power Down: Completely disconnect your Raspberry Pi 5 from its power supply.
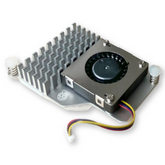
2. Install Active Cooler (Optional): If you have a Raspberry Pi Active Cooler, it is highly recommended to install it first for the best performance.
3. Attach Hardware: Your AI HAT+ comes with a ribbon cable, a GPIO stacking header, and mounting hardware (spacers and screws).
- Install the four provided spacers onto your Raspberry Pi 5 using four of the screws.
- Firmly press the GPIO stacking header onto the Raspberry Pi's GPIO pins.
- Take the PCIe ribbon cable and connect one end to the PCIe port on your Raspberry Pi 5. The port is located between the display and camera ports. Lift the tab on the connector, insert the cable with the copper contacts facing inward (towards the USB ports), and press the tab down to secure it.
- Place the AI HAT+ on top of the spacers and secure it with the four remaining screws.
- Connect the other end of the ribbon cable to the port on the AI HAT+. Lift the tab, insert the cable with the copper contacts facing up, and push the tab down to lock it in place.
Step 3: Final Configuration and Verification
With the hardware connected, you can power up your Raspberry Pi and complete the software setup.
1. Enable PCIe Gen 3: For maximum performance, it is highly recommended to enable PCIe Gen 3.0 speeds.
a. Open the configuration tool again:
sudo raspi-config
b. Navigate to Advanced Options > PCIe Speed and select Yes to enable Gen 3 mode.
c. Exit the tool and reboot your device.
2. Install AI Software: Install the necessary Hailo driver and software packages by running this command:
sudo apt install hailo-all
This command installs the Hailo kernel driver, firmware, middleware libraries (HailoRT), and demo applications
3. Reboot: Reboot your Raspberry Pi one last time for all settings to take effect.
sudo reboot
4. Verify Installation: After rebooting, open a terminal and run the following command to check if the AI HAT+ is recognized correctly:
hailortcli fw-control identify
If the setup is successful, you will see output displaying device information and firmware details for the Hailo chip, confirming that your AI HAT+ is ready.
Step 4: Run a Test Application
You can now run a simple object detection demo to see your Raspberry Pi AI HAT+ in action. This test uses the pre-installed rpicam-apps and a Raspberry Pi camera.
1. Install Camera Apps (if needed): The camera applications should be installed as part of the hailo-all package, but you can ensure they are present by running:
sudo apt install rpicam-apps
2. Run Object Detection: With a camera connected, run the following command in the terminal:
rpicam-hello -t 0 --post-process-file /usr/share/rpi-camera-assets/hailo_yolov6_inference.json
A camera feed will open on your display, and you should see bounding boxes appearing in real-time around any detected objects. You have now successfully set up your Raspberry Pi AI HAT+
Conclusion
Setting up the Raspberry Pi AI HAT+ is a straightforward process that unlocks powerful, on-device artificial intelligence capabilities for your Raspberry Pi 5.
By following these steps, you have transformed your device into an efficient edge AI machine ready to tackle demanding workloads like real-time object detection, robotics, and home automation.
This opens up a world of possibilities for creating sophisticated, low-latency AI projects, moving beyond simple scripts to build genuinely intelligent applications right at the network's edge.


