Expand Storage on Raspberry Pi 5 Using SSD
Summary
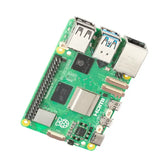
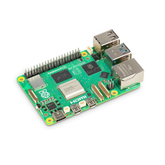
The Raspberry Pi 5 is a powerhouse single-board computer that's changed the game for makers, developers, and hobbyists worldwide.
But like a sports car with a tiny fuel tank, its microSD card storage can feel limiting when you're running serious projects. The good news is that upgrading to an SSD transforms your Pi into a speed demon with room to breathe.
In this walkthrough, we'll guide you through the complete process to expand storage on Raspberry Pi 5 using a solid-state drive, unlocking performance you didn't know your Pi was capable of.

Benefits of Using an SSD Over a microSD Card to Expand Storage on Raspberry Pi 5
Let's be honest: microSD cards were never designed to be primary storage drives. They're convenient, sure, but when you're pushing your Raspberry Pi to handle databases, media servers, or intensive development work, those little cards start showing their age.

Speed and Performance
The difference is night and day. When you increase storage on Raspberry Pi 5 with an SSD, you're fundamentally upgrading the entire experience.
- Read/write speeds are 5-10 times faster than even the best microSD cards
- Boot times drop from 45-60 seconds to just 15-25 seconds
- Applications launch instantly rather than sluggishly
- Database operations and file transfers happen in a fraction of the time
- System responsiveness feels like a completely different computer
Reliability and Longevity
MicroSD cards have a limited number of write cycles, and they tend to fail without warning. But with an SSD, you do not have to worry abut that.
- SSDs feature wear-leveling technology that distributes writes evenly
- Better controllers handle intensive workloads without degradation
- Years of heavy use without the sudden failures common to SD cards
- If you want to extend Raspberry Pi lifespan using SSD technology, this upgrade is essential
- Peace of mind knowing your data and projects are safer
Capacity Advantages
While you can find 128GB or even 256GB microSD cards, they're expensive and still limited. With an NVMe SSD with Raspberry Pi 5, you can easily install drives ranging from 256GB to 2TB or more at reasonable prices.
- Affordable large-capacity options from 256GB to multiple terabytes
- Room for extensive media libraries without constant management
- Space for multiple Docker containers and development environments
- Ability to run virtual machines and complex applications
- Better price-per-gigabyte compared to high-capacity SD cards
What You'll Need Before You Start
Before diving into your Raspberry Pi 5 SSD setup, let's gather everything you'll need. Having the right components from the start will save you from frustrating mid-project trips to the electronics store.
The SSD Itself
The best SSD for Raspberry Pi 5 depends on your specific use case. For maximum performance, an NVMe M.2 drive (2280 form factor) is your best bet.
- Samsung 970 EVO Plus for excellent all-around performance
- WD Black SN750 for high-speed operations and reliability
- Kingston NV2 for budget-conscious builds without sacrificing quality
- Crucial P3 for balanced performance and value
- 256GB capacity for standard projects, 512GB or larger for media centers
M.2 HAT+ Adapter
The Raspberry Pi 5 doesn't have a built-in M.2 slot, so you'll need the official hardware to connect SSD to Raspberry Pi 5.
- Official Raspberry Pi M.2 HAT+ adapter specifically designed for Pi 5
- Provides proper PCIe interface connection
- Includes mounting hardware and standoffs
- Ensures optimal compatibility and performance
- Don't use older adapters—they won't work with the Pi 5's architecture
Tools and Accessories
- Small screwdriver for assembly
- Standoffs (usually included with the HAT+)
- MicroSD card for initial setup (8GB minimum, 16GB recommended)
- USB card reader if your computer lacks a built-in SD slot
- Anti-static wrist strap (optional but recommended)
Software Requirements
- Latest Raspberry Pi Imager from the official Raspberry Pi website
- Backup of any existing data on your current Pi installation
- Stable internet connection for downloading OS images and updates
Steps to Add Extra Storage on Raspberry Pi 5

Now we get to the fun part; the actual Raspberry Pi SSD upgrade process. This external drive setup on Raspberry Pi might sound intimidating, but it's surprisingly straightforward when you break it down.
Physical Installation
First, power down your Raspberry Pi 5 completely and unplug it from the power source. Safety first. Never work on electronics while they're powered on.
Preparing the Raspberry Pi:
- Remove your Pi from its case if it's in one
- Place it on a clean, static-free surface
- Locate the PCIe connector between the two HDMI ports
- This flat connector is where the HAT+ will attach
Installing the M.2 HAT+:
- Carefully align the HAT+ with the standoff mounting holes on the Pi
- Ensure the PCIe connector on the HAT+ lines up with the socket
- Apply gentle, even pressure until you feel it seat properly
- Secure the HAT+ using the provided standoffs and screws
- Don't force anything—proper alignment means smooth installation
Mounting the SSD:
- Slide your NVMe drive into the M.2 slot at about a 30-degree angle
- Press it down flat against the mounting point
- Secure it with the small screw at the end of the slot
- The drive should sit flush and stable
Your hardware installation is complete—time to handle the Raspberry Pi 5 SSD tutorial software configuration.
Preparing the Operating System
This is where we set up the foundation to migrate Raspberry Pi OS to SSD.
Creating the Boot Media:
- Insert a microSD card into your computer
- Launch Raspberry Pi Imager
- Select Raspberry Pi 5 as the device
- Choose Raspberry Pi OS (64-bit is recommended)
- Select your microSD card as the storage
Configuring Advanced Options:
- Click the gear icon before writing
- Set your hostname for network identification
- Enable SSH if you want remote access
- Configure your Wi-Fi credentials and country
- Set a username and password
- These settings save significant time later
Initial Boot:
- Write the image to your microSD card (takes a few minutes)
- Insert the microSD card into your Pi
- Connect the SSD-equipped HAT+ to your Pi
- Power on and let it boot completely
- First boot takes longer as it resizes partitions and completes setup
Configuring the SSD
After your Pi boots from the microSD card, open a terminal. We need to update the system first to ensure we have the latest firmware and tools.
System Updates:
sudo apt update
sudo apt full-upgrade -y
sudo reboot
Enabling NVMe Boot:
After the reboot, it's time for the Raspberry Pi 5 boot from SSD configuration.
- Open Raspberry Pi Configuration tool from the desktop menu
- Or type sudo raspi-config in the terminal
- Navigate to Advanced Options
- Select Boot Order
- Choose NVMe/PCIe Boot option
- Confirm and exit the configuration tool
- Reboot once more
Your Pi should still boot from the microSD card at this point because we haven't copied the OS to the SSD yet. This is expected behavior.
Cloning Your System
The easiest way to handle this Raspberry Pi 5 storage expansion is using the built-in SD Card Copier utility.
Using SD Card Copier:
- Find SD Card Copier in the Accessories menu on the desktop
- Launch the application
- It automatically detects your microSD card as the source
- Your newly connected SSD appears as the destination
- Double-check that you've selected the correct drives
Copy Process:
- Check the option for "New Partition UUIDs" to avoid conflicts
- Start the copy process
- Depending on data volume, this takes 10-30 minutes
- Progress bar keeps you informed throughout
- Don't interrupt or power off during copying
First Boot from SSD:
- Once copying completes, shut down your Pi completely
- Remove the microSD card
- Power the Pi back on
- Your Pi will now boot directly from the SSD
- Faster boot time confirms successful installation
Verify Performance and Storage Speed
After completing your Raspberry Pi 5 storage upgrade, it's time to confirm that all that work paid off with real performance gains.
Storage Capacity Check
Open a terminal and verify your available space:
df -h
What to Look For:
- Your SSD listed with its full capacity
- A 512GB drive shows around 475GB usable space after formatting overhead
- Mounted at the root (/) filesystem
- Significantly more space than your previous microSD card
Speed Testing
Install the necessary tools and run performance benchmarks:
sudo apt install hdparm
Testing Read Speed:
sudo hdparm -Tt /dev/nvme0n1
Expected Results:
- Sequential read speeds of 400-500 MB/s or higher with quality NVMe drives
- Compare to the 50-90 MB/s from microSD cards
- The difference is staggering and immediately noticeable
- Some high-end drives may exceed 1000 MB/s
Testing Write Performance:
dd if=/dev/zero of=~/test.tmp bs=500K count=1024
- Dramatically faster results compared to SD storage
- Consistent performance even under sustained loads
- These aren't just impressive numbers—you'll feel the difference in every interaction
Real-World Performance Indicators
Boot Time Comparison:
- Time your Pi from power-on to desktop or login prompt
- Most users report boot times dropping from 45-60 seconds to 15-25 seconds
- Some optimized setups achieve sub-15-second boots
- Shutdown and restart operations are equally faster
Application Performance:
- Web browsers launch instantly rather than taking several seconds
- IDEs and development tools open without lag
- File operations complete in a fraction of the time
- Docker container management is noticeably smoother
- Media playback and streaming services buffer faster
Database and I/O Operations
- If you're running databases or intensive I/O workloads, you'll see massive improvements:
- SQLite database queries respond 5-10 times faster
- Log file writing doesn't bog down the system
- Multiple simultaneous read/write operations handle smoothly
- Web server response times improve dramatically
Conclusion
Upgrading your Raspberry Pi 5 with SSD storage is one of the most impactful modifications you can make.
The combination of faster speeds, improved reliability, and expanded capacity makes this upgrade essential for anyone using their Pi for more than casual tinkering.
Regardless of where you are using the Rapberry Pi for: running home automation, hosting services, developing software, or building a media center, the SSD advantage is undeniable.


