How to Read Data from ThingSpeak using ESP32: Complete Guide
Summary
ThingSpeak is a cloud-based IoT analytics platform developed by MathWorks that allows users to collect, visualize, and analyze live data streams from connected devices.
This platform provides RESTful APIs and MQTT support for easy integration with microcontrollers like ESP32, making it ideal for IoT applications requiring real-time data monitoring and storage.
ThingSpeak offers free accounts with up to 8,000 API requests per day, making it accessible for hobbyist and educational projects involving data fetching from ThingSpeak.

Why Use ESP32 with ThingSpeak for IoT Projects
The ESP32 microcontroller is perfectly suited for an ESP32 project with ThingSpeak integration due to its built-in Wi-Fi capabilities, dual-core processing power, and extensive memory resources.
Unlike the SP8266, the ESP32 offers superior processing capabilities and supports both Wi-Fi and Bluetooth connectivity, making it versatile for complex IoT applications.
The combination enables seamless data transmission to cloud platforms, real-time monitoring capabilities, and cost-effective solutions for weather stations, sensor networks, and automation systems.
Hardware and Software Requirements
Hardware Components
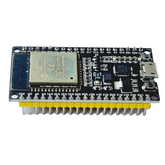
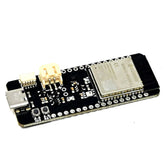
- ESP32 development board (ESP32 DevKit or similar)
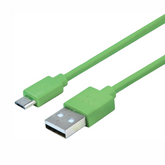
- USB cable for programming and power
- Stable power supply (optional for standalone operation)
- Sensors (optional, for actual data collection)
Software Requirements
- Arduino IDE with ESP32 board support
- WiFi library (built-in ESP32 library)
- HTTPClient library for HTTP requests
- ArduinoJson library for parsing JSON responses
- ThingSpeak library (optional, for simplified integration)
Setting Up a ThingSpeak Channel for Data Storage
Creating a ThingSpeak channel is essential for reading data from ThingSpeak using ESP32. First, create a free account at thingspeak.com and navigate to the "Channels" section.
Create a new channel by specifying field names (Field1, Field2, etc.) that correspond to your data types. After creation, locate your Channel ID in the channel URL and copy the Read API Key from the "API Keys" tab.
These credentials are crucial for authentication when your ESP32 makes data requests to the ThingSpeak servers.
Connecting ESP32 to Wi-Fi Network
The ESP32 WiFi connection setup is fundamental for cloud communication. The process involves initializing the WiFi library, connecting to your network using SSID and password credentials, and establishing a stable connection before attempting data operations. Here's the essential setup code:
#include  <WiFi.h>

const char* ssid = "YOUR_WIFI_SSID";
const char* password = "YOUR_WIFI_PASSWORD";

void setup() {
  Serial.begin(115200);
  WiFi.begin(ssid, password);

  while (WiFi.status() != WL_CONNECTED) {
    delay(500);
    Serial.print(".");
  }

  Serial.println("WiFi connected!");
}
The connection status should be verified before attempting any HTTP operations to ensure reliable data transmission.
Steps to Read Data from ThingSpeak using ESP32
Required Libraries
- Install the necessary libraries in your Arduino IDE :
- WiFi: Built-in ESP32 library for wireless connectivity
- HTTPClient: For making HTTP requests to ThingSpeak API
- ArduinoJson: For parsing JSON responses from ThingSpeak
- ThingSpeak: Official library for easier ThingSpeak integration
Installing Libraries
- Open Arduino IDE
- Go to Sketch > Include Library > Manage Libraries
- Search and install "ThingSpeak" by MathWorks
- Search and install "ArduinoJson" by Benoit Blanchon
ThingSpeak Channel Setup
Get Your Channel Information
- Log into your ThingSpeak account at thingspeak.com
- Navigate to your channel or create a new one
- Note down your Channel ID (visible in the channel URL)
- Go to the API Keys tab and copy your Read API Key
Hardware Setup
Connect your ESP32 to your computer via USB cable. No additional hardware is required for basic data reading but ensure your ESP32 has stable power supply.
Code Implementation
Basic HTTP GET Method
Here's the complete code to read data from ThingSpeak using HTTP GET requests:
#include <WiFi.h>
#include <HTTPClient.h>
#include <ArduinoJson.h>

// WiFi credentials
const char* ssid = "YOUR_WIFI_SSID";
const char* password = "YOUR_WIFI_PASSWORD";

// ThingSpeak settings
unsigned long channelID = YOUR_CHANNEL_ID;
const char* readAPIKey = "YOUR_READ_API_KEY";
const char* server = "api.thingspeak.com";

// Variables to store sensor data
float field1Value = 0;
float field2Value = 0;

void setup() {

  Serial.begin(115200);

  // Connect to WiFi
  WiFi.begin(ssid, password);
  Serial.print("Connecting to WiFi");

  while (WiFi.status() != WL_CONNECTED) {
    delay(500);
    Serial.print(".");
  }

  Serial.println();
  Serial.println("WiFi connected!");
  Serial.print("IP address: ");
  Serial.println(WiFi.localIP());
}

void loop() {
  if (WiFi.status() == WL_CONNECTED) {
    readThingSpeakData();
    delay(20000); // Read data every 20 seconds
  }
}

void readThingSpeakData() {
  HTTPClient http;

  // Construct the URL for reading data
  String url = "http://api.thingspeak.com/channels/" + String(channelID) +
               "/feeds.json?api_key=" + String(readAPIKey) + "&results=1";

  http.begin(url);
  int httpResponseCode = http.GET();

  if (httpResponseCode > 0) {
    String payload = http.getString();
    Serial.println("HTTP Response: " + String(httpResponseCode));
    Serial.println("Payload: " + payload);

    // Parse JSON response
    parseJSON(payload);
  } else {
    Serial.println("Error in HTTP request: " + String(httpResponseCode));
  }

  http.end();
}

void parseJSON(String jsonString) {
  DynamicJsonDocument doc(2048);
  deserializeJson(doc, jsonString);

  // Extract channel information
  int channelId = doc["channel"]["id"];
  String channelName = doc["channel"]["name"];

  Serial.println("Channel ID: " + String(channelId));
  Serial.println("Channel Name: " + channelName);

  // Extract feed data (most recent entry)
  if (doc["feeds"].size() > 0) {
    JsonObject feed = doc["feeds"][0];

    String createdAt = feed["created_at"];
    field1Value = feed["field1"].as<float>();
    field2Value = feed["field2"].as<float>();

    Serial.println("Latest Entry:");
    Serial.println("Timestamp: " + createdAt);
    Serial.println("Field 1: " + String(field1Value));
    Serial.println("Field 2: " + String(field2Value));
  }

  Serial.println("------------------------");
}
Using ThingSpeak Library Method
Alternative approach using the official ThingSpeak library:
#include <WiFi.h>
#include "ThingSpeak.h"

const char* ssid = "YOUR_WIFI_SSID";
const char* password = "YOUR_WIFI_PASSWORD";

WiFiClient client;

unsigned long channelID = YOUR_CHANNEL_ID;
const char* readAPIKey = "YOUR_READ_API_KEY";

void setup() {
  Serial.begin(115200);
  WiFi.mode(WIFI_STA);

  WiFi.begin(ssid, password);
  while (WiFi.status() != WL_CONNECTED) {
    delay(500);
    Serial.print(".");
  }

  Serial.println("WiFi connected!");
  ThingSpeak.begin(client);
}

void loop() {
  // Read specific field value
  float field1 = ThingSpeak.readFloatField(channelID, 1, readAPIKey);
  int statusCode = ThingSpeak.getLastReadStatus();

  if (statusCode == 200) {
    Serial.println("Field 1: " + String(field1));
  } else {
    Serial.println("Problem reading channel. HTTP error code " + String(statusCode));
  }

  delay(20000); // ThingSpeak allows updates every 15 seconds
}
Configuration Steps
Update Code Parameters
Replace the following placeholders in your code:
- YOUR_WIFI_SSID: Your WiFi network name
- YOUR_WIFI_PASSWORD: Your WiFi password
- YOUR_CHANNEL_ID: Your ThingSpeak channel ID number
- YOUR_READ_API_KEY: Your channel's Read API Key
URL Structure Understanding
ThingSpeak uses RESTful API endpoints for data retrieval:
- Basic format: https://api.thingspeak.com/channels/CHANNEL_ID/feeds.json
- With API key: ?api_key=READ_API_KEY
- Limit results: &results=NUMBER_OF_ENTRIES
- Specific field: /fields/FIELD_NUMBER.json
Data Rate Limits
ThingSpeak has rate limits for data retrieval:
- Maximum 8,000 requests per day for free accounts
- Recommended minimum interval: 15-20 seconds between requests
- Use results parameter to limit returned data and reduce bandwidth
Advanced Features
Reading Multiple Fields
To read specific fields individually:
// Read multiple fields separately
float temperature = ThingSpeak.readFloatField(channelID, 1, readAPIKey);
float humidity = ThingSpeak.readFloatField(channelID, 2, readAPIKey);
float pressure = ThingSpeak.readFloatField(channelID, 3, readAPIKey);
Reading Historical Data
Modify the URL to get historical entries:
String url = "http://api.thingspeak.com/channels/" + String(channelID) +
             "/feeds.json?api_key=" + String(readAPIKey) + "&results=10";
This implementation provides a complete foundation for reading data from ThingSpeak using ESP32, with both HTTP client and ThingSpeak library approaches for different use cases.
Conclusion
Reading data from ThingSpeak using ESP32 provides a powerful and cost-effective solution for IoT monitoring applications.
The ESP32's built-in Wi-Fi capabilities combined with ThingSpeak's cloud platform enable remote data access from anywhere in the world.
This integration offers real-time visualization, data analysis, and reliable communication for weather stations, sensor networks, and automation projects.
With proper implementation of rate limiting and error handling, the ESP32-ThingSpeak combination delivers a robust foundation for scalable IoT data retrieval systems.


