Getting Started with XIAO ESP32 C3 - Smallest ESP32 Board
Summary
The world of electronics is constantly shrinking, with components becoming smaller yet more powerful. The Seeed XIAO ESP32 C3 board is a prime example of this trend. It is part of Seeed Studio's popular XIAO series, known for its ultra-small form factor.
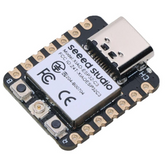
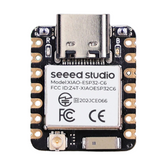
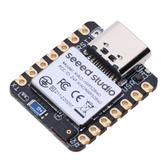
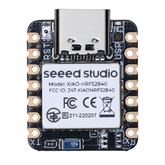
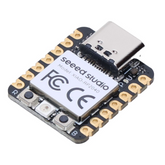
Imagine taking the power of the popular ESP32 chip—famous for its Wi-Fi and Bluetooth capabilities—and squeezing it onto a board that is barely larger than a postage stamp. That is precisely what the XIAO ESP32 C3 achieves, making it the smallest ESP32 board available.
Its minuscule size opens up a world of possibilities for projects where space is a critical constraint, such as wearables, tiny sensor nodes, and other compact Internet of Things (IoT) devices.
It’s designed for rapid prototyping and deployment, providing a powerful core for your next connected invention. Let’s take a detailed look into the features and capabilities of this board.

Key Features of XIAO ESP32 C3 Board
What makes this tiny board so special? It's not just about size; it's about the combination of features packed within it. The XIAO ESP32 C3 is built around Espressif’s ESP32-C3 chip, which itself is a modern and efficient piece of engineering. Understanding its key features helps to see why it stands out among IoT development boards.
- Powerful Single-Core Processor: At its heart is a 32-bit single-core RISC-V CPU, which can be clocked up to 160 MHz. While some larger ESP32s have dual cores, the RISC-V architecture is highly efficient, providing more than enough processing power for a vast range of IoT tasks, from reading sensors to managing wireless communications.
- Dual-Mode Wireless Connectivity: This is the headline feature. The board supports both 2.4GHz Wi-Fi and Bluetooth 5.0 (LE). This dual capability means your project can connect to a local network via Wi-Fi to send data to the cloud, or it can communicate directly with a smartphone or other devices using low-energy Bluetooth. This makes it an ideal low-power WiFi and Bluetooth microcontroller.
- Compact Form Factor: Measuring just 21 x 17.5mm, its "thumb-sized" design is its signature feature. This allows it to be embedded in projects where larger boards like a standard Arduino or even other ESP32 models would not fit.
- Rich Peripheral Interfaces: Despite its size, it doesn't skimp on connectivity options. It offers 11 digital I/O pins that can also be used for PWM. It also includes interfaces for I2C, UART, and SPI, allowing you to connect a wide variety of sensors, displays, and other modules. It also features 4 ADC pins for reading analog sensor data.
- Low Power Consumption: The ESP32-C3 chip is designed for efficiency. The board has a deep sleep mode that consumes as little as 44 μA, making it perfect for battery-powered applications where longevity is crucial. It can run for extended periods on a small battery, waking up only when it needs to transmit data.
Specifications of XIAO ESP32 C3
For those who want to dive deeper into the technical details, the specifications reveal the true potential of this ESP32 C3 development board. It combines a modern processor with ample memory and versatile I/O, making it a robust platform for both simple and complex projects.
- Processor: ESP32-C3, 32-bit single-core RISC-V running at up to 160 MHz.
- Wireless: Complete 2.4GHz Wi-Fi subsystem (802.11b/g/n) and Bluetooth 5.0 / Bluetooth mesh.
- Memory: 400KB of SRAM and 4MB of on-chip Flash memory.
- Interfaces: 1x I2C, 1x SPI, 2x UART.
- I/O Pins: 11x Digital I/O (PWM capable), 4x Analog I/O (ADC capable).
- Power: Input voltage (USB-C) is 5V. The board operates at 3.3V. It includes a charge controller for single-cell lithium batteries.
- Dimensions: 21 x 17.5 mm.
- Power Consumption: Deep sleep mode current is less than 44 μA.
Front & Back Components
A closer look at the Seeed Studio XIAO ESP32 C3 reveals a dense and thoughtfully laid-out design, with key components strategically placed for ease of use and functionality.
Front View

As seen in the diagram, the front side of the board is the primary interface. Dominating the top is the Type-C Interface, used for both power and programming the device.
Just beside it sits a tiny Charge LED, which indicates the status when a battery is being charged. The main ESP32-C3 chip is housed under a metal shield that bears the Seeed Studio logo and regulatory markings.
Towards the bottom, you'll find two crucial physical buttons: a Boot Button, used to put the device into bootloader mode for programming, and a Reset Button to restart the microcontroller's code.
Between these two buttons is a WiFi/BT ANTENNA CONNECTOR, allowing for an external antenna to be attached to boost wireless signal range.
Back View

Flipping the board over reveals several connection points designed for more advanced applications. A clearly marked BATTERY CONNECTOR with positive (+) and negative (-) pads allows you to directly solder a single-cell lithium battery, making it ideal for portable, power-conscious projects.
For developers needing deep-level debugging, a set of JTAG PADS (including MTDO, MTCK, MTDI, and MTMS) are available. In the center of the board, a THERMAL PAD is exposed.
This pad helps dissipate heat from the processor during intensive operations, contributing to the board's stability and performance. The back is also where you will find the printed labels for the GPIO pins, which is incredibly helpful when wiring your projects
Pinout Diagram of XIAO ESP32-C3
Understanding the pinout is fundamental to using any microcontroller, and the diagram provides a clear guide to the capabilities of each pin on the XIAO ESP32 C3. Here is a breakdown of the pins and their functions:

Power Pins: These pins are used to power the board and external components.
- 5V: Provides 5V power when the board is connected via USB.
- 3V3: The main 3.3V power supply regulated from the input voltage. This is the operating voltage for the ESP32-C3 chip.
- GND: The common ground connection for your circuit.
Analog Pins: These pins can read analog voltages, which is useful for sensors that have a variable output.
- A0 (GPIO2): Can be used as an analog input or as digital pin D0.
- A1 (GPIO3): Can be used as an analog input or as digital pin D1.
- A2 (GPIO4): Can be used as an analog input or as digital pin D2.
- A3 (GPIO5): Can be used as an analog input or as digital pin D3. It is important to note that this pin uses the ADC2 block, which may be unreliable when Wi-Fi is active. For critical analog readings, it is recommended to use pins connected to ADC1 (A0, A1, A2).
Digital Pins: These pins can be used as general-purpose inputs and outputs for tasks like reading buttons or controlling LEDs.
- D0 to D10: The board features 11 digital I/O pins, which are multiplexed with other functions like analog input or communication interfaces.
Communication Interface Pins: Specific pins are designated for standard communication protocols to connect with other devices, sensors, and modules.
- I2C (IIC): The standard two-wire interface for many sensors and displays.
- SDA (GPIO6): I2C Data line, corresponding to pin D4.
- SCL (GPIO7): I2C Clock line, corresponding to pin D5.
UART: Used for serial communication with a computer or other microcontrollers.
- RX (GPIO20): Receive line, corresponding to pin D7.
- TX (GPIO21): Transmit line, corresponding to pin D6.
SPI: A high-speed, three-wire communication protocol.
- SCK (GPIO8): Serial Clock, corresponding to pin D8.
- MISO (GPIO9): Master In Slave Out, corresponding to pin D9.
- MOSI (GPIO10): Master Out Slave In, corresponding to pin D10.
How to Set Up XIAO ESP32 C3 Board
Getting started with XIAO ESP32 C3 is straightforward, especially if you use the popular Arduino IDE. This mini XIAO ESP32 C3 tutorial will walk you through the initial setup process.
- Install Arduino IDE: If you don't already have it, download and install the latest version of the Arduino IDE from the official Arduino website.
- Add ESP32 Board URL: Open the Arduino IDE. Go to File > Preferences. In the "Additional Board Manager URLs" field, paste the following URL: https://raw.githubusercontent.com/espressif/arduino-esp32/gh-pages/package_esp32_index.json. Click OK.
- Install the ESP32 Board Package: Go to Tools > Board > Boards Manager. Search for "esp32" and install the package by Espressif Systems. This adds support for the entire family of ESP32 chips, including the C3 variant.
- Select the Board: Once the installation is complete, go to Tools > Board > ESP32 Arduino and select "XIAO_ESP32C3" from the list. This is a critical step, as it tells the IDE exactly what board you are using.
- Connect the Board: Connect your XIAO ESP32 C3 to your computer using a USB-C cable. Go to Tools > Port and select the COM port that corresponds to your board.
- Upload a Test Sketch: To verify that everything is working, open the classic "Blink" sketch from File > Examples > 01.Basics > Blink. Click the upload button (the right-pointing arrow). The IDE will compile and upload the code. If successful, the user-programmable LED on the board should start blinking. You have now successfully programmed your first microcontroller for IoT projects!
Popular Projects with XIAO ESP32 C3
The true test of a microcontroller is what you can build with it. The unique combination of small size, low power, and connectivity makes the XIAO ESP32 C3 perfect for a wide range of innovative projects. The ESP32 C3 performance is more than adequate for these tasks.
- Wearable Fitness Tracker: Thanks to its tiny size and low-power deep sleep mode, you can build a custom wearable. Combine it with an accelerometer to track steps and a small battery. Use Bluetooth LE to send the data to a custom smartphone app.
- Miniature Weather Station: Connect I2C sensors for temperature, humidity, and pressure. Program the board to wake up every few minutes, read the sensor data, and send it over Wi-Fi to a cloud service like ThingSpeak or a local server. This is a classic example of one of the many ESP32 C3 applications.
- Smart Home Remote: Create a tiny, battery-powered remote control for your smart home devices. Program buttons to send commands over Wi-Fi to systems like Home Assistant or MQTT brokers.
- Bluetooth LE Asset Tracker: Attach the board to an item you want to track, like your keys or a camera bag. Program it to act as a Bluetooth beacon. You can then use a phone to detect its proximity.
- Edge AI Sensor: For more advanced users, the board can be used for simple Edge computing with ESP32. You can run a lightweight machine learning model using a framework like TensorFlow Lite for Microcontrollers to perform tasks like keyword spotting or simple gesture recognition directly on the device.
Conclusion
From a highly specialized component to an accessible creative tool, the microcontroller has transformed how we interact with technology. The Seeed Studio XIAO ESP32C3 stands at the forefront of this evolution, embodying the principle of doing more with less.
Its potent combination of a RISC-V processor, dual-mode wireless connectivity, and rich peripherals, all packed into a thumb-sized form factor, makes it a uniquely powerful tool.
Whether you are a hobbyist building your first connected gadget, an engineer prototyping a compact IoT device, or a student exploring the future of embedded systems, this tiny board offers a gateway to turning your digital ideas into tangible, connected reality.


