Object Detection with Arduino Nicla Vision
Summary
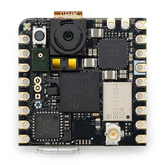
The Arduino Nicla Vision brings real-time object detection to the world of microcontrollers, a task once reserved for powerful computers.
This guide will walk you through creating your own object detection system using the Nicla Vision and Edge Impulse’s groundbreaking FOMO algorithm.
We’ll cover everything from data collection to deploying a trained model that can identify objects at impressive speeds.
This powerful combination makes it easier than ever to build smart, vision-enabled projects for any application you can imagine.

Object Detection with Arduino Nicla Vision
Before we move to the practical guide to object detection using the Arduino Nicla Vision, let’s first look at the working process and the algorithm that makes it all happen.
Object detection with the Arduino Nicla Vision is accomplished by creating and deploying a machine learning model, a process made accessible through the Edge Impulse platform and its FOMO (Faster Objects, More Objects) algorithm.
While traditional object detection models like YOLO or MobileNet-SSD are too large and computationally expensive to run effectively on low-power hardware, FOMO provides an innovative and highly efficient solution.
- The FOMO algorithm is engineered to run on devices with less than 200KB of RAM, making it a perfect match for the Nicla Vision's Cortex-M7 processor.
- Instead of drawing precise bounding boxes around objects, which is computationally intensive, FOMO divides the image into a grid and identifies the centroid (the central point) of each object within the grid cells. This drastically reduces the processing power needed.
- This streamlined approach allows the Nicla Vision to perform object detection at impressive speeds—up to 30 frames per second (fps) in some cases. This is significantly faster than traditional models, which might only achieve 1-2 fps on similar hardware
- Because it's built on a modified MobileNetV2 architecture and simplifies the output, a FOMO model is small enough to fit within the Nicla Vision's limited RAM and flash memory.
Step by Step Guide to Detect an Object with Arduino Nicla Vision
Here is a step-by-step guide to performing object detection with the Arduino Nicla Vision
1. Data Collection with OpenMV IDE
The first step is to create a dataset of images containing the objects you want to detect. Use the OpenMV IDE tool for this task.
- Prepare Your Objects: Gather the items you want to detect. For best results with FOMO, the objects should be of a similar size in the camera's frame and should not overlap.
- Connect to OpenMV IDE: Ensure your Nicla Vision has the OpenMV firmware installed and is connected to the OpenMV IDE.
- Capture Images: In the OpenMV IDE, use the Tools > Dataset Editor to create a new dataset. Run a script to capture images and save them to a folder on your computer. It is recommended to capture at least 50 images with varied angles, backgrounds, and lighting conditions to create a robust dataset.
2. Train the Model with Edge Impulse
With your dataset ready, the next step is to use the Edge Impulse Studio to train the object detection model.
- Create a Project: Log in to Edge Impulse, start a new project, and in the project settings, select Bounding boxes (object detection) as the project type. Set your target device as the Arduino Nicla Vision.
- Upload Data: In the Data acquisition tab, upload the images you collected. Edge Impulse can automatically split them into a training and a testing set.
- Label Your Objects: Go to the Labeling queue. For each image, you must draw bounding boxes around the objects you want to detect and assign a label (e.g., "wheel," "box"). This process teaches the model what to look for.
Create and Train the Model:
- Go to the Create impulse tab. Set your image size (e.g., 96x96 pixels) and add an Image processing block and an Object Detection (Images) learning block.
- In the learning block, Edge Impulse will automatically select the FOMO model.
- Start the training process. Edge Impulse will use your labeled images to train a neural network capable of detecting your chosen objects.
3. Deploy the Model to the Nicla Vision
Once training is complete and you are satisfied with the model's accuracy, you can deploy it to your device.
- Select Deployment Target: Go to the Deployment tab in Edge Impulse.
- Build Firmware: Select the OpenMV Library option. This will package your trained model and all necessary code into a single .zip file. Click the Build button to compile and download it.
4. Run Real-Time Object Detection
The final step is to load the model onto your Nicla Vision and run it.
- Load the Model: Unzip the downloaded file. You will find a trained model file (trained.tflite) and a labels file (labels.txt).
- Run Inference Script: The downloaded library also includes an example MicroPython script (e.g., nicla_vision_detection.py). Open this script in the OpenMV IDE.
- Run the script on your Nicla Vision. The board will begin capturing video, and you will see the live feed in the OpenMV IDE's Frame Buffer. The script will run the FOMO model on each frame, drawing a marker over any detected objects and identifying them by their label.
Conclusion
You have successfully built and deployed a real-time object detection model on the Arduino Nicla Vision.
By leveraging the power of the FOMO algorithm and the user-friendly Edge Impulse platform, you can create sophisticated machine vision applications with minimal hardware.
This process unlocks new possibilities for smart devices, from inventory management to automated monitoring.
Now that you understand the workflow, you are ready to start building your own custom vision solutions and bring your innovative ideas to life.


