Build Your Own Object Detection Using ESP32 Camera
Summary
Object detection is an exciting subject in computer vision that enables systems to recognize and identify items in images or movies. While this may appear complicated, advances in microcontrollers such as the ESP32-CAM make it easy to do rudimentary object detection on a budget. Whether you want to develop a security system, automate tasks, or simply learn about the ESP32-CAM, this project is a great place to start.
Episode EE06

Read Now: What is Esp32 Development Board
What You Will Need:
Before starting the project, make sure you have the required components:
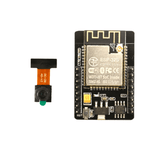
- ESP32-CAM Module: The project's key component is the CAM Module, which has a camera and Wi-Fi connectivity.
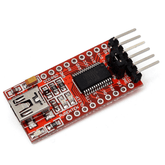
- FTDI programmer: Because the CAM lacks a built-in USB port, it must be programmed using an FTDI programmer.
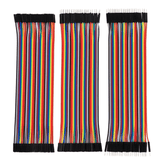
- Jumper wires: Used to link the FTDI programmer to the CAM.
- Breadboard: To make connections easier.
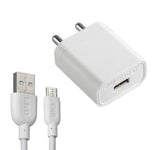
- Power source: A 5V power supply or battery.
- MicroSD Card (Optional): For storing photographs or videos taken with the CAM.
- Software: Includes the Arduino IDE with the ESP32 library installed, as well as extra libraries for object detection.
Do you want to make your own cam? Then read this blog Build Your Security Camera Using ESP32-CAM
Steps to Build an Object Detection Using ESP32 Camera Module:
Step 1: Setting Up the ESP32-CAM.
Install the Arduino IDE:
If you don't already have it, download and install the Arduino IDE.
To enable ESP32 board support, navigate to File > Preferences and enter the URL: https://dl.espressif.com/dl/package_esp32_index.json in the "Additional Board Manager URLs."
Then navigate to Tools > Board > Board Manager, search for "ESP32", and install the package.
Connecting the ESP32-CAM to the FTDI Programmer:

Use jumper wires to link the ESP32-CAM to the FTDI programmer:
- GND to GND.
- 5V to VCC.
- U0R to TX.
- U0T to RX.
- GPIO 0 to GND. (This switches the ESP32-CAM to programming mode.)
Connect the FTDI programmer to your computer using USB.
Select the correct board and port:
To pick the ESP32-CAM board in the Arduino IDE, go to Tools > Board > AI Thinker ESP32-CAM.
Select the appropriate COM port under Tools > Port.
Step 2: Install the Required Libraries
To identify objects, you must first install the required libraries in the Arduino IDE.
ESP32 Camera Library:
The ESP32 Camera library is required for communicating with the camera module. Install it using the Library Manager.
TinyML Library (optional):
If you're using machine learning models to recognize objects, install a TinyML library such as TensorFlow Lite for Microcontrollers.
HTTP Server Libraries:
Install the ESPAsyncWebServer and AsyncTCP libraries to enable video or picture streaming from the ESP32-CAM to your browser.
Get the ESP32-CAM at a special price!
Step 3: Capturing Images and Videos
Before digging into object detection, make sure your ESP32-CAM is working properly by collecting photos or streaming video.
Upload Example Code:
The ESP32 library comes with example codes for camera functionality. Open the CameraWebServer example (File > Examples > ESP32 > Camera > CameraWebServer), which allows you to stream video from your ESP32-CAM to a web browser.
Modify Wi-Fi Credentials:
In the example code, update the Wi-Fi credentials to match your network.
Upload the Code:
#include "esp_camera.h"
#include
#include "ESPAsyncWebServer.h"

// Replace with your network credentials
const char* ssid = "YOUR_SSID";
const char* password = "YOUR_PASSWORD";

// Create AsyncWebServer object on port 80
AsyncWebServer server(80);

// Camera model
#define CAMERA_MODEL_AI_THINKER // Has PSRAM
#include "camera_pins.h"

// Variables to store current and previous frame
camera_fb_t *fb_current = NULL;
camera_fb_t *fb_previous = NULL;

// Threshold for motion detection
const int motionThreshold = 25;

void setup() {
  // Start Serial Monitor
  Serial.begin(115200);

  // Connect to Wi-Fi
  WiFi.begin(ssid, password);
  while (WiFi.status() != WL_CONNECTED) {
    delay(1000);
    Serial.println("Connecting to WiFi...");
  }
  Serial.println("Connected to WiFi");

  // Start the camera
  camera_config_t config;
  config.ledc_channel = LEDC_CHANNEL_0;
  config.ledc_timer = LEDC_TIMER_0;
  config.pin_d0 = Y2_GPIO_NUM;
  config.pin_d1 = Y3_GPIO_NUM;
  config.pin_d2 = Y4_GPIO_NUM;
  config.pin_d3 = Y5_GPIO_NUM;
  config.pin_d4 = Y6_GPIO_NUM;
  config.pin_d5 = Y7_GPIO_NUM;
  config.pin_d6 = Y8_GPIO_NUM;
  config.pin_d7 = Y9_GPIO_NUM;
  config.pin_xclk = XCLK_GPIO_NUM;
  config.pin_pclk = PCLK_GPIO_NUM;
  config.pin_vsync = VSYNC_GPIO_NUM;
  config.pin_href = HREF_GPIO_NUM;
  config.pin_sccb_sda = SIOD_GPIO_NUM;
  config.pin_sccb_scl = SIOC_GPIO_NUM;
  config.pin_pwdn = PWDN_GPIO_NUM;
  config.pin_reset = RESET_GPIO_NUM;
  config.xclk_freq_hz = 20000000;
  config.pixel_format = PIXFORMAT_JPEG;

  // Init with high specs to pre-allocate larger buffers
  if(psramFound()){
    config.frame_size = FRAMESIZE_QVGA;
    config.jpeg_quality = 10;  //0-63 lower number means higher quality
    config.fb_count = 2;       //2 frame buffers for motion detection
  } else {
    config.frame_size = FRAMESIZE_CIF;
    config.jpeg_quality = 12;  //0-63 lower number means higher quality
    config.fb_count = 1;       //1 frame buffer for image processing
  }

  // Camera init
  esp_err_t err = esp_camera_init(&config);
  if (err != ESP_OK) {
    Serial.printf("Camera init failed with error 0x%x", err);
    return;
  }

  // Start streaming web server
  server.on("/", HTTP_GET, [](AsyncWebServerRequest *request){
    request->send(200, "text/plain", "ESP32-CAM Motion Detection");
  });

  // Route for video stream
  server.on("/video", HTTP_GET, [](AsyncWebServerRequest *request){
    request->send_P(200, "image/jpeg", fb_current->buf, fb_current->len);
  });

  server.begin();
}

void loop() {
  fb_current = esp_camera_fb_get();  // Capture current frame

  // Compare with the previous frame for motion detection
  if (fb_previous != NULL && fb_current != NULL) {
    int motion = detectMotion(fb_previous, fb_current);
    if (motion > motionThreshold) {
      Serial.println("Motion detected!");
      // You can add more actions here, like sending alerts
    }
  }

  // Swap frames
  if (fb_previous != NULL) {
    esp_camera_fb_return(fb_previous);  // Return frame buffer to avoid memory leak
  }
  fb_previous = fb_current;
  delay(100);  // Small delay between frames
}

// Basic motion detection by comparing pixel differences between frames
int detectMotion(camera_fb_t *frame1, camera_fb_t *frame2) {
  int diff = 0;
  for (int i = 0; i < frame1->len; i++) {
    diff += abs(frame1->buf[i] - frame2->buf[i]);
  }
  return diff / frame1->len;
}
Click on the upload button to flash the code to your ESP32-CAM. Remember to disconnect GPIO 0 from GND after uploading.
Check out How you can Build Your Own Alexa with ESP32.
Access the Stream:
Open the Serial Monitor to find the IP address of your ESP32-CAM. Enter the IP address in a browser to view the live video stream.
Step 4: Setting Up Object Detection
Now that your ESP32-CAM is streaming video, it's time to integrate object detection.
Load a Pre-Trained Model:
Object detection on microcontrollers usually involves using pre-trained models like MobileNet SSD, which are lightweight and optimized for small devices. You can use TensorFlow Lite models for this purpose.
Integrate the Model:
In your code, integrate the model and process the camera frames to detect objects. This usually involves converting the frames to grayscale or resizing them before feeding them into the model.
Detect Objects:
Once the model processes the frames, it will output the class of the detected object and its coordinates in the image. You can use this data to highlight the object in the stream or trigger actions.
Optimizing for Speed:
Object detection on the ESP32-CAM can be slow due to limited processing power. To optimize performance, consider reducing the frame rate or image resolution. You can also focus on detecting fewer objects or implementing a simpler detection algorithm.
Step 5: Testing and Improving
After uploading the object detection code to the ESP32-CAM, it’s time to test its performance.
Test Detection:
Place various objects in front of the camera and observe how accurately and quickly the ESP32-CAM detects them.
Debugging:
If the object detection isn't working as expected, use the Serial Monitor to debug the code and analyze the detection results.
Improvement Ideas:
If your object detection works but isn’t performing optimally, consider tweaking the model or exploring more efficient algorithms. You can also add features like saving detected objects' images to an SD card or sending notifications when certain objects are detected.
Also read, Building a Weather Station Using ESP32 Webserver
Conclusion
Congratulations! You've successfully implemented object detection on the ESP32-CAM. While this is just a basic introduction, there’s plenty of room for expansion. You can enhance this project by adding features like face recognition, integrating it with smart home devices, or even building a complete security system.
With its affordability and versatility, is an excellent tool for learning and implementing IoT projects. As you experiment further, you'll find endless possibilities to explore in the world of computer vision and object detection. Keep innovating, and enjoy your journey with the ESP32-CAM!


