How to Create a Digital Thermometer using Micro:Bit
Summary
A digital thermometer project using a BBC micro:bit is an excellent way to learn about sensors and programming while creating something useful for everyday life. If you've never worked with temperature sensors before, this blog will guide you through the entire process.
In this post, we will go step-by-step through creating your own digital thermometer project. Don't worry if you have never done sensor programming before. We will use simple drag-and-drop blocks, just like putting puzzle pieces together, to read temperature and display it clearly.

What Materials Are Needed for a Micro:Bit Digital Thermometer?
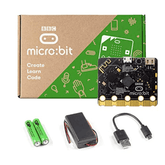
The wonderful thing about this digital thermometer project is that you need very few components. Here is a simple list of everything required:
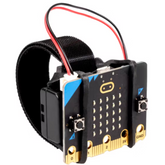
- A BBC micro:bit (V1 or V2): This is the small computer that will read temperature and display the results. The micro:bit V1 or micro:bit v2 has a built-in temperature sensor, so no extra sensors needed!
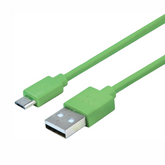
- A Micro-USB Cable: This is the same kind of USB cable used to charge many Android phones. It will connect the micro:bit to your computer for programming.
- A Computer with Internet Access: We need this to write our code using the online MakeCode editor. Any basic laptop or desktop will work perfectly.
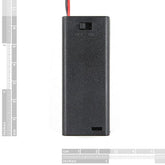
- A Battery Pack (Optional): This is not needed for programming, but if you want a portable thermometer that you can carry around, you will need this to power it without a computer.
How to Set Up a BBC Micro:bit?
Setting up the BBC micro:bit for digital thermometer temperature reading is very straightforward. Just follow these simple steps to get it ready for coding.
- Connect Your micro:bit: Take the micro-USB cable and connect one end to your micro:bit and the other end to a USB port on your computer. You should see some lights flash on the development board, and it will appear on your computer like a USB pen drive, usually called 'MICROBIT'.
- Open the MakeCode Website: On your computer, open your web browser (like Chrome or Firefox) and go to makecode.microbit.org. This is the free online code editor we will use. It's made by Microsoft and is perfect for beginners.
- Start a New Project: On the MakeCode homepage, click on the big purple box that says '+ New Project'. Give your project a descriptive name, like "Digital Thermometer," and click 'Create'. You will now see the coding screen with a virtual micro:bit on the left.
That's it. Your setup is complete and ready for temperature programming.
How Do You Program/ create a Digital Thermometer on the Micro:bit?

We will now tell our micro:bit development Board how to read the temperature and display it clearly. We will use the block editor to drag and drop the blocks I mention into the coding area.
Step 1: Display Temperature Continuously
The simplest way to create a digital thermometer is to show the temperature reading all the time.
- From the Basic category (blue), find the forever block. This block runs its code over and over again, which is perfect for a thermometer that should always show current temperature.
- From the Basic category, drag the show number block and place it inside the forever block.
- Now, from the Input category (pink), find the temperature (°C) block. This special block reads the micro:bit's built-in temperature sensor. Drag it and drop it into the show number block.
Your code should now look like this: The micro:bit will continuously read the temperature and display it on the LED screen.
Step 2: Add Temperature Units Display
Let's make our thermometer more professional by showing the temperature unit.
- From the Basic category, drag a show string block and place it below the show number block inside the forever loop.
- Click on the text area in the show string block and type "°C" (or just "C" if you prefer).
- Now add a pause block from the Basic category and set it to 1000 milliseconds (1 second).
This gives people time to read the temperature digital thermometer before it updates.
Step 3: Add Button Controls for Different Units
Let's add the ability to switch between Celsius and Fahrenheit using the micro:bit buttons.
- For Button A (Celsius): From the Input category, drag out an on-button A pressed block. Inside it, place a show number block with the temperature (°C) block, followed by a show string block displaying "°C".
- For Button B (Fahrenheit): Drag out an on-button B pressed block. For Fahrenheit, we need to convert from Celsius. From the Math category, create this formula: (temperature (°C) × 9 ÷ 5) + 32. Place this inside a show number block, followed by a show string block displaying "°F".
Step 4: Add a Startup Message
Let's make our thermometer user-friendly by showing instructions when it starts.
In the on-start block (already in your workspace), add these blocks:
- show string "THERMOMETER"
- pause 2000 milliseconds
- show string "A=°C B=°F"
- pause 2000 milliseconds
Step 5: Download the Code to Your Micro:bit
Your digital thermometer is complete! Click the big purple Download button at the bottom of the screen. A file will be saved to your computer. Drag this file from your Downloads folder onto the 'MICROBIT' drive. The light on the back of your micro:bit will flash, and once it stops, your thermometer is ready to use!
How Does the Micro:bit Know the Temperature?

You might be wondering how this temperature magic works. The micro:bit has a built-in temperature sensor that's actually part of the main processor chip. This sensor measures the temperature of the micro:bit itself, which gives us a pretty good estimate of the surrounding air temperature.
The digital thermometer sensor reads temperature in Celsius and can detect temperatures from about -25°C to +75°C (-13°F to +167°F). It's accurate to within about 4°C, which makes it great for learning and basic temperature monitoring, though not quite as precise as professional thermometers.
How Can I Improve My Digital Thermometer?
Now that you have a basic digital thermometer, here are some ideas to make it even better:
- Add Temperature Alerts: Use if blocks from the Logic category to check if the temperature is too hot (above 30°C) or too cold (below 10°C). Make the micro:bit show a warning icon or play a sound.
- Create a Min/Max Tracker: Use variables to store the highest and lowest temperatures recorded. Add button combinations (like A+B together) to display these values.
- Add Visual Temperature Scale: Instead of just numbers, create a visual bar graph using the plot bar graph block from Led category to show temperature as a rising or falling bar.
- Make Temperature Logging: Create a simple data logger that stores temperature readings over time, which you can view by scrolling through with buttons.
- Add Comfort Indicators: Program different LED patterns or icons to show if the temperature is comfortable, too hot, or too cold for different activities.
Conclusion
Congratulations! You have successfully built your very own digital thermometer project from scratch. You learned how to use the micro:bit's built-in temperature sensor, how to display real-time data, and how to create user-friendly controls with buttons. The best part about the micro:bit is that you can always modify the code and experiment with new features.


