Getting Started with Arduino Nicla Vision: A Beginner’s Guide
Summary
The Arduino Nicla Vision brings advanced machine vision and on-device AI to a compact, low-power form factor.
This powerful, standalone camera is designed to analyze images directly on the edge, making it ideal for everything from industrial automation to smart home projects.
It integrates a high-performance processor, a 2MP camera, and multiple sensors with Wi-Fi and Bluetooth connectivity.
This guide will provide you with a step-by-step introduction to setting up your Nicla Vision and developing your first intelligent vision applications.

What is the Arduino Nicla Vision
The Arduino Nicla Vision is a compact, standalone intelligent camera designed for processing and analyzing images directly on the device, a concept known as "edge AI".
It enables developers to integrate machine vision into various projects, from smart homes and gardens to industrial automation.
Features of the Arduino Nicla Vision
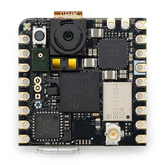
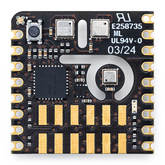
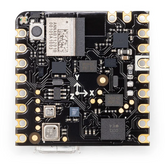
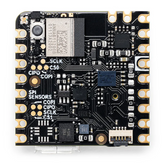
The Nicla Vision is packed with features in a very small form factor of just 22.86 x 22.86 mm. Its main components include:
- Powerful Processor: It is equipped with a dual-core STMicroelectronics STM32H747AII6 processor, which has an Arm Cortex-M7 core running at up to 480 MHz and a Cortex-M4 core running at up to 240 MHz. This allows it to run tasks in parallel, such as performing computer vision algorithms while managing other operations.
- Camera and Sensors: The board features a 2MP color camera that supports TinyML for on-device machine learning applications. It also includes a 6-axis motion sensor, an integrated microphone, and a distance sensor, enabling it to capture data about movement, sound, and distance.
- Connectivity: It offers both Wi-Fi and Bluetooth Low Energy connectivity, allowing it to communicate with other devices and send data to the Arduino IoT Cloud or other third-party services.
- Low Power Consumption: Despite its powerful components, the Nicla Vision is designed for low energy consumption and can be powered by a battery for standalone applications.
Arduino Nicla Vision Setup: Step-by-Step Guide
Step 1: Initial Hardware and Software Setup with Arduino IDE
The first step is to establish a connection with your Nicla Vision using the standard Arduino development environment. This is a mandatory step, even if your final project will use OpenMV or Edge Impulse.
1. Connect the Hardware: Use a micro-USB cable to connect your Nicla Vision to your computer.
2. Install Arduino IDE: If you haven't already, download and install the latest version of the Arduino IDE from the official Arduino website.
3. Install the Board Package:
- Open the Arduino IDE.
- Navigate to Tools > Board > Board Manager.
- In the search bar, type "Nicla Vision" and install the Arduino Mbed OS Nicla Boards package.
4. Configure the Board:
- Go to Tools > Board > Arduino Mbed OS Nicla Boards and select Arduino Nicla Vision from the list.
- Select the correct port under Tools > Port. It will typically be labeled with the board's name.
5. Test the Setup:
- Open the "Blink" example sketch by going to File > Examples > 01.Basics > Blink.
- Click the "Upload" button. After a few moments, the small green LED on your Nicla Vision should begin to blink, confirming that your setup is correct.
Step 2: Setting Up the OpenMV IDE for Computer Vision
For any project involving the camera, the OpenMV IDE is the recommended environment. It allows you to program the Arduino board in MicroPython and provides a live camera feed for easier development.
1. Update the Bootloader: Before the Nicla Vision can work with the OpenMV IDE, its bootloader must be updated.
- In the Arduino IDE, open the example sketch found at File > Examples > STM32H747_System > STM32H747_manageBootloader.
- Upload this sketch to your Nicla Vision.
- Open the Serial Monitor (Tools > Serial Monitor) and follow the on-screen instructions to complete the bootloader update.
2. Install OpenMV IDE and Firmware:
- Download and install the OpenMV IDE from the official OpenMV website.
- Put the Nicla Vision into bootloader mode by pressing the reset (RST) button on the board twice in quick succession. The green LED will start to fade in and out, indicating it's in bootloader mode.
- Open the OpenMV IDE and click the "Connect" icon in the bottom-left corner.
- A dialog box will appear, prompting you to install the latest OpenMV firmware. Click "OK" to proceed. The IDE will erase the board and flash the new firmware.
3. Run Your First Vision Script:
- Once the firmware is installed, the board will connect automatically.
- Click the green "Run" button to execute the default helloworld.py script.
- The "Frame Buffer" window in the OpenMV IDE should now display a live video stream from the Nicla Vision's camera, confirming your setup is ready for computer vision projects.
Step 3: Getting Started with Machine Learning using Edge Impulse
To build and deploy your own machine learning models (TinyML), you will use the Edge Impulse platform.
1. Install Edge Impulse: CLI You'll need Node.js and the Edge Impulse command-line interface (CLI). Open a terminal or command prompt and run:
npm install -g edge-impulse-cli
2. Flash the Edge Impulse Firmware:
- Download the latest pre-compiled Edge Impulse firmware for the Nicla Vision from the Edge Impulse documentation website.
- Follow the instructions provided to flash this firmware onto your board. This process is similar to flashing the OpenMV firmware.
3. Connect Your Device to Edge Impulse:
- With your Nicla Vision connected to your computer, open a terminal or command prompt.
- Run the command: edge-impulse-daemon.
- Follow the prompts to log in to your Edge Impulse account and select a project. Your device will be connected and will appear under the "Devices" tab in your Edge Impulse project.
4. Collect Data: You can now use the Edge Impulse dashboard to collect data directly from your Nicla Vision's camera and other sensors to train a machine learning model
Here’s a summary of the tools used:
| Tool | Primary Purpose | When to Use It |
|---|---|---|
| Arduino IDE | Initial setup, basic sketches, and bootloader management. | Always start here. Required for initial setup and for any non-vision projects. |
| OpenMV IDE | Developing computer vision applications using MicroPython. | For any project that involves capturing, processing, or analyzing images with the camera. |
| Edge Impulse | Building, training, and deploying machine learning models (TinyML). | When you want to add intelligence to your vision projects, such as object detection or image classification. |
Conclusion
The Arduino Nicla Vision powerfully merges computer vision with the accessible Arduino ecosystem.
This guide provides a clear, sequential path: start with the Arduino IDE for basic setup, advance to the OpenMV IDE for vision projects, and integrate machine learning with Edge Impulse.
By following these steps, you unlock the potential to build sophisticated, low-power smart devices that can see, analyze, and interact with the real world, paving the way for your innovative AI-driven projects.


