How to Connect BeagleBone Black to PC - Beginner’s Tutorial
Summary
If you’re a beginner looking to dive into the world of embedded systems, the BeagleBone Black is a fantastic place to start. It allows you to bring your electronics projects to life with a powerful yet affordable single-board computer.
This compact board is a favorite among hobbyists, engineers, and students for its flexibility and ease of use. In this beginner’s tutorial, we’ll walk you through everything you need to know about the BeagleBone Black, including its features, pinout, and, most importantly, how to connect it to your PC, whether you’re using Windows, macOS, or Linux.

What is BeagleBone Black?
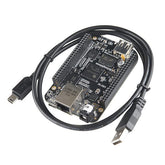
The BeagleBone Black is a low-cost, community-supported BeagleBone development board built around the ARM Cortex-A8 processor. It’s designed for rapid prototyping and learning, making it ideal for those just starting out with embedded systems or looking to experiment with hardware and software integration.
Unlike traditional microcontrollers, the beaglebone black microcontroller offers a full Linux operating system, giving you the power and flexibility of a minicomputer in a board that fits in your hand.
Features of BeagleBone Black

Here’s what makes the BeagleBone Black stand out:
- The BeagleBone Black is designed with a 1GHz ARM Cortex-A8 processor, giving users enough processing power to handle a wide range of tasks, from running a full Linux operating system to managing real-time hardware projects. This means you can smoothly multitask and experiment with more advanced applications without lag.
- With 512MB of DDR3 RAM, the board ensures that your programs run efficiently, whether you’re working on simple sensor readings or more complex automation projects. This memory capacity allows for smoother operation and better performance, especially when running multiple processes.
- The 4GB of onboard eMMC flash storage provides ample space to store your operating system, project files, and essential software. If you need more storage, you can easily expand it using a microSD card, making it flexible for larger projects or additional data.
- For connectivity, the BeagleBone Black offers USB client and host ports, Ethernet, and HDMI output. This variety allows you to connect the board to your PC, network it with other devices, and even hook it up to a monitor for a complete desktop experience. These options make it simple to interface with a range of peripherals and access the internet or local networks.
- The board features two 46-pin headers that support GPIO, PWM, UART, SPI, I2C, and more. This extensive expansion capability lets users connect sensors, motors, displays, and other hardware components, making the board highly adaptable for all kinds of electronics projects.
- It comes with Debian Linux pre-installed, so you can get started right out of the box. Plus, it supports other Linux distributions and even Android, giving you the freedom to choose the operating system that best fits your needs and preferences.
- Both the hardware and software of the BeagleBone Black are open source. This openness encourages community development and customisation, so you can tap into a wealth of shared resources, collaborate with others, and tailor the board to your unique projects.
Pinout Diagram

Based on the pin map table above and the color-coded system for the BeagleBone Black pinout, here's a detailed explanation of each keyword and its use:
GPIO (Light Green)
GPIO pins are the most versatile digital input/output pins on the BeagleBone Black. These pins can be configured as either inputs to read digital signals from sensors and switches, or as outputs to control LEDs, relays, and other digital devices. When writing a logical 1 to a GPIO pin, it outputs +3.3V, while writing 0 grounds the pin to 0V. GPIO pins are always available unless you specifically enable a shared interface that uses those particular pins.
AIN (Dark Green)
AIN stands for Analog Input, which are dedicated analog-to-digital converter (ADC) pins that remain always enabled. These pins allow you to read analog voltage levels from sensors like temperature sensors, light sensors, potentiometers, and other analog devices. The BeagleBone Black features seven analog input pins (AIN0 through AIN6) that can measure voltage levels and convert them to digital values for processing.
PWM (Light Brown)
PWM (Pulse Width Modulation) pins generate square wave signals with variable frequency and duty cycle, making them perfect for controlling servo motors, dimming LEDs, and motor speed control. The BeagleBone Black has eight PWM output pins that can operate at frequencies from 0 Hz up to 400 MHz. These pins are disabled by default and must be enabled using the enablePWM function before use.
UART (Pink)
UART pins provide serial communication capability, allowing the BeagleBone Black to communicate with other devices using asynchronous serial protocols. These pins come in pairs - one for transmitting (TX) and one for receiving (RX) data - and are commonly used for connecting GPS modules, Bluetooth modules, and other serial devices. UART interfaces are disabled by default and require enabling using the enableSerialPort function.
SPI (Light Blue)
SPI (Serial Peripheral Interface) pins enable high-speed, full-duplex serial communication with peripheral devices like displays, sensors, and flash storage. The SPI interface uses four main pins: SCLK for clock signal, MOSI for master output, MISO for master input, and chip select pins for device selection. SPI is disabled by default and requires enabling using the enableSPI function, with support for data speeds up to 32 MHz.
I2C (Dark Brown)
I2C (Inter-Integrated Circuit) pins facilitate communication with low-speed peripheral devices using a two-wire protocol consisting of SDA (serial data) and SCL (serial clock) lines. This interface is perfect for connecting multiple devices like ADCs, LCDs, and sensors to the same bus, with each device having a unique 7-bit address. The BeagleBone Black features two I2C buses with built-in 1.8kΩ pull-up resistors, and I2C1 is enabled by default while I2C2 requires manual enabling.
How to Connect BeagleBone Black to PC

How to Connect BeagleBone Black to Windows
- Connect the Board: Plug the BeagleBone Black into your Windows PC using the USB cable.
- Wait for Detection: Windows should recognize the board as a new device. If prompted, allow Windows to search for drivers.
- Install Drivers: If the board isn’t recognized, open the BeagleBone storage device that appears in ‘My Computer’ and run the driver installer found in the ‘Drivers’ folder (for example, Bone_D64.exe for 64-bit systems).
- Disable Driver Signature Enforcement (if needed): On Windows 8/10, you may need to temporarily disable driver signature enforcement to install unsigned drivers.
- Access the Board: Open your browser and go to http://192.168.7.2 to access the BeagleBone’s web interface or use an SSH client like PuTTY to connect to 192.168.7.2 with username debian and password temppwd.
- Ready to Go: You can now program and interact with your beaglebone development board from your Windows PC.
How to Connect BeagleBone Black to macOS
- Connect the Board: Attach the BeagleBone Black to your Mac using the USB cable.
- Wait for Boot: The board should appear as a new network device.
- Install Drivers (if prompted): macOS usually includes the necessary drivers, but if not, download and install them from the BeagleBone official site.
- Network Configuration: Your Mac should assign the board an IP address (usually 192.168.7.2). You can check this in System Preferences > Network.
- Access via Browser: Open Safari or Chrome and go to http://192.168.7.2 to access the board’s interface.
- SSH Access: Open Terminal and type ssh debian@192.168.7.2 (default password: temppwd).
- Internet Sharing (Optional): To share your Mac’s internet with the board, enable Internet Sharing in System Preferences > Sharing, and select the BeagleBone interface as the target.
How to Connect BeagleBone Black to Linux
- Connect the Board: Plug the BeagleBone Black into your Linux PC using the USB cable.
- Auto-Detection: Most modern Linux distributions will recognize the board and load the necessary drivers automatically.
- Check Network Device: Use ifconfig -a to see if a new network interface (often usb0 or eth1) has appeared.
- Assign IP Address: If needed, set your PC’s IP to 192.168.7.1 and the BeagleBone to 192.168.7.2 for direct communication.
- SSH to Board: Open a terminal and type ssh debian@192.168.7.2 (password: temppwd)
- Ready to Develop: You now have full access to your beaglebone black microcontroller and can start coding or configuring hardware.
Conclusion
The BeagleBone Black is a versatile and beginner-friendly platform that opens up a world of possibilities in embedded systems and electronics. Whether you’re a student, hobbyist, or engineer, connecting your beaglebone board to your PC is the first step toward building exciting projects. With its rich features, extensive pinout, and support for multiple operating systems, the BeagleBone Black stands out as a top choice for anyone looking to explore hardware development.


