Getting Started with FlySky FS-i6: Complete Overview
Summary
I remember unboxing my very first FLYSKY FS-i6 transmitter, heart racing at the thought of finally leveling up my drone hobby.
If you are anyone who is curious about what makes this transmitter one of the most popular choices for beginners and hobbyists alike, you’re in the right place.
In this walkthrough, I’ll guide you step-by-step through everything you need to know: from pinouts and wiring, to channel settings, binding, calibration, and even firmware updates. So grab your transmitter, and let’s get started!

Introduction to FlySky FS-i6 Transmitter and Receiver
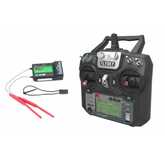
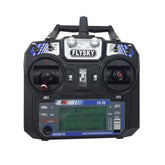
The FLYSKY FS-i6 transmitter and receiver system is a total game-changer in the world of affordable radio controllers.
Think of it as the Swiss Army knife for RC pilots. Engineered for reliability and customizable control, it provides seamless command over drones, fixed-wing planes, helicopters, and even boats.
What makes the FLYSKY FS-i6 transmitter and receiver so appealing is its blend of ease-of-use and feature-rich performance.
For beginners, this digital proportional radio control system offers a low learning curve, but even seasoned pilots appreciate the extendable features and dependable 2.4GHz signal—no more worrying about interference on a crowded flying field!
Key Functions and Features

I’ll never forget the moment I discovered just how much the FLYSKY FS-i6 transmitter packs under the hood. It would be wrong to consider it as just a remote; it’s a sophisticated control hub. Here’s what you’ll find once you dig deeper:
- 2.4GHz AFHDS 2A Technology: Delivers a strong, interference-resistant link between you and your model.
- 6 Channels: Tailored for drones and planes needing up to six channels out of the box.
- Ergonomic LCD Interface: A crisp, backlit screen makes adjusting settings on the fly a breeze.
- Multi-Model Memory: Store up to 20 different model profiles—swap your drone, quad, or plane with a few button presses.
- Telemetry Readout: Get real-time battery and signal voltage feedback, a big plus for flights that push your range.
- Trainer Port: Connect with a second radio for teacher/student training or easy simulator setup.
- Extensive Switch and Knob Selection: Perfect for custom mixes, gear retracts, or gimbal control—flexibility is the game here.
These features make the FLYSKY FS-i6 transmitter and receiver an excellent RC radio controller for beginners, but also powerful enough for advanced tinkerers
Specifications of FS-i6 Transmitter & FS-iA6B Receiver
I’m a bit of a spec's nerd, so getting into the details here just feels right. If you’re the type who likes to know exactly what’s under the hood before you dive in, this is your section. Trust me, a quick look at the numbers will show there’s more to this combo than meets the eye.
You can always check your flysky fs-i6 manual for detailed specs, but these basics cover most use-cases
FlySky FS-i6 Transmitter Specifications
- Model Type: Glider/Heli/Airplane
- Band: 142
- 2.4GHz System: AFHDS 2A and AFHDS
- Code Type: GFSK
- DSC Port: PS2
- Output: PPM
- Charger Port: No
- ANT length: 26mm*2 (dual antenna)
- Online update: Yes
- Certificate: CE0678, FCC
- Model Memories: 20
- Channel Order: Aileron-CH1, Elevator-CH2, Throttle-CH3, Rudder-CH4, Ch 5 & 6 open to assignment to other functions.
FS-iA6B Receiver Specifications
- Channel: 6
- Frequency Range: 2.4055–2.475 GHz
- Band Width Number: 140
- Transmitting Power: ≤ 20 dBm
- RF Receiver Sensitivity: 105 dBm
- 2.4G Mode: The second generation of an enhanced version of the automatic FM digital system
- Encoding: GFSK
- Antenna Length: 2 x 26 mm (dual antenna)
- Input Power: 4.0 – 8.4 VDC (2A)
- Dimension: 47 x 26.2 x 15 mm
- Weight: 14.9 gm
- Data Acquisition Interface: Yes
- Model Type: Airplane / Glider / Helicopter
- Compatible Transmitter: Compatible with FS-i4, FS-i6, FS-i10, FS-GT2E, FS-GT2G
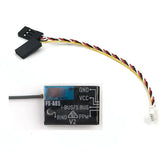
FLYSKY FS-iA6B Receiver Pinout
All those pins and ports on the receiver can be a little intimidating at first—been there! But once you get your bearings, it’s like decoding a secret map to your next RC adventure. Let me walk you through the pinout, so the “mystery box” inside your kit becomes your new best friend.

Receiver Pinout Breakdown
On the FS-iA10B receiver—the beefier sibling of the humble FS-iA6B—each group of pins is clearly labeled for streamlined building or troubleshooting. Here’s what you need to know:
CH1 to CH10 (Servo Channels and Aux):
These are the standard servo or ESC output pins. Each channel is used to control a specific surface or auxiliary function:
- CH1: Often used for aileron servo.
- CH2: Elevator servo.
- CH3: Throttle (for ESC or throttle servo).
- CH4: Rudder servo.
- CH5-CH10 (Aux 1 to Aux 6): Extra channels for gimbals, landing gear, camera servos, or custom accessories.
Each channel port typically has three pins—signal, 5V (VCC), and ground—so ensure you connect the servo’s signal wire to the right pin (usually the top row, but always double check your receiver’s label or flysky fs-i6 manual).
Battery Input (B/VCC and Switch):
- The receiver is powered by the battery through these pins. Install a simple inline switch here to power your receiver on or off safely.
i-BUS Serial Interface:
- This port is a game-changer for modern multirotor and flight controller setups. Rather than running a bundle of wires for each channel, you can carry all outputs and telemetry data with a single cable—making your build cleaner and reducing connection errors.
PPM Output:
- This lets you send all channel signals down a single wire, perfect for many flight controllers that support PPM input.
i-BUS Sensor Port:
- Reserved for additional telemetry or remote sensor modules, helping you collect live data on battery voltages, signal strength, GPS, and more.
Antenna Ports:
- Dual antennas ensure a robust, long-range 2.4GHz connection and reduce dropouts—even in complex environments.
Status Indicator:
- An onboard LED lets you monitor binding status and signal health at a glance.
FlySky FS-iA6B Receiver Connections: How to Wire It Right
I won’t lie—wiring up your first receiver feels a lot like a puzzle you really want to get right on the first try. But don’t worry; once you get the hang of where things go, it’s actually pretty satisfying to see everything light up and respond exactly how you want
Follow these steps:
- Slot each servo or ESC connector into the matching channel pins (signal wires usually on the top row; refer to the flysky fs-i6 manual for exact orientation).
- Use the iBus/PPM port when using modern flight controllers for cleaner wiring—less clutter in your build!
- Always keep the receiver’s antennas away from motors or metal parts to minimize interference.
How to Bind FlySky FS-i6 with FS-iA6B Receiver

Now, let’s get you flying! Binding is the handshake between your transmitter and receiver. Here’s how I’ve done it:
- Insert the Bind Plug: Pop the bind plug into the “B/VCC” pins on the receiver.
- Power the Receiver: Supply power (usually from an ESC’s BEC). You’ll see a rapid blinking light.
- Bind Key Hold: On your FLYSKY FS-i6 transmitter, hold the BIND button, and power it up while still holding the button.
- Watch for Confirmation: The LED on the receiver will stop blinking and stay solid—meaning you’re successfully bound!
- Remove Bind Plug and Re-power: Take out the bind plug, power cycle the receiver, and your FLYSKY FS-i6 transmitter and receiver are ready to roll.
This is your basic FlySky FS-iA6B receiver binding process and works for both first-timers and experienced users who are switching models.
Step-by-Step FlySky FS-i6 Setup with a Drone or RC Plane

Here’s a practical, foolproof FlySky FS-i6 transmitter tutorial to get you started with a FlySky FS-i6 setup with drone or fixed-wing:
- Bind Transmitter and Receiver: As shown above.
- Connect Servos/ESCs: Plug your ESCs or servos into the receiver channels per the pinout diagram.
- Power Everything Up: Start with transmitter switched on, then the receiver.
- Flight Controller Integration: If you’re using a flight controller, connect using the iBus or PPM signal.
- Control Check: Move all sticks and toggle switches; verify correct surfaces/outputs move on your drone/plane.
- Reverse Channels/Adjust Endpoints as Needed: Use transmitter menus to reverse or subtrim channels for precise response.
Don’t forget: refer to FS-i6 channel settings in your flysky fs-i6 manual for advanced mixing or setup tricks.
FlySky FS-i6 Channel Settings and Customization

Now it’s all about tailoring the controls. One of the joys of the FLYSKY FS-i6 transmitter is tweaking the channels just how you want:
- Servo Reverse: Instantly reverse channel directions right from the settings.
- End Points/Subtrims: Fine-tune servo movement ranges for precise travel.
- Mixing Functions: Perfect for elevons, V-tails, or specialty aircraft.
- Aux Switches: Assign switches/pots on the FLYSKY FS-i6 transmitter to gear, lights, or gimbals.
All these customizations can be adjusted via the LCD menu. Spend time here; the difference in flight feel is worth it. Customizing FS-i6 channel settings makes your flying experience uniquely yours.
FlySky FS-i6 Throttle Calibration Made Easy
Throttle calibration is crucial for synced endpoints between your transmitter and ESCs. Here’s my method for FlySky FS-i6 throttle calibration:
- Remove Props for Safety
- Turn on Transmitter; Set Throttle Stick to Max.
- Power ESC with Receiver Connected: The ESC will beep for high throttle detection.
- Drop Throttle to Minimum: ESC beeps confirming calibration.
- Power Down Everything: Restart and test throttle response—smooth and full range!
Proper calibration ensures your motor arm/disarm points and throttle output match, avoiding “dead zones” or random cutoffs.
Failsafe Setup on the FlySky FS-i6 Transmitter
The failsafe feature is your drone’s best insurance policy against lost signal mishaps. Setting up a proper FlySky FS-i6 failsafe setup means peace of mind:
- Navigate to ‘Fail Safe’ in Transmitter Menu.
- Select Each Channel: Assign failsafe position (e.g., throttle to minimum, aileron/elevator/rudder to neutral).
- Test: Power off your transmitter while the receiver is on—confirm it goes to predetermined failsafe positions.
Remember, a correctly set failsafe can prevent flyaways and keep your model (and everyone else) safer.
How to Connect FlySky FS-i6 to PC via USB or Dongle
Got simulator fever? You can use your FLYSKY FS-i6 as a PC controller—a great way to practice and crash virtually (no repairs necessary!). Here’s how I connect my transmitter for How to connect FlySky FS-i6 to PC:
- Buy a Trainer USB/Audio Dongle: Available online or with some kits.
- Plug into Trainer Port: Connect the cable to the back of your transmitter.
- Install RC Simulator Software: ClearView, DRL, or others.
- Calibrate Controller in Software: Follow on-screen prompts for stick calibration.
This simple connection mirrors real-world flight controls and helps new pilots build muscle memory before taking off for real.
FlySky FS-i6 Firmware Update Guide
Keeping your FLYSKY FS-i6 up-to-date unlocks bug fixes and sometimes even new functionality. If you’re after an FS-i6 firmware update or want to upgrade channels, here's my routine:
- Get the Right Data Cable: Usually comes with the transmitter.
- Plug Into PC: Use the PS2-style DSC port.
- Download Official Firmware: Or community upgrades (proceed with caution—check compatibility!).
- Run Firmware Tool: Follow on-screen steps; don’t disconnect during the process.
- Restart and Verify: Check if FS-i6 firmware update succeeded. Always back up your settings!
Updating the flysky fs-i6 firmware is a great way to extend the life and features of your transmitter.
Understanding Mode 1 vs Mode 2 on the FlySky FS-i6

Everyone’s got a preference, and the FLYSKY FS-i6 transmitter makes switching easy. Here’s what you need to know about Mode 1 vs Mode 2 transmitter setups:
- Mode 1: Throttle on right, elevator on left (favored in some regions).
- Mode 2: Throttle on left, elevator on right (most common globally, and default on many FLYSKY FS-i6 transmitters).
Changing modes is as simple as toggling a menu option and, if needed, physically swapping stick springs inside the transmitter.
Conclusion
After logging countless hours with the FLYSKY FS-i6 transmitter and receiver system, I can honestly say this setup is a standout example of how user-friendly design and performance can truly go hand in hand in the RC world.
From the moment you start exploring the pinouts to customizing channel mixes or updating firmware, it’s clear FlySky’s team made a deliberate effort to support both RC newcomers and experienced pilots looking for reliability and flexibility.
What really makes the FLYSKY FS-i6 transmitter shine is how approachable it feels—even for those just starting their RC journey. The learning curve is gentle, but there’s enough depth to keep you experimenting and improving your skills flight after flight.
Whether you’re wiring up your very first drone, diving into FS-i6 channel settings for the perfect stick feel, or binding yet another receiver for your growing fleet, each step reinforces a sense of confidence and control.
If you’re considering your first or next transmitter and receiver kit, you can check out these products at Robocraze—where authenticity, support, and quality are top priority. In a hobby powered by precision, those details always matter most.


