ACEBOTT 4WD Smart Car Kit Full Setup Tutorial
Summary
After exploring many robotics kits and programming with various educational kits, I can confidently say that the intersection of hands-on learning and cutting-edge technology has never been more accessible.
When I first encountered the ACEBOTT 4WD Smart Car Kit, I immediately recognized its potential to bridge the gap between theoretical programming concepts and practical robotics applications.
The world of educational robotics has evolved dramatically, transforming what once required expensive specialized equipment into achievable projects that students and hobbyists can complete in their spare time.
In this comprehensive walkthrough, we'll dive deep into setting up and programming your own intelligent vehicle using the ACEBOTT 4WD Smart Car Kit.
Whether you're an educator looking to enhance your STEM curriculum, a student exploring robotics and programming concepts, or a maker wanting to create an impressive autonomous vehicle, this guide will take you through every step of building a fully functional smart car from unboxing to advanced programming features.
What is the ACEBOTT 4WD Smart Car Kit?
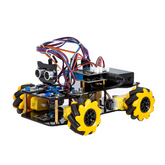
The ACEBOTT 4WD Smart Car Kit is a packaged collection of components that immediately impressed with its educational focus and comprehensive documentation.
It's a legitimate robotics learning platform built around the ESP32 microcontroller that happens to deliver professional-grade capabilities while remaining accessible to beginners.
What strikes you first is the intelligent design philosophy. The kit includes everything needed for a complete robotics education experience, from basic assembly to advanced programming concepts.
The ESP32-based controller provides WiFi connectivity, powerful processing capabilities, and extensive GPIO options that rival much more expensive educational platforms.
At a fraction of the cost of traditional robotics education systems, it delivers functionality that supports everything from basic motor control to complex autonomous navigation.
This DIY car project for beginners has gained significant traction among educators, students, and makers who need something between simple toy robots and professional development platforms. It represents the sweet spot where educational effectiveness meets practical affordability.
Key Features and Components
After spending considerable time working with the ACEBOTT 4WD Smart Car Kit, I've discovered features that genuinely enhance the learning experience, and components that demonstrate why this platform has become so popular in educational settings.
The ESP32 microcontroller at its core provides powerful processing capabilities with built-in WiFi functionality, but it's the thoughtful component selection and educational materials that really set this kit apart.
- Complete Component Set: The DIY car kit includes a precision-machined chassis, four high-quality DC motors with wheels, ultrasonic sensor for distance measurement, infrared sensors for line following, servo motor for sensor positioning, and comprehensive electronic components. Every component serves multiple educational purposes while maintaining professional build quality.
- Comprehensive Programming Support: The ACECode programming environment provides both block-based and text-based programming options, making it accessible to beginners while supporting advanced users. The visual programming interface eliminates syntax barriers while teaching fundamental programming concepts.
- Multiple Control Options: Students can control their vehicles through infrared remote, smartphone app, or web interface, demonstrating different communication protocols and user interface concepts. This RC car kit assembly supports various interaction methods that mirror real-world applications.
- Advanced Sensor Integration: The ultrasonic sensor enables obstacle avoidance functionality, while infrared sensors support line following robot car capabilities. Additional sensors can be integrated to expand functionality and learning opportunities.
- WiFi Connectivity: Built-in wireless capabilities enable remote monitoring, control, and programming updates without physical connections. This feature supports modern IoT concepts while simplifying development workflows.
- Educational Documentation: The comprehensive manual provides step-by-step assembly instructions, programming tutorials, and robotic project ideas that progress from basic concepts to advanced applications.
Hardware Assembly Guide
Now, let’s get to work. The first thing that we have to do is assemble the car itself. This hands-on assembly process will provide you with invaluable insights into mechanical engineering principles, electronic system integration, and the satisfying experience of creating something tangible from individual parts. Before we dive into the step-by-step construction, ensure you have a clean workspace, adequate lighting, and all the tools mentioned in your kit's documentation ready for what will be an educational and rewarding build experience.
- Unbox all parts and confirm they are all available

- Carefully remove the protective paper from all acrylic components

2. Assembling the Motors
- Attach the M brackets to the motors. The M bracket should be installed on the side of the motor with the convex point

- Repeat this process for all four BO motors
- Install the motor in the chassis
- Note, when installing the motors onto the main chassis, ensure that the convex points on the motors are facing outwards

- Install all four motors.
3. Attaching the ESP32 Car Shield
- Identify the front and back of the acrylic upper board
- Secure the ESP32 car shield to the upper board using screws. Note that only three screws are needed for this step
- Use a cross sleeve to reinforce the screws

- Install the servo motor, making sure the motor shaft faces forward

- Attach the servo rock arm from the servo package to the motor

- Install the ultrasonic sensor

- Make sure it is pointed directly forward

- Install the battery holder, being mindful of the cable's orientation as shown in the video

- Connect the battery holder's cable to the controller board
- Pass the connecting wires from the modules on the lower acrylic plate through the round hole on the upper acrylic plate

- Install the Acrylic Plates

- At the end of this process, it should look like:

- Next, install the four wheels, making sure they are installed correctly according to the video. The gear on the four wheels should be "crossed"

- Before powering on the device, double-check all cable connections to prevent any damage to the modules and the controller board
- Use cable ties to organize and secure the wires.
Software Setup and Programming Environment
The ACEBOTT 4WD Smart Car Kit surprised me with how streamlined the entire software setup process was. Here’s how to do it:
- ACECode Installation: Download and install the ACECode programming environment from the official ACEBOTT website. The installation wizard handles driver installation, environment configuration, and example program setup automatically. This eliminates the dependency conflicts that plague many embedded development platforms.
- ESP32 Configuration: The programming environment automatically detects and configures the ESP32 controller board when connected via USB. Board detection and port configuration happen seamlessly without manual driver installation or complex setup procedures.
- Programming Language Options: ACECode supports both visual block-based programming for beginners and traditional text-based coding for advanced users. The seamless transition between programming styles allows students to progress naturally from visual concepts to professional development practices.
- Library and Extension Installation: Essential libraries for motor control, sensor reading, and communication protocols come pre-installed and configured. Additional extensions can be added through the built-in package manager as projects become more sophisticated.
- Example Program Collection: The environment includes numerous example programs that demonstrate everything from basic LED control to complex autonomous navigation algorithms. These examples serve as both learning tools and starting points for custom development.
- Upload and Testing Process: Programs upload to the controller board through a simple click interface, with automatic compilation and error checking that helps students identify and fix problems quickly.
Simple Programs to get started
Getting your hands dirty with actual programming is where the real excitement begins, and where you'll discover just how much educational value the ACEBOTT 4WD Smart Car Kit delivers.
I've worked with enough educational robotics platforms to know that this phase usually involves more troubleshooting than learning, but this experience felt genuinely different.
Within minutes of uploading my first program, I was already planning advanced autonomous features instead of fighting basic motor control issues.
- Connect the Smart Car to your computer
- Open the ACECode App
- Click the Extension Button

- Select the Smart Car Extension

- The Smart Car Option will now be available

- Now, let’s program some functionalities.
- Drag and drop the following blocks. Depending on the kind of behavior you want.

- Finally, upload the code to your car.
Conclusion
The ACEBOTT 4WD Smart Car Kit represents a significant advancement in educational robotics platforms that successfully bridges the gap between beginner-friendly accessibility and professional-grade capabilities.
By combining proven ESP32 technology with thoughtful educational design and comprehensive software support, it eliminates traditional barriers to robotics education while maintaining the depth needed for serious learning outcomes.
The comprehensive documentation, supportive software environment, and extensive feature set create long-term educational value that justifies the investment for both individual learners and institutional programs.
Whether used for independent exploration or structured curriculum delivery, the ACEBOTT 4WD Smart Car Kit delivers the combination of engagement, education, and technical depth that defines effective STEM learning experiences.


