Which Arduino Board to Buy
Summary
Are you looking for to get started with electronics or programming? Then Arduino could be exactly what you need! In this blog, we'll look at what Arduino is, its essential features, and what you can accomplish with it.
We also present examples of Arduino projects, describe several types of Arduino boards, and offer advice on how to choose right Arduino board for your purposes.
Finally, we discuss some of the benefits of using Arduino and offer a selection of the finest Arduino boards to get you started. This site contains something for everyone, from beginners to seasoned makers!
Confused about Which Arduino Board to Buy for your next project, then this blog will help you
What is Arduino?
Arduino is an open-source prototype platform with simple hardware and software.
It is made up of a circuit board with a microcontroller and other supporting components mounted on it, which can be programmed using Arduino IDE (Integrated Development Environment), which is used to write and upload computer code to the physical board.
read more : What is Arduino UNO
Key Features of Arduino are:
- Arduino boards can read analog or digital input signals from different sensors and turn them into an output such as activating a motor, turning LED on/off, connecting to the cloud, and many other actions.
- You can control your board functions by sending a set of instructions to the microcontroller on the board via Arduino IDE.
- Unlike most previous programmable circuit boards, Arduino does not need an extra piece of hardware (called a programmer) to load a new code onto the board. A USB cable is all you'll need.
- Additionally, the Arduino IDE uses a simplified version of C++, making it easier to learn to program.
- Finally, Arduino provides a standard form factor that breaks the functions of the microcontroller into a more accessible package.
What can you do with Arduino?
Arduino is an incredibly versatile microcontroller board with limitless possibilities for developing electronic applications and prototypes.
Some of the most basic Arduino projects are listed below. This will give you an idea of what you can do with Arduino.
read more : Arduino Uno Pin Diagram: A Complete Guide
Projects using Arduino:
1. Obstacle avoidance system: An infrared sensor can help a mobile robot avoid obstacles.
2. Humidity and Temperature Measurement System: The temperature and humidity of the surrounding air may be shown on an LCD or OLED screen using the DHT11 sensor's measurements.
3. LED Blinkies: By mixing several LEDs, you may create a wide variety of patterns.
4. Keypad inputs: Entering information and using it to take action. Examples include turning on and off a buzzer, relay, LED, and other devices.
5. Ultrasonic sensor-based distance measurement: An Arduino board and an ultrasonic sensor are used to calculate the distance between two objects.
6. Building an Automatically Controlled Moving Robot: As previously stated, it is possible to create an automatically controlled moving robot.
7. Basic pulse oximeter monitoring system: A MAX30100 sensor may be used to build a pulse oximeter that measures blood Spo2 levels and heart rate.
8. Use a WiFi module to connect to the internet and share data: DHT11 sensor data may be published to websites like "Thingspeak" and viewed from anywhere in the world over the Internet.
9. Home automation system: With an HC-05 Bluetooth module and a relay, you may create a rudimentary home automation system.
read our blog on arduino sensors, It covers their working principle, applications, and examples, emphasizing their significance for both beginners and experienced Arduino enthusiasts.
Different types of Arduino Boards:
- Arduino UNO
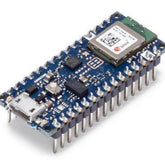
- Arduino NANO
- Arduino Leonardo
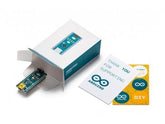
- Arduino Micro
- Arduino NANO Every
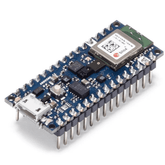
- Arduino NANO 33 BLE
- Arduino NANO 33 BLE Sense
- Arduino MKR Zero
- Arduino UNO Wifi
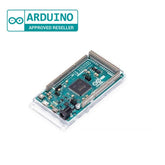
- Arduino Due
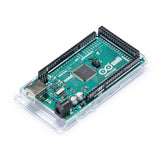
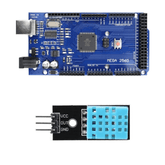
- Arduino Mega 2560
- Arduino MKR VIDOR 4000
- Arduino Zero
- Arduino NANO 33 IoT
- Arduino MKR Fox 1200
- Arduino MKR WAN 1300
- Arduino GSM 1400
- Arduino MKR Wifi 1010
- Arduino NANO RP2040 Connect
How do you select the right Arduino Board for your needs:
The qualities listed below might help you choose the best Arduino board for your project.
By looking at the metrics listed below and comparing them to the Arduino board's specifications.
1. Microcontroller (MCU): The microcontroller is the Arduino board's heart (or, more accurately, brain).
The Arduino development board consists of many AVR microcontrollers, each with its own set of capabilities and features.
2. Input Voltage: This is the board's recommended input voltage range. The board's maximum voltage may be somewhat higher, but this is a safe operating range.
It's worth mentioning that many of the Li-Po batteries we sell are 3.7V, thus any board with an input voltage of at least 3.7V may be powered directly by one of our Li-Po battery packs.
3. System Voltage: This is the system voltage of the board, i.e. the voltage at which the microcontroller is running.
This is an important factor for shield compatibility since the logic level is now 3.3V instead of 5V.
You always want to be sure that whatever outside system with which you're trying to communicate can match the logic level of your controller.
4. Clock Speed: This is the operating frequency of the microcontroller and is related to the speed at which it can execute commands.
Although there are rare exceptions, most ATmega microcontrollers running at 3V will be clocked at 8MHz, whereas most running at 5V will be clocked at 16MHz.
5. Digital I/O: The term "Digital I/O" refers to the number of digital input/output (I/O) pins on an Arduino board.
All of these can be used as inputs or outputs. Some provide PWM, while others are serial connection ports.
6. Analog Inputs: This section describes how many analog input pins are available on the Arduino board.
Analog pins are labeled "A" followed by a number and are used to read analog data via the ATMega chip's analog-to-digital converter (ADC).
Analog inputs can also be adjusted to provide additional digital I/O if necessary!
7. PWM: This indicates the number of digital I/O pins that may generate a pulse-width modulation (PWM) signal.
The PWM signal functions similarly to an analog output, allowing your Arduino to "fake" an analog voltage between zero and system voltage.
8. UART: The UART is the maximum number of independent serial communication lines that your Arduino board can handle.
On most Arduino boards, digital I/O pins 0 and 1 serve as serial transmission and reception pins. Certain Arduino boards include multiple UARTs, enabling you to use more than one serial port simultaneously.
Although every Arduino board has at least one UART for programming, not all of them have accessible pins broken out.
9. Flash Space: Flash space is the amount of program memory on the chip that you may use to save your drawing.
The bootloader consumes just a small amount of this RAM, therefore not all of it is available.
10. Programming Interface: This is where you connect the Arduino board to your computer and program it.
Some boards include a USB cable, so all you have to do is connect them to a USB cable. Others have a header that can be used to connect an FTDI Basic breakout or an FTDI Cable.
Other boards, such as the Mini, separate the serial pins for programming, but they are not pin-compatible with the FTDI header. Any Arduino board with a USB jack has additional hardware that allows for serial to USB conversion.
Some boards, however, don't need additional hardware because their microcontrollers have built-in USB support.
11. WiFi-enabled: Some Arduino boards include built-in WiFi modules. Arduino boards are ideal for IoT applications.
If you're using IoT technology in your application and need to communicate data over the Internet, you may use Arduino IoT boards such as Arduino WiFi.
read more : What is the microcontroller used in Arduino UNO?
Advantages of Arduino:
1. Coordination between software and hardware, simplicity, and compactness are the most important advantages of Arduino.
When we talk about a development board, we expect it to have all of the features needed to set it up and program it.
In most Arduino boards, you can connect a USB cable to the Arduino board and transfer a program written in the Arduino IDE at the push of a button.
2. The Arduino platform is also compatible with all operating systems, unlike most AVR programming software, which is only compatible with Windows and Linux.
3. The wide variety of Arduino boards and considering the needs of different users is another advantage of Arduino.
Although Arduino has over 40 different boards, only a small number of them are well-known. For a complete list of boards, go to the Arduino website.
4. Growing resources and libraries is another advantage point for Arduino. Arduino has evolved from an electronic board thanks to open-source hardware and software.
Thousands of developers using Arduino all over the world daily, design new modules and hardware for Arduino and provide their libraries with plenty of examples to users free of charge.
This extensive training and content allow you to complete your project in the shortest amount of time possible by combining codes and libraries.
5. In addition to Arduino’s communication with various modules and sensors alongside various libraries for said modules, many libraries are connecting Arduino boards to other software such as MATLAB, Simulink, LabVIEW, and even Python.
Don't worry if you don't know how to program in C or if you need to use a computer environment for your project; Arduino makes it simple.
Today you can buy an Arduino UNO for a very low cost, and easily connect sensors and operators to your computer. No longer will you need expensive DAQ cards.
6. Besides all the positive capabilities of Arduino hardware and software, we should mention that the Arduino platform is somewhat educational and essentially one of the goals of this platform was to educate electronics to all.
This platform's educational goals include an easy-to-use programming language, numerous tutorials, libraries, and the Arduino Forum community for sharing information and supporting Arduino users.
read more : Arduino Hacks we bet you did not know!
Disadvantages of Arduino:
1. Having mentioned the advantage of Arduino, it is only fair to mention some of its disadvantages.
A variety of boards with different applications can be a strength for Arduino, but the lack of an inclusive board that incorporates most of these features can be a disadvantage.
DUE has the best features of all Arduino boards; however, its size is inconvenient for many projects. Furthermore, this board lacks Wi-Fi and Bluetooth capabilities.
In general, Arduino's products haven't paid much attention to IoT and industrial boards. In terms of price, Arduino boards designed for these fields cannot compete with competitors.
2. Another drawback of Arduino is that it can only use older, less powerful ARM processors.
For Arduino's prejudice in using AT processors, less power consumption and faster processing speed have been sacrificed.
The production of the 101 board could be a watershed moment for Arduino, ushering in a new generation of processors.
3. Another disadvantage of Arduino is that most boards do not have the same USB port and do not use all of the microcontroller's features.
List of best Arduino Boards:
All of the Arduino boards are excellent for their respective applications; however, the "How do you select the right board for your application?" section can help you choose the best Arduino boards.
Below are some of the commonly used boards for certain applications
For entry-level:
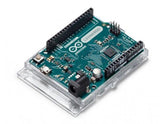
1. Arduino UNO
The Arduino UNO offers versatile digital and analog I/O pins for connecting a variety of components.
It supports ISP download for advanced customization and provides dual voltage output options (5V/3.3V) for compatibility.
With convenient power options via USB or external supply (5V-9V DC), it's ideal for hobbyists, educators, and professionals alike, enabling easy prototyping and experimentation.
If you're deciding to buy Arduino Uno original instead of other options, there are several good reasons to consider.
Choosing the original Uno means you're getting something reliable and well-made, with consistent performance and durability.
You also get access to official support, lots of helpful guides, and a big community. Plus, it works perfectly with everything in the Arduino world, like shields, libraries, and other accessories.
Read our blog smart dustbin project using Arduino detailing Arduino code for making a smart dustbin, the required components, and the circuit diagram for making an automatic dustbin project.

|
Microcontroller |
ATmega328P |
|
USB connector |
USB-B |
|
Built-in LED Pin |
13 |
|
Digital I/O Pins |
14 |
|
Analog input pins |
6 |
|
PWM pins |
6 |
|
UART |
Yes |
|
I2C |
Yes |
|
SPI |
Yes |
|
I/O Voltage |
5V |
|
Input voltage (nominal) |
7-12V |
|
DC Current per I/O Pin |
20 mA |
|
Power Supply Connector |
Barrel Plug |
|
Clock speed |
16 MHz |
|
USB-Serial Processor |
ATmega16U2 16 MHz |
|
Memory |
2KB SRAM, 32KB FLASH, 1KB EEPROM |
|
Weight |
25 g |
|
Dimensions |
53.4 mm x 68.6 mm |
2. Arduino NANO

|
Microcontroller |
ATmega328 |
|
USB connector |
Mini-B USB |
|
Built-in LED Pin |
13 |
|
Digital I/O Pins |
14 |
|
Analog input pins |
8 |
|
PWM pins |
6 |
|
UART |
RX/TX |
|
I2C |
A4 (SDA), A5 (SCL) |
|
SPI |
D11 (COPI), D12 (CIPO), D13 (SCK). Use any GPIO for Chip Select (CS). |
|
I/O Voltage |
5V |
|
Input voltage (nominal) |
7-12V |
|
DC Current per I/O Pin |
20 mA |
|
Clock speed |
16 MHz |
|
Memory |
2KB SRAM, 32KB flash 1KB EEPROM |
|
Weight |
5gr |
|
Dimensions |
18 mm x 45 mm |
read more : What is Arduino Nano
3. Arduino Micro

|
Microcontroller |
ATmega32u4 |
|
USB connector |
Micro USB |
|
Built-in LED Pin |
13 |
|
Digital I/O Pins |
20 |
|
Analog input pins |
12 |
|
PWM pins |
7 |
|
UART |
Yes |
|
I2C |
Yes |
|
SPI |
Yes |
|
I/O Voltage |
5V |
|
Input voltage (nominal) |
7-12V |
|
DC Current per I/O Pin |
10 mA |
|
Clock speed |
6 6MHz |
|
Memory |
2.5KB SRAM, 32KB FLASH, 1KB EEPROM |
|
Weight |
13 g |
|
Dimensions |
18 mm x 48 mm |
4. Arduino Leonardo

|
Microcontroller |
ATmega32u4 |
|
USB connector |
Micro USB (USB-B) |
|
Built-in LED Pin |
13 |
|
Digital I/O Pins |
20 |
|
Analog input pins |
12 |
|
PWM pins |
7 |
|
UART |
Yes |
|
I2C |
Yes |
|
SPI |
Yes |
|
I/O Voltage |
5V |
|
Input voltage (nominal) |
7-12V |
|
DC Current per I/O Pin |
10 mA |
|
Power Supply Connector |
Barrel Plug |
|
Clock speed |
16 MHz |
|
Memory |
2.5KB SRAM, 32KB FLASH, 1KB EEPROM |
|
Weight |
20 g |
|
Dimensions |
53.3 mm x 68.6 mm |
Enhanced featured boards:
1. Arduino NANO 33 BLE

|
Microcontroller |
nRF52840 |
|
Operating Voltage |
3.3V |
|
Input Voltage (limit) |
21V |
|
DC Current Per I/O Pin |
15 mA |
|
Clock Speed |
64MHz |
|
CPU Flash Memory |
1MB (nRF52840) |
|
SRAM |
256KB (nRF52840) |
|
EEPROM |
none |
|
Digital Input / Output Pins |
14 |
|
PWM Pins |
all digital pins |
|
UART |
1 |
|
SPI |
1 |
|
I2C |
1 |
|
Analog Input Pins |
8 (ADC 12 bit 200 samples) |
|
Analog Output Pins |
Only through PWM (no DAC) |
|
External Interrupts |
all digital pins |
|
LED_BUILTIN |
13 |
|
USB |
Native in the nRF52840 Processor |
|
Dimensions |
45 mm x 18 mm |
|
Weight |
5 gr (with headers) |
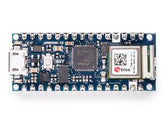
2. Arduino NANO 33 BLE sense

|
Microcontroller |
nRF52840 |
|
Operating Voltage |
3.3V |
|
Input Voltage (limit) |
21V |
|
DC Current Per I/O Pin |
15 mA |
|
Clock Speed |
64MHz |
|
CPU Flash Memory |
1MB (nRF52840) |
|
SRAM |
256KB (nRF52840) |
|
EEPROM |
none |
|
Digital Input / Output Pins |
14 |
|
PWM Pins |
all digital pins |
|
UART |
1 |
|
SPI |
1 |
|
I2C |
1 |
|
Analog Input Pins |
8 (ADC 12 bit 200 ksamples) |
|
Analog Output Pins |
Only through PWM (no DAC) |
|
External Interrupts |
all digital pins |
|
LED_BUILTIN |
13 |
|
USB |
Native in the nRF52840 Processor |
|
IMU |
LSM9DS1 |
|
Microphone |
MP34DT05 |
|
Gesture, Light, Proximity |
APDS9960 |
|
Barometric Pressure |
LPS22HB |
|
Temperature, Humidity |
HTS221 |
|
Dimension |
45 mm x 18 mm |
|
Weight |
5 gr (with headers) |
For IoT based projects:
1. Arduino NANO 33 IoT

|
Microcontroller |
SAMD21 Cortex®-M0+ 32bit low power ARM MCU |
|
Radio Module |
u-blox NINA-W102 |
|
Secure Element |
ATECC608A |
|
Operating Voltage |
3.3V |
|
Input Voltage (limit) |
21V |
|
DC Current Per I/O Pin |
7 mA |
|
Clock Speed |
48MHz |
|
CPU Flash Memory |
256KB |
|
SRAM |
32KB |
|
EEPROM |
none |
|
Digital Input / Output Pins |
14 |
|
PWM PINS |
11 (2, 3, 5, 6, 9, 10, 11, 12, 16 / A2, 17 / A3, 19 / A5) |
|
UART |
1 |
|
SPI |
1 |
|
I2C |
1 |
|
Analog Input Pins |
8 (ADC 8/10/12 bit) |
|
Analog Output Pins |
1 (DAC 10 bit) |
|
External Interrupts |
All digital pins (all analog pins can also be used as interrput pins, but will have duplicated interrupt numbers) |
|
LED_Builtin |
13 |
|
USB |
Native in the SAMD21 Processor |
|
IMU |
LSM6DS3 |
|
Dimensions |
45 mm x 18 mm |
|
Weight |
5 gr (with headers) |
2. Arduino UNO WiFi

|
Microcontroller |
ATmega4809 |
|
Operating Voltage |
5V |
|
Input Voltage (Recommended) |
7 - 12V |
|
Digital I/O Pins |
14 — 5 Provide PWM Output |
|
PWM Digital I/o Pins |
5 |
|
Analog Input Pins |
6 |
|
DC Current Per I/O Pin |
20 mA |
|
DC Current For 3.3V Pin |
50 mA |
|
Flash Memory |
48 KB (ATmega4809) |
|
SRAM |
6,144 Bytes (ATmega4809) |
|
EEPROM |
256 Bytes (ATmega4809) |
|
Clock Speed |
16 MHz |
|
Radio Module |
u-blox NINA-W102 |
|
Secure Element |
ATECC608A |
|
Inertial Measurement Unit |
LSM6DS3TR |
|
LED_BUILTIN |
25 |
|
Dimension |
68.6 mm x 53.4 mm |
|
Weight |
25 g |
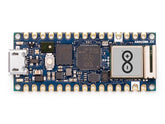
3. Arduino NANO RP2040 Connect

|
Microcontroller |
Raspberry Pi® RP2040 |
|
USB Connector |
Micro USB |
|
Built-in LED pin |
13 |
|
Digital I/O Pins |
20 |
|
Analog Input Pins |
8 |
|
PWM Pins |
20 (Except A6, A7) |
|
External Interrupts |
20 (Except A6, A7) |
|
Wi-Fi |
Nina W102 uBlox module |
|
Bluetooth® |
Nina W102 uBlox module |
|
Secure Element |
ATECC608A-MAHDA-T Crypto IC |
|
IMU |
LSM6DSOXTR (6-axis) |
|
Microphone |
MP34DT05 |
|
UART |
Yes |
|
I2C |
Yes |
|
SPI |
Yes |
|
Circuit operating voltage |
3.3V |
|
Input Voltage (VIN) |
5-21V |
|
DC Current Per I/O Pin |
4 mA |
|
Clock Speed |
133 MHz |
|
Memory |
16MB Flash IC |
|
Nina W102 Ublox Module Memory |
448 KB ROM, 520KB SRAM, 16MB Flash |
|
Weight |
6 g |
|
Dimensions |
18 mm x 45 mm |
read more : 5 Arduino Project Ideas – Expert Level
Conclusion:
In this blog, we have gone through, what is Arduino? What can you do with Arduino? Types of Arduino boards.
How do you select the right board for your needs? Advantages and Disadvantages of Arduino Boards and List of best Arduino boards.
So by this information, we can select the best Arduino board that will be suitable for our applications.
If you appreciate our work don't forget to share this post and leave your opinion in the comment box.
Please do check out other blog posts about Arduino Interfacing ACS712 with Arduino , Arduino Interfacing with Ultrasonic Sensor , LED Interfacing with Arduino , Interfacing GSM Module with Arduino , Interfacing MAX30100 Pulse Oximeter with Arduino , IR Sensor Interfacing with Arduino , How to connect ZMPT101B to Arduino and How to use Buzzer with Arduino.
Make sure you check out our wide range of products and collections (we offer some exciting deals!)
Excerpt
Frequently Asked Questions
1. Which is the most popular Arduino board?
The most popular Arduino board is Arduino UNO. This is very much suitable for beginners, who are starting their embedded systems journey.
2. What is better Arduino Uno or Nano?
Both are better in different applications. Arduino UNO is not a breadboard-friendly board. While Arduino NANO can be inserted into the breadboard.
3. Which is the best Arduino board for beginners?
Arduino UNO or Arduino NANO will be best for beginners.
4. Which is the Best Arduino board for robotics?
Arduino Mega 2560 may be better for robotics projects. As it contains more GPIO pins as compared to other Arduino Boards.
5. Why is Arduino used for?
Arduino is an electronics platform that is not restricted and can be used to create various devices and projects. It comprises a circuit board that can be programmed physically, and software which transforms inputs from sensors, buttons, and other sources into outputs like LED activation or motor activation. People who like to tinker, students, hobbyists, and makers often use Arduino because it provides a simple way to build interactive objects that can get input from sensors and switches. Its hardware and software are easy to comprehend, making it a helpful tool for DIY projects and learning electronics.
6. Why Arduino is used in IoT?
Arduino is a popular choice for IoT because it includes a microcontroller that processes data and helps IoT systems function properly. It can be programmed multiple times, allowing for various IoT projects to be created simply by changing the code. Arduino boards are also easier to program and maintain compared to other options, as they are relatively simple and robust. Many people use Arduino in various IoT applications, and there is a comprehensive solution called the Arduino IoT Cloud for creating IoT projects. Overall, Arduino collects data from sensors/devices to send to the internet and receives data from the internet to control motors/actuators in IoT applications.
7. Which software is used for Arduino?
Arduino Software (IDE) refers to the software used to program Arduino devices such as the Arduino Uno. This integrated development environment (IDE) is optimized for Arduino boards, allowing users to create, build, and upload code to the hardware. It has a user-friendly interface and a code editor with syntax highlighting and error checking. The Arduino IDE also contains a library manager that allows you to quickly manage additional libraries, as well as a serial monitor for debugging and communication with your Arduino board.
8. Is Arduino a free software?
Yes, Arduino software is open-source and free to use. This program is free to modify, share, and use for any purpose. The Arduino IDE is released under an open-source license, reflecting the Arduino community's philosophy that open-source software helps everyone.
9. Is Arduino safe for kids?
Yes, Arduino is safe for kids. It runs at low voltages, so that it safe to use, and it offers a simple method for kids to learn about electronics, coding, and technology. The large community offers support and resources for project-based learning. But adult supervision is recommended, especially with advanced projects.
10. What is a sketch in Arduino?
A sketch in Arduino is a program or code that is especially intended to execute on an Arduino board. It is the code that you upload to the board, allowing the microcontroller to carry out your commands. A sketch typically has two main functions: setup(), which handles initial configuration, and loop(), which contains the core program logic that runs continually.
11. Does NASA use Arduino?
Yes, NASA has used Arduino in various projects, particularly for prototyping and educational purposes. Arduinos help in developing scientific instruments, as they're cost-effective and versatile. The ease of use makes them suitable for educational programs and experiments in robotics and electronics.
12. Is ESP32 better than Arduino?
ESP32 can be considered better than Arduino in certain aspects, such as built-in Wi-Fi and Bluetooth capabilities, which facilitate IoT projects. It offers more processing power and memory, making it ideal for complex applications. However, Arduino's simplicity and extensive community support make it a great choice for beginners.
13. Which Arduino should I buy as a beginner?
The Arduino UNO is the best choice for beginners. It's user-friendly, has plenty of online resources, and is compatible with many shields and modules. The UNO provides a solid foundation for understanding electronics and coding, making it perfect for initial projects.
14. Is Arduino UNO 5V or 12V?
The Arduino UNO operates at 5V. While it can accept a voltage input of 7-12V through its barrel jack, the onboard regulator converts it to 5V for the microcontroller and I/O pins. Always ensure your components are compatible with the 5V supply.
15. Can Arduino Uno run Python?
Arduino UNO doesn't natively run Python, but you can use MicroPython or CircuitPython with compatible boards. For the Uno, you can control it via Python on your computer using libraries like PySerial, allowing you to send commands and read data over the serial connection.
16. Is Arduino better than Raspberry Pi?
Arduino and Raspberry Pi serve different purposes. Arduino is great for real-time control and simple tasks, while Raspberry Pi is suited for complex computing and multitasking projects. If you're looking for basic robotics or electronics, choose Arduino; for applications needing an operating system, opt for Raspberry Pi.


