Best 5 Fun Arduino Project Ideas for Beginners - Explore Bluetooth Controlled Car, Anti Theft Alarm & More.
Summary
What if you could drive a car using your phone, build your own security system, or even shake hands with a robot? Sounds crazy, right? Well, with Arduino, it’s totally possible—and easier than you think!
In this blog, we’re diving into five insanely cool DIY Arduino project ideas for beginners that will make you feel like a tech wizard. You’ll learn how to build a Bluetooth-controlled car, an anti-theft alarm, a touch-free water dispenser, and more—all while having a blast!
No boring theory here—just pure hands-on fun! So, grab your Arduino and let’s start building some epic tech magic!
Project 1: Bluetooth Controlled Car Arduino Project
Transform your basic Arduino project into a fun, remote-controlled car with Bluetooth! With the Bluetooth-controlled car, you can control a car wirelessly from your smartphone, giving you the power to drive it around just by tapping your phone screen.

Concept and Purpose
This Arduino project introduces basic Bluetooth communication with Arduino. By pairing an Arduino with a Bluetooth module, you can send commands to control the car’s movements. It’s perfect for beginners looking to understand how to control motors and communicate with devices wirelessly.
Components and Tools Needed
- Arduino Uno
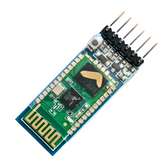
- Bluetooth HC-05/HC-06
- DC Motors (2)
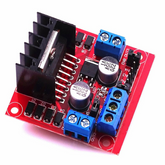
- L298N Motor Driver
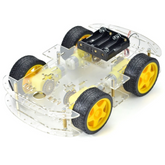
- Car Chassis
- Smartphone with Bluetooth app (Arduino Bluetooth Controller)
Get the Complete DIY Car Chassis Kit!
Look out our various collections of Original Arduino products.
Connections:
- Connect DC Motors to the L298N Motor Driver.
- Wire the HC-05 Bluetooth Module to TX and RX pins of Arduino.
- Connect motor driver pins to Arduino GPIO pins for motor control.
Code
#include
AF_DCMotor motor1(1); // Motor 1
AF_DCMotor motor2(2); // Motor 2
char command; // Variable to hold incoming Bluetooth command
void setup() {
 Serial.begin(9600); // Initialize serial communication with Bluetooth
}
void loop() {
 if (Serial.available() > 0) {
 command = Serial.read(); // Read Bluetooth command
 if (command == 'F') {
 motor1.setSpeed(255);
 motor1.run(FORWARD);
 motor2.setSpeed(255);
 motor2.run(FORWARD);
 } else if (command == 'B') {
 motor1.setSpeed(255);
 motor1.run(BACKWARD);
 motor2.setSpeed(255);
 motor2.run(BACKWARD);
 } else {
 motor1.setSpeed(0);
 motor1.run(RELEASE);
 motor2.setSpeed(0);
 motor2.run(RELEASE);
 }
 }
}
The Bluetooth Controlled Car Arduino project offers a fun, hands-on way to explore wireless communication and motor control with Arduino. It’s a great introduction to robotics and IoT!
Project 2: Anti-Theft Alarm using Arduino
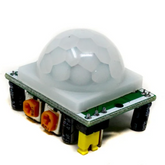
This Anti Theft Alarm system makes use of a PIR motion sensor and Arduino to create a motion-triggered alarm, perfect for securing your home or workspace.

Concept and Purpose
Using a PIR motion sensor, the system can detect motion within a specific range and trigger an alarm if movement is detected, and this Arduino security system project provides a security solution for your surroundings.
Components and Tools Needed
Connections:
- Connect the PIR sensor to the digital pin of Arduino.
- Attach the buzzer and LED to Arduino for feedback.
Code for Anti-Theft Alarm
int pirPin = 7; // PIR sensor connected to digital pin 7
int buzzer = 8; // Buzzer connected to pin 8
int ledPin = 13; // LED connected to pin 13
void setup() {
 pinMode(pirPin, INPUT);
 pinMode(buzzer, OUTPUT);
 pinMode(ledPin, OUTPUT);
}
void loop() {
 int motion = digitalRead(pirPin); // Read motion sensor
 if (motion == HIGH) {
 digitalWrite(buzzer, HIGH); // Turn buzzer ON
 digitalWrite(ledPin, HIGH); // Turn LED ON
 } else {
 digitalWrite(buzzer, LOW); // Turn buzzer OFF
 digitalWrite(ledPin, LOW); // Turn LED OFF
 }
}
The Anti-Theft Alarm project provides a basic security system that’s easy to build and customize. It’s a great way to learn about sensors and how to use them with Arduino.
Project 3: Automatic Water Dispenser
Create a touch-free water dispenser using Arduino, perfect for hygiene-conscious individuals! This system automatically dispenses water when an object is detected nearby using an ultrasonic sensor.

Concept and Purpose
This Arduino project for engineering students introduces proximity sensing and automation. The ultrasonic sensor detects the presence of a hand or object, triggering the dispenser to release water, making it a convenient and hygienic solution for water dispensing.
Components and Tools Needed
Connections:
- Connect the HC-SR04 ultrasonic sensor to Arduino for distance measurement.
- Control the water pump via a relay module.
Code for Automatic Water Dispenser
#include
#define TRIGGER_PIN 12
#define ECHO_PIN 11
#define MAX_DISTANCE 200
NewPing sonar(TRIGGER_PIN, ECHO_PIN, MAX_DISTANCE);
int pumpPin = 7; // Pin for the water pump relay
void setup() {
 pinMode(pumpPin, OUTPUT);
 digitalWrite(pumpPin, LOW); // Ensure pump is off at start
}
void loop() {
 int distance = sonar.ping_cm();
 if (distance < 10 && distance > 0) { // Object detected within 10 cm
 digitalWrite(pumpPin, HIGH); // Turn water pump ON
 delay(3000); // Dispense for 3 seconds
 digitalWrite(pumpPin, LOW); // Turn water pump OFF
 }
 delay(1000);
}
The Automatic Water Dispenser is an innovative, hygiene-friendly solution. This Arduino IoT project is also a great way to explore sensors, actuators, and home automation with Arduino!
Project 4: Servo Motor Controller
In this cool Arduino project, you’ll learn how to control the position of a servo motor using Arduino, a fundamental skill for building robots and automation systems.

Concept and Purpose
By using PWM (Pulse Width Modulation) signals, this project helps you control a servo motor’s angle precisely. It's perfect for beginners learning motor control.
Components and Tools Needed
- Arduino Uno
- Servo Motor
- External Power Source (for the motor)
Connections
- Connect the servo motor signal wire to an Arduino PWM pin.
Code for Servo Motor Controller
#include
Servo myServo;
int angle = 0;
void setup() {
 myServo.attach(9); // Connect servo to pin 9
}
void loop() {
 for (angle = 0; angle <= 180; angle++) {
 myServo.write(angle); // Move the servo to the angle
 delay(15); // Wait for the servo to reach the position
 }
 for (angle = 180; angle >= 0; angle--) {
 myServo.write(angle); // Move the servo back
 delay(15); // Wait for the servo to reach the position
 }
}
The Servo Motor Controller Arduino project is perfect for mastering motor control and is widely applicable in robotics and automation.
Project 5: Automatic Hand Shake
This fun Automatic Shake Hand project is the best Arduino robot project in 2025. It uses a servo motor to simulate a robotic handshake. Impress your friends by making a robot that can shake hands with you!

Concept and Purpose
Using a servo motor and simple Arduino programming, this project demonstrates robotic movement and basic servo control.
Components and Tools Needed
- Arduino Uno
- Servo Motor
- Push Button (optional for triggering handshake)
Connections:
- Attach the servo motor to the Arduino PWM pin for control.
- (Optional) Use a button to trigger the handshake.
Code for Automatic Hand Shake
#include
Servo myServo;
int pos = 0;
void setup() {
 myServo.attach(9); // Attach servo to pin 9
}
void loop() {
 for (pos = 0; pos <= 90; pos++) { // Move servo to 90 degrees
 myServo.write(pos);
 delay(500);
 }
 for (pos = 90; pos >= 0; pos--) { // Move servo back to 0 degrees
 myServo.write(pos);
 delay(500);
 }
}
The Automatic Shake Hand project is a creative way to introduce yourself to servo control and basic robotics. It’s a great way to start building simple automation systems!
Conclusion
Level up your DIY game with these 5 fun Arduino projects! Whether you’re controlling a car with Bluetooth or learning about servo motors, these IoT projects using Arduino will help you understand the basics of electronics, robotics, and automation. Let us know which one you're going to try first!
Excerpt
Frequently Asked Questions
1. What is the best Arduino project for beginners?
The Bluetooth Controlled Car is one of the best Arduino projects for beginners. It introduces wireless communication using Bluetooth, motor control with an L298N motor driver, and basic Arduino programming. This project helps beginners understand how to control a robot wirelessly using a smartphone, making it both fun and educational. It also lays the foundation for more advanced robotics and IoT projects.
2. Do I need coding experience to build these Arduino projects?
No, you don’t need prior coding experience to start with these projects. Most Arduino projects for beginners come with pre-written code, which you can upload directly to the Arduino board. However, learning some basic programming concepts like variables, loops, and conditionals will help you understand how the code works and allow you to modify projects to your liking. Over time, you can start experimenting and writing your own code to create custom Arduino-based projects.
3. Who is the Authorized Seller of Arduino in India?
Robocraze is one of the authorized sellers of Arduino in India, offering a wide range of official Arduino boards, shields, and accessories. Buying from an authorized seller ensures you get genuine Arduino products with proper quality assurance and support.
4. Is Arduino hard to learn?
No, Arduino is beginner-friendly and easy to learn, even if you have no prior coding experience. It uses simplified C++ programming and has a vast community with tutorials, forums, and open-source projects. Beginners can start with simple projects like LED blinking, sensor-based automation, and motor control, gradually moving on to advanced IoT and robotics applications.
5. What is Arduino in IoT?
Arduino is widely used in IoT (Internet of Things) projects to control and monitor connected devices. With modules like Wi-Fi (ESP8266, ESP32) and Bluetooth (HC-05, HC-06), Arduino enables communication between devices and cloud platforms. It helps in creating smart home automation, remote monitoring systems, and sensor-based applications.
6. Can Arduino run Python?
While Arduino does not natively support Python, some boards like Arduino Nano 33 BLE and ESP32 can run MicroPython, a lightweight version of Python for microcontrollers. Additionally, Python can be used on a computer to communicate with Arduino via serial communication, making it useful for data processing, automation, and IoT applications.
7. What is the easiest Arduino project?
The LED Blinking (Blink) project is the easiest Arduino project for beginners. It involves writing a simple code to turn an LED on and off using Arduino’s digital pins. This project helps beginners understand basic coding, pin configuration, and microcontroller operation, making it the perfect starting point before moving on to more advanced projects like Bluetooth-controlled cars or IoT applications.
8. What are the best beginner Arduino projects?
The best beginner Arduino projects include a simple LED blink, a temperature and humidity monitor using DHT11, a basic robot car, and a light-sensitive follower robot. These projects help you understand basic programming and circuit connections while providing a fun learning experience!
9. Which Arduino project is best to start with?
Starting with the classic LED blink project is ideal. It introduces you to basic coding and circuit assembly. Once you master this simple task, you can move on to more complex projects that integrate sensors and motors.
10. Do I need coding skills for Arduino?
Basic coding skills are helpful but not mandatory for Arduino projects. The Arduino IDE is user-friendly with many tutorials available. Beginners can learn as they build projects, using simple code examples to guide their learning process.
11. How can I make a Bluetooth-controlled car with Arduino?
To make a Bluetooth-controlled car, you’ll need an Arduino board, a motor driver, Bluetooth module, and a chassis. Program the Arduino to receive commands via Bluetooth. You can control the car using a mobile app like Arduino Bluetooth Controller for seamless operation.
12. What sensors are used in beginner Arduino kits?
Beginner Arduino kits often include sensors like temperature sensors (DHT11), ultrasonic distance sensors, infrared sensors, and light sensors (photoresistors). These components allow you to create various interactive projects and learn about sensor applications in real time.
13. How to upload code to Arduino?
Upload code to your Arduino using the Arduino IDE. Connect the board to your computer via USB, select the correct board and port in the IDE, then click on the upload button. The IDE will compile your code and transfer it to the Arduino.
14. What is the easiest Arduino project to build?
The easiest Arduino project is the LED blink project. It requires minimal components: just an LED, a resistor, and the Arduino board. This project teaches you about basic circuit connections and programming, making it a perfect starting point for beginners!
15. How to troubleshoot Arduino circuits?
To troubleshoot Arduino circuits, start by checking connections and ensuring that everything is wired correctly. Verify your code for errors. Use the Serial Monitor to debug and check variable values during execution. Testing individual components can also help isolate issues.
16. Can I use Arduino without a computer?
Yes, you can use Arduino without a computer! Once you've uploaded your code, the Arduino board operates independently. You can power it with a battery or external power source for various projects, such as robotic applications or environmental monitoring.
17. What is the average cost of beginner Arduino projects?
The average cost of beginner Arduino projects ranges from $20 to $50, depending on components and kits. Basic starter kits are often available for around $30, which include essential components and accessories for various projects.


