How to Use a Buzzer with Arduino – Circuit, Code & Applications
Summary
Are you looking to add sound to your Arduino project? A buzzer is a simple and cost-effective solution.
In this blog, we will cover what a buzzer is, how it works with Arduino, and the components required to interface it. We will also provide a step-by-step guide on how to use the buzzer with your Arduino board.
Whether you're a beginner or experienced with Arduino, this blog will help you add sound to your project.
What is a Buzzer?
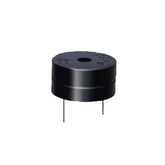
A Buzzer is basically a beeper that produces sound when an electric current is passed through it.
It can be directly connected to the Arduino and produce different tones by giving different frequency electrical pulses to the buzzer.
The buzzers are most commonly used in Alarm devices, timers, security systems, and to produce sound on confirmation of user input in many systems.
The buzzers are of different types, such as Mechanical buzzers, Electromechanical buzzers and Piezoelectric buzzers.
The piezoelectric buzzer is most commonly used with the Arduino. As it is lightweight, simple in construction, typically a low-cost product that can generate different sound tones of different frequencies and does not require a separate oscillating circuit.
In this blog, we will produce different sound tones using a buzzer by applying different frequency electrical pulses.
Read more: Interfacing GPS Module with Arduino
How does the Arduino Buzzer work?
The Positive pin (+ve) of the Arduino buzzer has to be connected to the VCC of Arduino, and the Negative pin (-ve) has to be connected to the GND pin of the Arduino.

When the Positive pin is connected to the 5 Volts pin of the Arduino directly, the buzzer produces a sound of constant frequency.
When a square wave of a certain frequency (and 50% duty cycle) is applied to the Positive (+ve) pin of the buzzer, Arduino generates tones.
The different frequencies generate different tones. By changing the frequency on the positive pins of the Arduino buzzer, we can create a melody of the song.
Read our blog Arduino VS NodeMCU, which provides a detailed comparison between Arduino Uno and NodeMCU microcontrollers.
How to use the Arduino buzzer?
If your buzzer has a sticker on top of it, pull the sticker off. Connect the short pin of the buzzer to the Arduino's ground pin (GND) and the other end to digital pin 9.
Using the Arduino, you can make sounds with a buzzer by using different frequencies of electrical pulses. You have to tell the Arduino on which pin the buzzer is connected, what should be the frequency (in Hertz, Hz) of the electric pulse should be applied to the buzzer, and for how much time you want it to keep making the tone.
So, for doing this, we will use the Arduino buzzer tone generation command:
tone(9, 1200, 500); // tone on pin 9 at 1200 Hz for 1/2 second
The above-mentioned command is the function used to generate an electric signal of a particular frequency and for a particular period of time on a particular pin.
So we are using pin number 9 of Arduino to perform such an operation here. When you call the tone() function, you have to pass this function with 3 arguments. I.e, Pin number, frequency of the signal you want to generate, and the time in milliseconds.
As per the above-mentioned command, 9 stands for the pin number of the pin you want to use (Note that the pin you use for this operation should be a PWM pin).
The 1200 stands for the frequency you want to generate, and the 500 stands for time in milliseconds; this is the time period that the Arduino generates the frequency for the buzzer.
Also Read - IR Sensor Interfacing with Arduino
Once the square wave is generated as per what we declared in the tone(); function, to stop the frequency generation noTone(); function has to be used. The syntax for the noTone() function is mentioned below.
If you do not call the noTone() function, it will keep making a tone until you tell it to stop by calling noTone(pin) or by calling tone() with a different frequency.
noTone(9); // Stops the generation of a square wave triggered by tone().
To stop the frequency generation generated by the tone() function, the above function has to be called.
In the noTone(); an argument with the pin number has to be passed, which tells the Arduino to stop the frequency generation on a particular pin. (Note: The same pin has to be used, which was used for the tone generation).
So let’s see the complete code and the connection for playing music on the buzzer Arduino.
Read more: Temperature Sensor Interfacing with Arduino
Components required to interface the buzzer with Arduino:
Steps to use the Buzzer with Arduino
Step 1: First, grab all the components listed above.

Step 2: Make connections as per the circuit diagram given below:

|
Pin number 9 of Arduino |
One of the pins of a 100-ohm Resistor |
|
GND pin of Arduino |
Negative pin of the buzzer (Shorter pin) |
|
An empty 100-ohm resistor pin |
Positive pin of the buzzer |
- Connect the Arduino to the Computer using a USB cable.
- Open Arduino IDE and select the correct board and port.
- Next, in the top left corner, go to File>> Examples >> 02. Digital >> toneMelody.
- Once the code is opened, upload the code to the Arduino, and the melody music sound will be played using the buzzer.
The below-attached code plays simple jingle-bell music:
            #include "pitches.h"
            // notes in the melody:int melody[] = {
            NOTE_E5, NOTE_E5, NOTE_E5,
            NOTE_E5, NOTE_E5, NOTE_E5,
            NOTE_E5, NOTE_G5, NOTE_C5, NOTE_D5,
            NOTE_E5,
            NOTE_F5, NOTE_F5, NOTE_F5, NOTE_F5,
            NOTE_F5, NOTE_E5, NOTE_E5, NOTE_E5, NOTE_E5,
            NOTE_E5, NOTE_D5, NOTE_D5, NOTE_E5,
            NOTE_D5, NOTE_G5};
            // note durations: 4 = quarter note, 8 = eighth note, etc,
            also called tempo:int noteDurations[] = {
            8, 8, 4,
            8, 8, 4,
            8, 8, 8, 8,
            2,
            8, 8, 8, 8,
            8, 8, 8, 16, 16,
            8, 8, 8, 8,
            4, 4};
            void setup() {
            // iterate over the notes of the melody:
            int size = sizeof(noteDurations) / sizeof(int);

            for (int thisNote = 0; thisNote < size; thisNote++) {

            // to calculate the note duration, take one second divided by the
            note type.
            //e.g. quarter note = 1000 / 4, eighth note = 1000/8, etc.
            int noteDuration = 1000 / noteDurations[thisNote];
            tone(8, melody[thisNote], noteDuration);

            // to distinguish the notes, set a minimum time between them.
            // the note's duration + 30% seems to work well:
            int pauseBetweenNotes = noteDuration * 1.30;
            delay(pauseBetweenNotes);
            // stop the tone playing:
            noTone(8);
            }}
            void loop() {
            // no need to repeat the melody.}
Code Explanation:
Header File: The code begins by including a header file, pitches.h.h, which most likely contains definitions for musical note frequencies like NOTE_E5 and NOTE_G5. This makes the code more readable and understandable.
Melody and Note Durations: The melody to be played is specified in the melody[] array, which contains the frequencies of musical notes. The duration of every note in the song is contained in the noteDurations[] array. Note durations are indicated by the numbers: 4 for a quarter note, 8 for an eighth, and so on.
Setup method: The setup() method contains the important logic for playing the melody.
The size of the noteDurations[] array is calculated to iterate over both arrays.
- The function iterates through each note and plays it:
- The tone() function plays the note specified in melody[] at pin 8 for the duration specified by noteDurations[].
- The function calculates the note duration as 1000 / noteDurations[thisNote], where thisNote is the current note index.
- To create intervals between notes for a better sound, the code uses the delay() function after each note.
- The noTone() function is used after each note to prevent the tone from playing.
The loop(): The loop() method is empty, thus, the music plays once when the application starts and does not repeat. Because the loop includes no code, the music is only heard once during the setup procedure.
Conclusion:
Buzzers may seem like a simple component, but they have a multitude of uses in various applications.
Understanding how Arduino buzzers work, how to use them, and how to interface them with an Arduino can be incredibly useful for electronics enthusiasts and hobbyists alike.
With the right components and a few simple steps, you can create all kinds of sounds and alarms with ease.
So why not try incorporating a buzzer into your next Arduino project and see where your creativity takes you? Start buzzing with excitement and take your electronics skills to the next level!
If you appreciate our work, don't forget to share this post and leave your opinion in the comment box.
Please do check out other blog posts about Arduino Interfacing ACS712 with Arduino , Arduino Interfacing with Ultrasonic Sensor , LED Interfacing with Arduino , Interfacing GSM Module with Arduino , Interfacing MAX30100 Pulse Oximeter with Arduino , IR Sensor Interfacing with Arduino and How to connect ZMPT101B to Arduino
Make sure you check out our wide range of products and collections (we offer some exciting deals!)
Excerpt
Frequently Asked Questions
1. How do I make my Arduino beep?
The buzzer can be beeped using a digitalWrite function. By giving the pin number and the state to which the Buzzer is connected on the Arduino.
2. What is Active and Passive buzzers:
Active buzzer: An active buzzer has a built-in oscillating source, so it will make sounds when electrified. Can turn it on or off to make various sounds. Only requires an external DC voltage to make it sound (batteries or USB from Arduino).
3. Is buzzer a sensor?
Passive buzzer: The passive buzzer is an electromagnetic speaker used to generate sound signals of different frequencies. a passive buzzer requires a signal source, which will set the sound signal parameters. An Arduino board can be such a source.
4. How do I connect a buzzer to Arduino?
To connect a buzzer to an Arduino, simply connect one terminal of the buzzer to a digital pin (e.g., pin 8) and the other terminal to the ground (GND). Ensure the connections are secure for optimal performance.
5. What pin is used to connect a buzzer to Arduino?
You can use any digital pin on the Arduino, but commonly, pins like 8 or 9 are chosen. Just connect one side of the buzzer to this pin and the other to ground (GND) for proper operation.
6. What is the difference between active and passive buzzers?
Active buzzers generate sound with a built-in oscillator and only require a DC voltage, making them easy to use. Passive buzzers need an external AC signal to produce sound, allowing for pitch variation but requiring more complex coding.
7. How do I make a buzzer beep in Arduino code?
To make a buzzer beep, use the tone() function in your Arduino code. For example: tone(8, 1000); for a 1,000 Hz sound on pin 8. Add noTone(8); to stop the sound.
8. Can I control buzzer sound frequency with Arduino?
Yes, you can control the buzzer sound frequency using the tone() function. By changing the frequency value, you can create different tones, allowing for varied sound effects in your project.
9. What is the voltage requirement of an Arduino buzzer?
Most buzzers require a voltage of 5V, which is standard for Arduino boards. Always check the specifications of your specific buzzer to ensure compatibility and avoid damage.
10. Why is my buzzer not working with Arduino?
If your buzzer isn't working, check the wiring for loose connections, ensure the correct pin is used, and verify that your code includes the tone() function. Also, confirm that the buzzer is functional by using it with a direct power source.
11. Can I use a buzzer as a speaker in Arduino projects?
Yes, you can use a buzzer as a basic speaker in Arduino projects. Passive buzzers offer more flexibility for sound variations, while active buzzers are simpler for basic signals. However, sound quality will be limited compared to a dedicated speaker.
12. How do I create a melody or tone with Arduino buzzer?
To create a melody, you can use an array of notes and frequencies in your code. Use the tone() function in a loop, adjusting the frequency for each note while including delays to control the timing between notes.
13. What are common applications of buzzers in Arduino projects?
Buzzers are commonly used in Arduino projects for alerts, notifications, and status indicators. They're also popular in alarm systems, timers, and games, helping to provide audio feedback for various functions.


