Smart Dustbin using Arduino
Summary
Are you looking for a strategy to improve the efficacy of your waste management? You only need to look at this blog.
In this blog article, we will look at everything from the hardware requirements to the functioning.
Advanced sensors, analytics, and Arduino power this smart dustbin. This garbage has the potential to change how waste can be disposed of. Read further to learn more about this outstanding technology and how to get started right now.
Introduction
In this article, we will be looking at how to make a smart dustbin using Arduino, an ultrasonic sensor, and an SG-90 servo motor. Let's start!

Hardware Required
We will need the following components for making the Arduino smart dustbin:
If you don't have any of the hardware then you can click on the required component name and buy it from our store and successfully complete this smart dustbin project.
read more : Smart Security System
1. Arduino Uno

Ardunio Uno is a development board that manages all of the processing for smart dustbin projects.
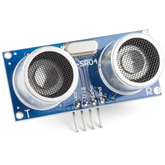
2. Ultrasonic Sensor HC-SR-04
This sensor functions as an object detecting sensor. It measures the object's distance from the sensor.

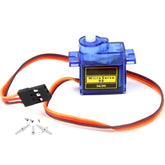
3. SG-90 Servo
A Servo motor is used for moving the dust bin lid.

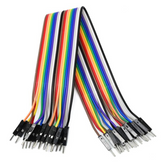
4. Jumper Wires
Used to do circuit connections between different components.

read more : How NRF24l01 Arduino Nano Works
Working Principle
Smart dustbin works on the principle of object detection using an ultrasonic sensor. The ultrasonic sensor transmits sound waves.
These waves get reflected whenever an object comes into the vicinity of the sensor. This generates an electrical signal which is used to open the dustbin lid.

read more : How to Setup Fingerprint Sensor with Arduino
Circuit Diagram
This is the circuit diagram for making smart dustbin. Make the connections as shown in the diagram below.

Arduino Smart Dustbin Code
Explore our carefully made code for making smart dustbin with Arduino. This program uses sensors and motors to make this Arduino project easier.
Check out our Arduino code for smart dustbin to see how it works and make your automatic dustbin project successful!
/*
  SMART DUSTBIN ARDUINO CODE

  Lid of the dustbin gets opened when a person comes in range of 30cm in front of the dustbin
*/

#include   //INCLUDES SERVO LIBRARY

Servo servo;
int trigPin = 5;
int echoPin = 6;
int servoPin = 9;
long duration, distance, average;
long averDist[3];

void setup() {
  Serial.begin(9600);
  servo.attach(servoPin);
  pinMode(trigPin, OUTPUT);
  pinMode(echoPin, INPUT);
  servo.write(0); //CLOSES CAP ON STARTING
  delay(100);
  servo.detach();
}

void measure() {
  digitalWrite(trigPin, LOW);
  delayMicroseconds(5);
  digitalWrite(trigPin, HIGH);
  delayMicroseconds(15);
  digitalWrite(trigPin, LOW);
  pinMode(echoPin, INPUT);
  duration = pulseIn(echoPin, HIGH);
  distance = (duration / 2) / 29.1; //CALCULATES DISTANCE
}

void loop() {
  Serial.println(distance);
  for (int i = 0; i <= 2; i++) { //CALCULATES AVERAGE DISTANCE
    measure();
    averDist[i] = distance;
    delay(10);
  }
  distance = (averDist[0] + averDist[1] + averDist[2]) / 3;

  if ( distance <= 30 ) {
    servo.attach(servoPin);
    delay(1);
    servo.write(180);
    delay(3500);
  }
  else
    servo.write(0);
    delay(1500);

    servo.detach();

}
Servo motor;
This creates a servo object.
|
int trigPin = 5; |
The above lines assign trigger and echo pins of the ultrasonic sensor to 5 and 6 respectively. Servo’s PWM pin is connected to pin 9 of Arduino.
long duration, distance, average;
long averDist[3];
These are the variables created for storing and processing data from ultrasonic sensor.
|
servo.attach(servoPin); |
servo. Attach (servoPin) - attaches the servo variable which we created initially to the servo pin, set trigger and echo pins as Output and Input respectively, close the lid of the dustbin by setting servo to 0 positions, and then detach the servo object.
|
Serial.println(distance); |
Measure function calculates the distance and average calculates the average of 3 distances measured by ultrasonic sensor.
|
if ( distance <= 30 ) { |
If the distance is less than 30 then the dustbin lid is opened by setting the servo to 180 position otherwise the dustbin’s lid is closed.
read more : IR Sensor Interfacing with Arduino
Conclusion
Build your Arduino smart dustbin project to learn about innovation and cleanliness. This guide enables you to contribute to a greener, more technologically advanced future.
In this blog article, we learned that creating a smart dustbin with Arduino is a fun and creative project that not only keeps your surroundings clean but also improves your technical abilities.
With the help of ultrasonic sensors and wireless communication, you can make your daily chores more efficient and eco-friendly.
So why wait? Grab your Arduino kit and start building your own smart dustbin today! So take your first step towards becoming a tech-savvy and environmentally conscious individual. Start your journey towards a cleaner and smarter future today with this exciting Arduino project.
If you understand how to make smart dustbin using Arduino and appreciate our work don't forget to share this post and leave your opinion in the comment box.
Please do check out other blog posts about Interfacing ACS712 with Arduino , Arduino Interfacing with Ultrasonic Sensor , LED Interfacing with Arduino , Interfacing GSM Module with Arduino , Interfacing MAX30100 Pulse Oximeter with Arduino , IR Sensor Interfacing with Arduino , How to connect ZMPT101B to Arduino and How to use Buzzer with Arduino.
Make sure you check out our wide range of products and collections (we offer some exciting deals!)
Excerpt
Frequently Asked Questions
1. How does smart dustbin work with Arduino?
The smart dust bin, powered by Arduino, is equipped with sensors to identify objects in close proximity. A signal is then transmitted to a servo motor, which unhinges the lid. The motor is programmed to shut the lid after a certain duration. Additional sensors can detect the bin's filling level and send alerts to users for emptying. This technology boosts waste management efficiency.
2. Is smart dustbin an IoT device?
Yes, a smart dustbin is an IoT or Internet of Things device that uses sensors, wireless connectivity, and cloud-based analytics to monitor and optimize waste management. It can detect the level of trash in the bin and alert waste management teams when it's time to empty it, improving efficiency and reducing costs. Smart dustbins can also help cities and organizations track their waste generation and recycling rates, ultimately contributing to more sustainable and cleaner environments.
3. Which sensor is used in smart dustbin?
The mystical smart dustbins use ultrasonic sensors to detect the presence of objects or beings, resulting in automatic lid activation. Furthermore, weight sensors conjure the ability to measure waste volume and alert owners of the need for disposal.
4. Which motor is used in smart dustbin?
The SG90 TowerPro Servo Motor is the motor that is mainly used in smart dustbin.
5. Why Arduino is used in smart dustbin?
For a variety of reasons, Arduino is used in smart dustbins. It simplifies communication module connection and adds functionality such as smartphone alerts for bin status. Its microcontrollers are capable of doing complex tasks such as garbage sorting and Internet of Things connectivity. Also, Arduino's open-source design enables easy access to project data, which facilitates the development of smart waste management solutions.
6. What is the main objective of smart dustbin?
The primary goal of smart dustbins is to improve waste management by reducing negative environmental consequences while optimizing collection routes and timelines.
7. Where are smart bins used?
Smart dustbins used for a variety of purposes in places where efficient waste management is required. Because of its cutting-edge features, which include real-time fill level monitoring, automatic collection notifications, and data analytics for garbage collection route optimization, they are used in public places, companies, municipalities, residential buildings, commercial spaces, and educational institutions.
8. What is a smart dustbin and how does it work?
A smart dustbin is an innovative waste disposal system equipped with sensors and automation technology. It detects the presence of waste using sensors like ultrasonic or infrared, automatically opening its lid when an object approaches. This helps in maintaining hygiene and reducing contact, making waste disposal more convenient in public spaces.
9. Which sensors are used in an Arduino-based smart dustbin?
An Arduino-based smart dustbin typically uses ultrasonic sensors to detect distance and infrared sensors to monitor proximity. These sensors trigger the lid to open automatically when waste is detected. Additional sensors, like weight sensors, can be integrated to assess the fill level, enhancing waste management capabilities.
10. How does the ultrasonic sensor detect object distance?
The ultrasonic sensor emits high-frequency sound waves that bounce off nearby objects. By measuring the time it takes for the sound waves to return, the sensor calculates the distance to the object. This real-time data enables an Arduino-controlled mechanism, like a smart dustbin lid, to respond promptly when an object is detected.
11. What Arduino code is used for a smart dustbin?
The Arduino code for a smart dustbin incorporates libraries for sensors, such as ultrasonic and servo motor control. It initializes sensors, reads distance values, and activates the servo motor to open the lid when an object is within a specified range. You can find sample codes online tailored for smart dustbin projects.
12. Can the dustbin lid open automatically using a servo motor?
Yes, the dustbin lid can open automatically using a servo motor. When the sensors detect an approaching object, the Arduino sends a signal to the servo motor, which then pivots the lid open. This automation enhances convenience and hygiene by minimizing contact with the dustbin.
13. How is power supplied to the smart dustbin?
The smart dustbin is typically powered using batteries, USB power supply, or a solar power system. Rechargeable batteries are a popular option for portability, while a solar panel can contribute to energy efficiency in outdoor settings, ensuring that the smart dustbin remains operational without frequent recharging.
14. Can I add an IoT module to monitor dustbin status remotely?
Yes, you can easily add an IoT module, such as Wi-Fi or GSM, to your smart dustbin. This integration allows you to monitor the dustbin's status remotely via a smartphone app or web interface. You'll receive updates on fill levels and operational status, enhancing waste management efficiency.
15. What are the benefits of using a smart dustbin in public areas?
Smart dustbins promote cleanliness and efficiency in public areas by reducing litter and minimizing human contact. They help ensure timely waste collection by notifying municipal services when full. Additionally, these dustbins can improve overall hygiene and environmental awareness among the public.
16. How can I reduce power consumption in the circuit?
To reduce power consumption in your smart dustbin circuit, use low-power components, such as energy-efficient sensors and microcontrollers. Implement sleep modes for the Arduino when inactive and consider using timers to control the active duration of sensors and the servo motor, ensuring power is conserved during idle periods.
17. Can this project be expanded to a waste segregation system?
Absolutely! You can expand your smart dustbin project to include waste segregation features. By integrating additional sensors and actuators, you can create compartments for different waste types. Enhance the system with an IoT feature that notifies users about correct disposal methods, promoting recycling and responsible waste management.


