Building Your Own Alexa with ESP32
Summary
Voice assistants such as Alexa, Google Assistant, and Siri have become an essential part of our daily life. These devices ease tasks by reacting to voice instructions, such as shutting off lights, playing music, or answering inquiries. However, did you know that you can build your own voice assistant with a simple microcontroller like the ESP32? This project will allow you to create a simple version of Alexa that can respond to orders and control gadgets via the internet.
Episode EE05:

Know about ESP32 in detail in our blog What is ESP32 Development Board
What You Will Need:
Before starting the project, acquire the following components:
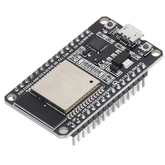
- The ESP32 Development Board: At the heart of this project is the ESP32, a powerful microcontroller with Wi-Fi and Bluetooth capabilities.
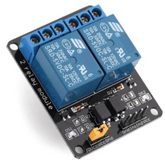
- 2-channel relay: It is an electrical device that controls two separate circuits with a single low-power signal, often used for switching high-power devices.
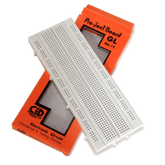
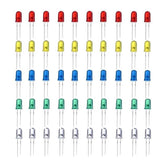
- Breadboards, LEDs, and jumper wires provide for simple connections.
- Power Supply: A 5V USB power supply is required to power the ESP32.
- Micro-USB Cable: This cable connects the ESP32 to your computer for programming.
- Software includes the Arduino IDE, ESP32 libraries, and required voice processing libraries such as ESP-Skainet.
Hey, do you want to make your own security camera? Read now, Build Your Security Camera Using ESP32-CAM: A Step-by-Step Guide
Steps to Build Alexa with ESP32
Step 1: Setting up the ESP32
Install the Arduino IDE.
If you haven't already, visit the official website to download and install the Arduino IDE.
To add the ESP32 board to the Arduino IDE, navigate to File > Preferences and add the URL: https://dl.espressif.com/dl/package_esp32_index.json to the "Additional Board Manager URLs."
Next, go to Tools > Board > Board Manager, then search for "ESP32" and install the package.
Connect the ESP32:
Connect the ESP32 to your computer via a Micro-USB connector.
Navigate to Tools > Board in the Arduino IDE and choose the appropriate board and port for your ESP32 model. Also, choose the proper COM Port.
Install required libraries:
You will require libraries for Wi-Fi, microphones, and voice processing. Install the required libraries via the Arduino Library Manager.
Step 2: Set Up Voice Recognition
To process voice instructions, you'll need the ESP-Skainet library, which was created specifically for the ESP32 to handle speech recognition.
Install the ESP-Skainet library:
Navigate to the library manager in the Arduino IDE and look for "ESP-Skainet." Install it.
Configure the microphone:
Connect the microphone module to the ESP32 with jumper wires. Ensure that the connections are correct.
Connect VCC to 3.3V, GND to GND, and Data Out (DO) to a GPIO pin, such as GPIO 15.

Upload the example code:
The ESP-Skainet library includes example code for voice recognition. Start by uploading a simple example to see if the microphone is correctly capturing voice commands.
Step 3: Programming the ESP32 for Alexa-like functionality.
Now that you've built up speech recognition, you may program your ESP32 to respond to certain commands.
Define voice commands:
In your code, specify a list of keywords or phrases that your ESP32 will recognize. Examples include "Turn on the light," "Play music," and "What time is it?"
Process Commands:
Use conditionals (if-else statements) to process recognized commands and perform actions. For example:
if (command == "Turn on the light") {
    // Code to turn on a connected LED or relay
}
else if (command == "Play music") {
    // Code to send a signal to a connected speaker
}
Add Wi-Fi connectivity:
Connect your ESP32 to Wi-Fi so it can interact with the internet. For this, you can utilize the WiFi.h library.
Once linked, you can extend its capabilities by integrating with web services or APIs to retrieve weather data, play music, and even manage smart home devices.
Also read our step-by-step process to make an Internet Clock using ESP32 and OLED Display
Step 4: Testing and Debugging.
Once the code has been submitted, it is time to test your creation.
Power the ESP32:
Turn on your ESP32 and speak the predefined commands into the microphone.
Check responses:
Check that the ESP32 successfully interprets and responds to your requests, whether it's turning on an LED or retrieving data from the Internet.
Debugging:
If something isn't functioning, utilize the Serial Monitor in the Arduino IDE to debug your code and ensure the speech recognition is accurate.
Read this blog it will help you to Build a Weather Station Using an ESP32 Webserver - Always get real-time weather updates!
Conclusion
Congratulations! You have successfully created your own Alexa-like speech assistant using the ESP32. This project not only teaches you about speech recognition but also covers a variety of IoT ideas.
This project can be expanded by adding more advanced capabilities, such as integrating with smart home systems, controlling appliances, or connecting to cloud services.
With the ESP32's adaptability and the capability of speech recognition, the possibilities are limitless. Continue exploring and improving your customized voice assistant!
Please do check out other blog posts about Popular electronics
Check out other related blog posts about Drones: Drone transmitter and receiver , Drone motors and Getting started with a Quadcopter
Make sure you check out our wide range of products and collections (we offer some exciting deals!)


