Internet Clock using ESP32 and OLED Display
Summary
Discover the cutting-edge world of the Internet of Things (IoT) with our blog on building an Internet clock using an ESP32 microcontroller and OLED display. This innovative system offers accurate timekeeping, real-time synchronization, and customizable features. From the purpose and advantages of the system to the step-by-step guide on building a prototype, this blog unveils the power of ESP32 in creating a modern timepiece. Explore the code implementation and dive into the working principles of this remarkable IoT device. Brace yourself for a fascinating journey into the realm of Internet-connected timekeeping!
In today's interconnected world, accurate timekeeping is essential for various applications and devices. From coordinating global financial transactions to ensuring synchronization in distributed systems, having a reliable and precise time reference is crucial. With the advancement of technology, it is now possible to create an Internet clock that can fetch and display accurate time from online sources. In this tutorial, we will explore the fascinating world of building an Internet clock using the ESP32 microcontroller and an OLED display.
The ESP32, a powerful and versatile microcontroller, provides the necessary capabilities for connecting to the internet and retrieving time data from online servers. Combined with an OLED display, which offers a crisp and clear visual output, we can create a compact and visually appealing clock that displays the accurate time information.
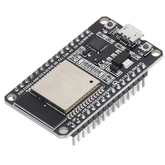
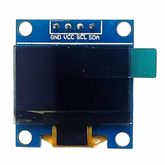
Through this tutorial, we will delve into the step-by-step process of building the Internet clock. We will cover the necessary hardware components, including the ESP32 microcontroller and the OLED display, as well as the required software libraries and tools for programming.
Purpose of the system
The purpose of the Internet clock system using ESP32 and OLED display is to provide an accurate and synchronized time reference by fetching time data from online servers. The system aims to offer a reliable and visually appealing solution for displaying the precise time, eliminating the need for manual adjustments and ensuring synchronization with global time standards.
With this system, users can benefit from the convenience of having an internet-connected clock that automatically retrieves accurate time information from online sources. It eliminates the reliance on traditional clocks that may require manual setting and can potentially drift in accuracy over time. The Internet clock offers a hassle-free and highly reliable alternative, especially in environments where precise timekeeping is critical, such as financial transactions, industrial automation, or distributed systems.
Advantages of the system
The Internet clock system using ESP32 and OLED display offers several advantages over traditional clocks and timekeeping methods. Here are some key advantages:
- Accuracy: The system fetches time data from online servers, which are synchronized with highly accurate atomic clocks. This ensures that the displayed time is precise and synchronized with global time standards, eliminating the need for manual adjustments.
- Synchronization: The Internet clock system allows for automatic synchronization with online time servers, ensuring that the displayed time remains consistent and in line with the most accurate time references available. This is particularly useful in environments where time synchronization is critical, such as in distributed systems or networked applications.
- Convenience: With the Internet clock system, there is no need for manual time setting or adjustments. The system automatically fetches the time information from online sources, providing a hassle-free and effortless timekeeping experience.
- Real-time Updates: The system can continuously update the displayed time in real-time, providing users with the most up-to-date and accurate time information. This is particularly beneficial in scenarios where time-critical decisions or actions need to be made.
- Versatility: The ESP32 microcontroller used in the system offers versatile connectivity options, allowing for easy integration with various networks and online time servers. This makes the Internet clock system adaptable to different environments and usage scenarios.
Building a prototype
Components
Circuit diagram

We used SPI mode to connect our 128×64 OLED display Module (SSD1306) to ESP32. So, it will use 7 pins. Connections with ESP32 are given as:
|
OLED Pins |
Connected to ESP32 pins |
|
|
Code:
#include


#include


#include

#include

#include

#include


const char* ssid     = "**";


const char* password = "**";


#define NTP_OFFSET  19800 // In seconds


#define NTP_INTERVAL 60 * 1000    // In miliseconds


#define NTP_ADDRESS  "1.asia.pool.ntp.org"


WiFiUDP ntpUDP;


NTPClient timeClient(ntpUDP, NTP_ADDRESS, NTP_OFFSET, NTP_INTERVAL);


#define OLED_MOSI  23


#define OLED_CLK   18


#define OLED_DC    4


#define OLED_CS    5


#define OLED_RESET 2


Adafruit_SSD1306 display(OLED_MOSI, OLED_CLK, OLED_DC, OLED_RESET, OLED_CS);


void setup()


{


display.begin();


Serial.begin(9600);


Serial.println();


Serial.println();


Serial.print("Connecting to… ");


Serial.println(ssid);


WiFi.begin(ssid, password);


while (WiFi.status() != WL_CONNECTED)


{


delay(500);


Serial.print(".");


}


Serial.println("");


Serial.println("WiFi has been connected.");


Serial.println("The IP address: ");


Serial.println(WiFi.localIP());


timeClient.begin();


display.begin(SSD1306_SWITCHCAPVCC);


display.clearDisplay();


display.setTextColor(WHITE);


display.setTextSize(2);


}


void loop()


{


timeClient.update();


String formattedTime = timeClient.getFormattedTime();


display.clearDisplay();


display.setTextSize(2);


display.setCursor(0, 0);


display.println(formattedTime);


display.display();   // Please write the buffer to the display


delay(10);


delay(100);


}
- NTP_OFFSET, which is your country's time zone; for example, +5:30 for India. So in seconds, it will be 19800.
- NTP_INTERVAL, which is the amount of time that NTP needs to update the time. There are 60–64 seconds.
- Your nation's NTP server is located at NTP_ADDRESS. You can use "in.pool.ntp.org" for India.
Working of the system
The working of the Internet clock system using ESP32 and OLED display involves several steps to fetch and display accurate time information. Here is a detailed overview of the system's operation:
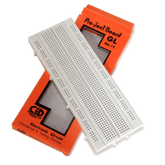
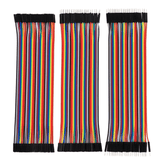
- Hardware Setup: Begin by connecting the ESP32, OLED display, and breadboard using jumper wires. Ensure proper connections between the ESP32's GPIO pins and the corresponding pins on the OLED display.
- Initialization: Import the necessary libraries and modules on the ESP32. This includes configuration of the OLED display, establishing Wi-Fi connectivity, and setting up the necessary time-related functions.
- Wi-Fi Connection: Connect the ESP32 to a Wi-Fi network for the internet connection. This allows the ESP32 to fetch time data from online servers.
- Time Synchronization: Use the ESP32's built-in functions or external libraries to synchronize the system's time with an online time server. This helps to make sure that the system's internal clock is accurate and up-to-date.
- Time Retrieval: Fetch the current time from the online time server using the ESP32's internet connectivity capabilities. This can be done through protocols such as Network Time Protocol (NTP) or Simple Network Time Protocol (SNTP).
- Display Update: Update the OLED display with the retrieved time information. Utilize the appropriate functions or libraries to convert the time data into a suitable format and display it on the OLED screen. This may include formatting the time in hours, minutes, and seconds, along with any additional details such as date or time zone.
- Continuous Update: Implement a loop mechanism to continuously fetch and update the time information from the online server. This ensures that the displayed time remains accurate and synchronized.
- User Interaction: Optionally, incorporate user interaction features such as button presses to adjust settings, switch between time zones, or display additional information on the OLED screen.
By following these steps, the Internet clock system using ESP32 and OLED display can fetch the precise time from online servers and display it on the OLED screen. The system continuously updates the time display to ensure accuracy and synchronization with the global time reference.
Conclusion
In conclusion, the Internet clock system utilizing the ESP32 microcontroller and OLED display is a testament to the convergence of advanced technology and precise timekeeping. With its flawless and seamless integration of online connectivity and visual output, this innovative system offers an incredible solution for accurate time retrieval and display. By utilising the ESP32's robust capabilities and the high-resolution OLED display's visual capabilities, users are presented with a simple timekeeping experience that transcends conventional methods.
Through its ability to synchronize with online time servers and continuously update the displayed time, this system ensures temporal precision without any manual intervention. The harmonious interplay between the ESP32, OLED display, and Wi-Fi connectivity harmonizes seamlessly to bring forth an unparalleled timekeeping marvel.
Moreover, the Internet clock system embraces convenience, obliterating the need for cumbersome adjustments and ushering in a new era of effortless time management. The visual allure of the OLED display, complemented by the ESP32's impeccable performance, delivers a feast for the eyes, captivating users with its captivating and refined presentation of the time.
If you appreciate our work don't forget to share this post and leave your opinion in the comment box.
Please do check out other blog posts about Popular electronics
Make sure you check out our wide range of products and collections (we offer some exciting deals!)
Excerpt
Frequently Asked Questions
1. How to use OLED display with ESP32?
The steps to use an OLED display with ESP32 in bullet points:
2. How do I use real time clock in ESP32?
Here are some additional details on how to use an OLED display with ESP32:
3. What components are required to make an Internet clock with ESP32?
To create an Internet clock using the ESP32, you'll need an ESP32 microcontroller, an OLED display (such as the SSD1306), a compatible power supply, jumper wires, and optionally a breadboard for easy connections. An Internet connection, typically via Wi-Fi, is essential for time synchronization using NTP.
4. How does ESP32 connect to the internet for time sync?
The ESP32 connects to the internet via Wi-Fi. By using the Wi-Fi library in your code, you can configure the ESP32 to connect to your local network. Once connected, it can sync time through Network Time Protocol (NTP) servers, which provide accurate time data over the internet.
5. Which library is used for OLED display with ESP32?
The most commonly used library for interfacing an OLED display with the ESP32 is the Adafruit SSD1306 library. This library makes it easy to control the OLED and display text, graphics, or any other data you want to show, including time and date information.
6. Can I customize the time format on the OLED screen?
Yes, you can customize the time format on the OLED screen. By modifying the code, you can display time in 12-hour or 24-hour formats, and include or exclude leading zeros. This flexibility allows you to present time exactly how you prefer on the display.
7. How accurate is the ESP32 Internet clock?
The ESP32 Internet clock is quite accurate, typically within a few milliseconds, thanks to its use of NTP servers. However, the overall accuracy may vary based on the internet connection stability. Regular timestamps allow for adjustments, ensuring minimal drift over time.
8. How do I display date and day along with time?
To display the date and day along with the time on the OLED screen, you'll need to modify the code to fetch and format the date data from the NTP server. Use functions to extract the weekday and format the date, then send this data to the OLED display for presentation.
9. Is Wi-Fi mandatory for this project?
Yes, Wi-Fi is mandatory for this project. The ESP32 requires a Wi-Fi connection to access NTP servers for accurate time synchronization. Without internet access, the clock will not update correctly and will only show the last known time.
10. Can I use NTP servers other than default ones?
Absolutely! You can choose to use different NTP servers other than the default ones. By modifying your code, you can specify alternative NTP server addresses, allowing you to connect to servers that might provide better accuracy or faster response times based on your location.
11. How much power does the OLED clock consume?
The power consumption of an OLED clock using the ESP32 is relatively low. The ESP32 generally consumes around 160-250 mA during active Wi-Fi transmission. However, the OLED display consumes significantly less, about 20 mA max. Overall, the project is energy-efficient, making it ideal for battery-powered applications.
12. Can I add weather info to this ESP32 clock?
Yes, you can definitely add weather information to your ESP32 clock. By integrating a weather API, you can fetch real-time weather data and display it on your OLED. This adds extra functionality and makes your clock even more useful as a daily tool.


