Interfacing Proximity Sensors with Arduino
Summary
Proximity sensors are an essential component of modern technology, used in a variety of applications.
This blog covers the foundations of proximity sensors, including their types, working principles, and how to connect them to an Arduino. This fascinating blog is a must-read for both enthusiasts and engineers.
From capacitive to inductive sensors, learn about the various types and their applications. Find out how proximity sensors work and how to program them with Arduino.
In this tutorial, we are going to learn Interfacing Proximity Sensors with Arduino
What is Proximity Sensors:
In simple words, proximity sensors are the devices that are used to detect the presence of an object in its surroundings without any physical contact with the objects.
The proximity sensors detect objects by using an electromagnetic field or electromagnetic radiation beam.

The sensors detect the presence of an object when the electromagnetic radiation has reflected the sensor. The object which is detected by the proximity sensors is known as targets.
Proximity sensors are available in different sizes, shapes (Circular or rectangular). Different materials (plastic, metallic, etc) some proximity sensors are a combination of both plastic and metallic material.
The proximity sensors have more reliability due to the absence of the mechanical parts and it does not have contact with the target object. The proximity sensors which are designed for very short range can be used as touch switches.
The proximity sensors are most commonly used in manufacturing industries for counting, detection, positioning, etc. The proximity sensors have longer life as compared to the other sensors.
Grab the various collections of Sensors.
read more : Interfacing GPS Module with Arduino
Types of Proximity Sensors:
- Inductive Proximity Sensor
- Capacitive Proximity Sensor
- Optical Proximity Sensor
- Magnetic Proximity Sensor
- Ultrasonic Proximity Sensor
Working Principle of Proximity Sensors:

We will now see the working principle of an Inductive proximity sensor. The inductive proximity sensor circuit is used for detecting metal objects and the Inductive proximity sensor does not detect any objects other than metals.
The above diagram shows the circuit diagram of an inductive proximity sensor. Which contains a voltage regulator, trigger circuit, an oscillator, electric coil, and magnetic field.

The electric coil produces a magnetic field when the power supply is given. As the circuit contains an oscillator, an alternating magnetic field is produced by the coils.
Whenever a metal object is bought in the influence of the magnetic field, an eddy current will be produced in the metal object and circulates within the metal object.
This causes an increase in load and a decrease in the amplitude of the magnetic field.
When the metal target is moved closer to the metal object causes an increase in eddy current on the metal object and hence load on the oscillator increases and field amplitude decreases.
Read our blog on how proximity sensor works where we discuss what are proximity sensors, how does a proximity sensor work, the different types of proximity sensors available and their potential applications in different scenarios.
We will use an Inductive proximity sensor to detect metal objects without any physical contact with the target.
To interfacing proximity sensor with Arduino we need some hardware as mentioned below.
| Hardware Required | Quantity | Link |
| Arduino | 1 | Buy Now |
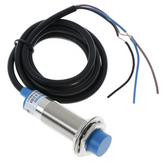
| Inductive proximity sensor LJ12A3-4-Z/BY 3-Wire | 1 | Buy Now |
| 10K resistor | 2 | Buy Now |
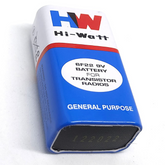
| 9V Battery | 1 | Buy Now |
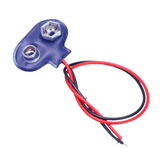
| 9V Battery Clips with Bare Leads | 1 | Buy Now |
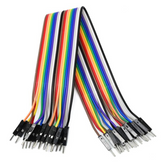
| Male to Male Jumper wire | As required | Buy Now |
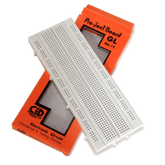
| Breadboard | 1 | Buy Now |
read more : Arduino Sensor types and Applications
Proximity Sensor Diagram:

Circuit Diagram for Interfacing Proximity Sensor with Arduino:

The above figure shows the pinout of the Inductive proximity sensor LJ12A3-4-Z/BY 3-Wire.
|
VIN pin of the proximity sensor |
Positive wire of the battery connector |
|
GND pin of the proximity sensor |
Negative pin of the battery connector and GND pin of Arduino |
|
OUT pin of proximity sensor |
Pin 2 of Arduino through a 10K resistor in series. And the OUT pin 2 of Arduino is pulled to LOW using a 10K resistor |
The connection for Interfacing of Proximity Sensor with Arduino is very easy,
Connect VIN pin of the proximity sensor with Positive wire of the battery connector.
GND pin of the sensor with negative pin of the battery connector & GND Pin of Arduino.
OUT pin of proximity sensor with Pin 2 of Arduino through a 10K resistor in series. And the OUT pin 2 of Arduino is pulled to LOW using a 10K resistor
(Note: Te resistor in series with OUT pin of the proximity sensor is used to reduce the voltage from 9V to 4.5V. As 9V will damage the Arduino due to Overvoltage. Using a 10K resistor in series is compulsory)
Once, the connection is completed, we will see the code for interfacing proximity sensor with Arduino to detect the presence of metal objects in surroundings.
read more : Temperature Sensor Interfacing with Arduino
Code:
const int Pin=2;
void setup()
{
pinMode(Pin, INPUT);
Serial.begin(9600);
}
void loop()
{
int sensorValue = digitalRead(Pin);
if(sensorValue==LOW)
{
Serial.println("no Object");
delay(500);
}
else
{
Serial.println("Object Detected");
delay(500);
}
}
The above code is used to detect metal object and display it on the Serial monitor.
Explanation:
First, we create a constant integer datatype variable named Pin and set its value to 2.
This implies that we will read sensor values via Arduino pin number 2.
const int Pin=2;
Next, we are using void setup() function. This function executes only one time in the entire program.
In the void setup() function, we are declaring the Pin as INPUT by using a pinMode function and telling Arduino to establish serial communication with 9600 baud rate.
Next we have a void loop() function. This function is continually performed. In the void loop() function, we declared an integer variable named sensorValue.
This variable stores the data that the Arduino reads from the sensor. We're saving data from the digitalWrite function, which reads data from the sensor. It will be either HIGH or LOW.
Next, we are using an if-else statement. This if-else statement verifies whether the output is HIGH(1) or LOW(0).
If the output of the sensor is HIGH then “no Object” will be printed on the serial monitor. Or if the output of the sensor is HIGH then “Object detected” will be printed on the serial monitor.
And we have given a delay() function which reads the data every half-second from the sensor.
read more : Top 10 Robotic Projects for Beginners
Conclusion
proximity sensors have become an essential component in various industries for their ability to detect the presence or absence of objects without physical contact.
The many types of proximity sensors, which include inductive sensors, capacitive sensors, and ultrasonic sensors, give a wide range of sensing capabilities to fulfill a variety of purposes.
Understanding the working principles of proximity sensors and how to link them with Arduino will allow you to make the most of their power and precision in your future projects.
So, don't wait any longer; begin exploring the world of proximity sensors today and discover limitless possibilities!
If you understand how to interfacing proximity sensor with arduino and appreciate our work don't forget to share this post and leave your opinion in the comment box.
Please do check out other blog posts about Arduino Interfacing ACS712 with Arduino , Arduino Interfacing with Ultrasonic Sensor , LED Interfacing with Arduino , Interfacing GSM Module with Arduino , Interfacing MAX30100 Pulse Oximeter with Arduino , IR Sensor Interfacing with Arduino , How to connect ZMPT101B to Arduino and How to use Buzzer with Arduino.
Make sure you check out our wide range of products and collections (we offer some exciting deals!)
Excerpt
Frequently Asked Questions
1. Can we connect the proximity sensor with Arduino?
Yes, we can. The proximity sensor can be used with Arduino to detect an object. Any digital pin of Arduino can be used to connect the proximity sensor. But care has to be taken in terms of the voltage as the proximity sensor works on 9v. So, a resistor in series with the output pin of the proximity sensor has to be used.
2. What is a magnetic proximity sensor?
Magnetic proximity sensors are non-contact proximity device that detects magnetic objects (e.g. permanent magnets). They sense the presence of a magnetic object. Magnetic proximity sensors use for non-contact position detection beyond the normal limits of inductive sensors.
3. What is a capacitive proximity sensor?
Capacitive Proximity Sensors detect changes in the capacitance between the sensing object and the Sensor. As per the name, capacitive proximity sensors operate by noting a change in the capacitance read by the sensor.
4. Where are proximity sensors used?
Proximity sensors find utility in a diverse range of applications like assembly lines, anti-aircraft systems, phones, recycling plants, and self-driving cars. They function reliably in places with water or oil presence. The sensors enable detection of nearby objects without physical contact and can recognize air gestures and hover-manipulations. Magnetic proximity sensors are one of the varieties that can detect magnetic objects effectively with their extended sensing ranges.
5. What are the types of proximity sensor?
Proximity sensors come in several forms, including inductive, capacitive, ultrasonic, and photoelectric. Inductive sensors detect metal objects via electromagnetic fields, whereas capacitive sensors distinguish between metals and nonmetals by measuring capacitance changes. Photoelectric sensors detect changes in the light path, while ultrasonic sensors employ sound waves to measure distance and presence. These sensors are most commonly used in robotics and automation.
6. What is the range of proximity sensor?
Proximity sensors detect things by a change in capacitance, which allows them to detect a wide variety of metallic and nonmetallic materials. These sensors typically operate within a range of 3 to 30 mm, making them perfect for short-range object detection.
7. Is IR sensor a proximity sensor?
Yes, an infrared sensor may be used as a proximity sensor. IR proximity sensors function by generating infrared light via a pair of IR light-emitting diodes (LEDs). Light flows through the air, reflecting off everything along its route. The sensor detects reflected light and can determine the proximity of objects within its range. This type of sensor is commonly used for item recognition in a range of applications.
8. What is the best proximity sensor for Arduino?
The best proximity sensor for Arduino is decided by your project's specifications and the type of object you want to detect. Ultrasonic sensors are excellent for measuring distances and avoiding obstacles, but infrared proximity sensors are good for short-range detection in applications like line following. Capacitive sensors are best suited for detecting nonmetallic items at close range, but inductive sensors are useful for detecting metal objects. Choose a sensor based on your desired range, object type, and application.
9. What is a proximity sensor and how does it work?
A proximity sensor detects nearby objects without physical contact. It operates by emitting an electromagnetic field or a beam of radiation (like infrared) and measuring the reflection from an object. When an object enters this field, the sensor triggers a signal, indicating its presence. This functionality is crucial in automation and robotics applications, ensuring safety and efficiency.
10. What types of proximity sensors exist (inductive, capacitive, optical)?
Proximity sensors come in three primary types: inductive, capacitive, and optical. Inductive sensors detect metallic objects using electromagnetic fields. Capacitive sensors sense both metallic and non-metallic objects by measuring changes in capacitance. Optical sensors utilize light to detect objects, commonly found in applications needing precise measurement or object recognition.
11. How do you interface a proximity sensor with Arduino?
To interface a proximity sensor with Arduino, connect the sensor’s output pin to a digital input pin on the Arduino. Connect the power and ground pins accordingly. Use a simple sketch to read the sensor’s output. By checking for HIGH or LOW signals, you can trigger actions such as activating motors or sending alerts when an object is detected.
12. What is the difference between analog and digital outputs of proximity sensors?
Analog outputs provide variable voltage levels proportional to the detected object’s distance, allowing for precise measurements. In contrast, digital outputs deliver a binary signal (HIGH or LOW), indicating only the presence or absence of an object. Choosing between them depends on the required accuracy and application, especially in robotics and automation tasks.
13. What are common applications of proximity sensors in robotics and automation?
Proximity sensors are widely used in robotics and automation for object detection, obstacle avoidance, and positioning tasks. They play critical roles in assembly lines, autonomous vehicles, and warehouse robotics, ensuring safety and operational efficiency. In smart homes, they help in automated lighting and security systems, enhancing user convenience and safety.
14. How do you calibrate a proximity sensor for correct detection?
Calibrating a proximity sensor involves adjusting its sensitivity to optimize detection accuracy. Start by placing known objects at varying distances and adjusting the sensor’s settings until it reliably detects each object. This may involve modifying the output threshold or sensitivity settings in the sensor's configuration. Regular calibration ensures consistent performance in dynamic environments.
15. What factors affect detection range in a proximity sensor?
Several factors affect the detection range of a proximity sensor, including object material, size, and shape. Environmental conditions like temperature, humidity, and ambient light can also influence performance. Additionally, the sensor's design and specifications, such as frequency and power, play crucial roles in determining how far it can accurately detect objects.
16. Can you use multiple proximity sensors in one Arduino project?
Yes, you can use multiple proximity sensors in one Arduino project. Connect each sensor to different digital input pins on the Arduino board. Create individual code segments to read the outputs of each sensor simultaneously. This allows for complex applications, such as mapping obstacles or implementing sophisticated robotic behaviors.
17. What are limitations of low-cost proximity sensors?
Low-cost proximity sensors often have limitations, such as reduced detection range, lower accuracy, and sensitivity issues. They may struggle in environments with interference or fluctuating conditions. Additionally, the build quality might affect durability and reliability over time. While suitable for basic applications, they may not perform well in demanding industrial settings.
18. How do you troubleshoot a proximity sensor not detecting objects?
To troubleshoot a non-detecting proximity sensor, first check the power supply and connections. Ensure the sensor is correctly oriented and within range of the object. Clean the sensor lens to eliminate dirt or obstructions. Test the wiring and consider replacing the sensor if it's still unresponsive. Environmental factors may also need assessing to rule out interference.


