LCD 16×2 Pin Configuration and Its Working
Summary
Discover the world of LCD 16x2 displays and unleash their potential with Arduino! In this captivating blog, we delve into the fundamentals of LCD 16x2 technology, starting with its pin diagram and key features. Gain a deeper understanding of the essential registers that control its functions and explore a range of powerful commands to manipulate the display. Whether you're a seasoned Arduino enthusiast or a curious beginner, this blog will empower you to harness the capabilities of the LCD 16x2 and bring your projects to life
What is the LCD 16*2:
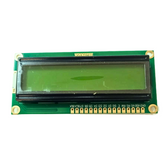
LCD 16x2 is a type of liquid crystal display (LCD) that can display up to 16 characters per line and 2 lines. These displays are widely used in a variety of applications, such as displaying text or data in electronic projects. The LCD is operated through a built-in controller that can understand and execute a series of commands. These commands allow for functions like setting the cursor position, clearing the display, and controlling the on/off state of the display. The LCD 16x2 is a widely used device in electronic projects, such as showing text or data.
LCD 16x2 Pin Diagram:
The LCD 16x2 has a total of 16 pins, which can be divided into two groups: power pins and data pins. The power pins include:
- VSS (ground): This pin is connected to the ground of the circuit.
- VCC (power supply): This pin is connected to the positive power supply of the circuit, usually 5V.
- VEE (contrast adjustment): This pin is used to adjust the contrast of the display. By adjusting the voltage on this pin, you can change the darkness of the characters on the screen.
The data pins include:
- RS (register select): This pin is used to select the register that the data or commands that will be sent. When the RS (Register Select) signal is in a low state, data is transmitted to the instruction register (IR). On the other hand, when the RS signal is set to a high state, the data is directed to the data register (DR).
- R/W (read/write): This pin is used to select whether the data is being written to the LCD or read from it. When R/W is low, the data is being written, and when it is high, the data is being read.
- E (enable): This pin is used to enable the data transfer between the microcontroller and the LCD. A high-to-low transition on this pin initiates the data transfer.
- DB0-DB7 (data bus): These pins are used to send data and commands to the LCD. The data is sent in parallel, with 8 bits being sent at a time.
In summary, the LCD 16x2 pin diagram includes power pins VSS, VDD, and VEE, and data pins RS, R/W, E, and DB0-DB7. Power pins are responsible for powering the device and data pins are used to send data and commands to the LCD and receive data from it.

Features of LCD 16x2:
The features of LCD 16x2 include:
The LCD 16x2 features a screen with the capability to display up to 16 characters per line and 2 lines. This makes it well-suited for showcasing concise messages or presenting data in a compact format.

- Built-in controller: The LCD 16x2 comes equipped with a built-in controller capable of interpreting a specific set of commands. These commands enable functionalities such as setting the cursor position, clearing the display, and controlling the on/off state of the display.
- Low power consumption: The LCD 16x2 consumes very little power, making it ideal for use in battery-powered devices.
- Wide operating temperature range: The LCD 16x2 is designed to function effectively across a wide temperature range, specifically from -20 to 70°C. This broad operating temperature range makes it highly adaptable and suitable for implementation in diverse environments.
- Easy to interface: The LCD 16x2 can be easily interfaced with microcontrollers like Arduino, PIC, and other microcontroller boards. It has a parallel interface and the standard library is available for most of the microcontroller platforms
- Variety of commands: The LCD 16x2 can be controlled using a variety of commands, such as Clear Display, Return Home, Set Cursor Position, Turn On/Off Display, and Shift Cursor/Display.
- High visibility: LCD 16x2 has high visibility and is readable in most lighting conditions.
Registers of LCD 16x2:
The LCD 16x2 has two registers, the instruction register (IR) and the data register (DR).
The Instruction Register (IR): The instruction register (IR) is used to store commands that control the LCD's operation. These commands include setting the cursor position, clearing the display, and controlling the display on/off state. When the microcontroller sends a command to the LCD, it is sent to the IR.
The Data Register (DR): The data register (DR) is used to store the data that will be displayed on the screen. When the microcontroller sends data to the LCD, it is sent to the DR. The data is then read by the LCD's controller and displayed on the screen.
16x2 LCD Commands:
The LCD 16x2 can be controlled using a variety of commands, which are typically sent as hexadecimal codes. Some of the commonly used commands and their corresponding hex codes include:
|
Hex Code |
Command to LCD Instruction Register |
|
0F |
LCD ON, cursor ON |
|
01 |
Clear display screen |
|
02 |
Return home |
|
04 |
Decrement cursor (shift cursor to left) |
|
06 |
Increment cursor (shift cursor to right) |
|
05 |
Shift display right |
|
07 |
Shift display left |
|
0E |
Display ON, cursor blinking |
|
80 |
Force cursor to beginning of first line |
|
C0 |
Force cursor to beginning of second line |
|
38 |
2 lines and 5×7 matrix |
|
83 |
Cursor line 1 position 3 |
|
3C |
Activate second line |
|
08 |
Display OFF, cursor OFF |
|
C1 |
Jump to second line, position 1 |
|
OC |
Display ON, cursor OFF |
|
C1 |
Jump to second line, position 1 |
|
C2 |
Jump to second line, position 2 |
LCD 16x2 Arduino:
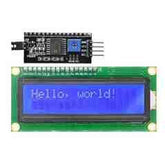
The LCD 16x2 can be easily controlled using an Arduino microcontroller. To connect the LCD to the Arduino, you will need to establish a connection between the LCD's data pins and the Arduino's digital pins. The LiquidCrystal library is used to transmit commands and data to the LCD. Alternatively, you can opt for an easier control method by using the I2C communication protocol. In this case, you would connect the LCD to an I2C adapter, which requires only 4 pins to control the LCD.

The LCD 16x2 display is highly capable and adaptable, making it suitable for a diverse range of applications. Its low power consumption and broad operating temperature range make it an excellent option for various projects and with the help of Arduino, controlling it can be easy and fun.
Conclusion
the LCD 16x2 display is a versatile and widely used component in the world of electronics. We explored its various aspects, including the pin diagram, features, registers, commands, and its integration with Arduino. The LCD 16x2 offers a compact yet powerful interface for displaying information, making it a favorite choice for projects requiring visual output. Its compatibility with Arduino opens up a world of possibilities for creative enthusiasts. Whether you're a beginner or an experienced hobbyist, mastering the LCD 16x2 can enhance your electronics skills and bring your projects to life. So why wait? Dive into the world of LCD 16x2 and unleash your creativity today!
If you appreciate our work don't forget to share this post and leave your opinion in the comment box.
Please do check out other blog posts about Popular electronics
Make sure you check out our wide range of products and collections (we offer some exciting deals!)
Excerpt
Frequently Asked Questions
1. What is a 16x2 LCD?
16x2 LCDs are compact displays that show 16 characters on 2 lines. Each character is formed by a 5x7 pixel matrix. They are widely used for text-based information in electronics, robotics, and embedded systems. Operated at 4.7-5.3V, they interface with microcontrollers. The 16x2 LCD is favored for its simplicity and efficiency in conveying information.
2. Why we use LCD 16x2?
A 16x2 LCD is commonly used in electronics for displaying information. It's compact, easy to interface, versatile, and has low power consumption. It's cost-effective, ideal for DIY projects and education. Overall, it provides a convenient way to display information.
3. How to test 16x2 LCD display?
To test a 16x2 LCD display, follow these steps:
4. What is a 16×2 LCD display and how many characters can it show?
A 16×2 LCD display is a type of liquid crystal display that can show 16 characters per line on two lines, making it ideal for simple data presentation. Each character occupies a grid of 5x8 pixels. This compact size allows easy integration into various electronics projects, from calculators to microcontroller interfaces.
5. What is the pin configuration of an LCD 16×2 module?
The LCD 16×2 module typically has 16 pins. The key pins include VSS (ground), VDD (power), VO (contrast), RS (register select), RW (read/write), E (enable), and data pins D0 to D7. These pins facilitate communication and control between the LCD and microcontrollers.
6. How does the LCD 16×2 module work with microcontrollers like Arduino?
The LCD 16×2 module interfaces with microcontrollers like Arduino via digital pins. You can send commands and data by setting specific pins high or low. Libraries like LiquidCrystal simplify this process, allowing you to easily control the display and manage text output without complicated wiring.
7. What is the difference between using 4-bit mode and 8-bit mode for an LCD 16×2?
In 4-bit mode, only the upper half of the data pins (D4 to D7) are used, saving pins for other components. This mode requires more command cycles but is sufficient for most text displays. In 8-bit mode, all data pins (D0 to D7) are utilized, allowing faster data transmission and lower latency in response time.
8. What controller chip is used in most LCD 16×2 modules?
Most LCD 16×2 modules utilize the HD44780 controller chip. This chip manages the character generation and display function, making it compatible with various microcontrollers. Its popularity is due to its simplicity and widespread support in coding libraries for easy integration.
9. How do you adjust the contrast of a 16×2 LCD display?
To adjust the contrast of a 16×2 LCD display, you can modify the voltage supplied to the VO pin. This pin typically connects to a potentiometer, allowing you to turn the knob to increase or decrease voltage. Proper contrast improves readability, especially in varying lighting conditions.
10. How many pins does an LCD 16×2 module have and what are their functions?
An LCD 16×2 module typically has 16 pins. Key functions include VSS (ground), VDD (power), VO (contrast), RS (register select), RW (read/write), E (enable), and data pins D0 to D7. These pins allow for data transfer and control signals essential for operating the display.
11. What are the common commands for the LCD 16×2 (e.g., clear display, set cursor)?
Common commands for the LCD 16×2 include clearing the display (0x01), setting the cursor position (0x80), and controlling text display (like entry mode, display on/off). These commands are essential for managing how information is presented on the screen and enhancing user interaction.
12. Why is the LCD 16×2 still used in electronics projects?
The LCD 16×2 remains popular due to its simplicity, affordability, and ease of use. It's perfect for displaying text in various electronics projects, requiring minimal components. Its compatibility with many microcontrollers and libraries makes it a go-to choice for hobbyists and professionals alike.
13. What are the limitations of the LCD 16×2 display?
Limitations of the LCD 16×2 include a low refresh rate, limited color display (usually monochrome), and restricted character size. It’s also less suitable for high-resolution graphics or real-time data presentation. These factors can restrict its use in projects requiring advanced display features.


