Interfacing Ultrasonic Sensor with Raspberry Pi 4 GPIO
Summary
Ultrasonic sensors are widely used for distance measurement, but how do they actually work? This blog delves into the science behind ultrasonic sensors and provides a step-by-step guide on how to calculate the distance between the sensor and an object. It also includes a tutorial on interfacing the popular HC-SR04 ultrasonic sensor with a Raspberry Pi, complete with code examples and wiring diagrams. If you're looking to use ultrasonic sensors in your next project, this blog is a must-read.
Introduction
In this comprehensive guide, we explore the science of ultrasonic sensors and walk you through the process of interfacing an ultrasonic sensor with Raspberry Pi for precise distance calculations.
The Raspberry Pi 4 is a powerful and versatile tool for makers, entrepreneurs, scientists, hobbyists and engineers. Its unique capabilities make it perfect for interfacing with an ultrasonic sensor to measure distances or detect obstacles. By combining the power of the Raspberry Pi 4 processor together with an Ultrasonic Sensor you can get accurate readings from up to 5 meters away in virtually any environment without using line-of-sight technology!
The combination allows precision monitoring of objects within view while avoiding interference from other sources of radiation such as heat or light waves that may otherwise distort results. With its reliable sensing capability coupled with fast data processing speed; this system makes it possible to accurately monitor distance changes quickly at any time – making sensors like these ideal tools when accuracy matters most!
Before starting with the project let's understand how ultrasonic sensor works:
How Ultrasonic Sensors Work?

An ultrasonic sensor is a sensor that transmits ultrasonic sound waves and receives them back to calculate the distance from the object. It is used in lots of applications like obstacle avoidance robots, measuring liquid in bottles, etc. It's similar to SONAR technology used in ships to calculate the depth of the ocean.
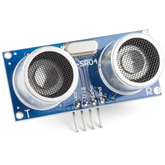
Now let us look at the HC-SR04 ultrasonic sensor particularly. HC-SR04 ultrasonic sensor has 4 important pins. Let's understand them properly.
VCC and GND are power supply pins.
Trig pin:
Sends the ultrasonic wave which hits the target object and gets reflected or echoed back.
Echo pin:
This reflected/echoed wave is received by the receiver which makes this echo pin go from the initial state of HIGH(goes high 5v when trig pin transmits wave) to LOW(goes low when the wave is received).
Note: Sending 5V output signal from echo pin to GPIO of Rpi ( rated at 3.3v) would damage the pin. To solve this problem we will be using a level shifter for this pin.
Also, read our blog on Ultrasonic Sensor Working Principle detailing the principles and workings of these sensors, their applications, and how are ultrasonic sensors used.
How to calculate the distance between the ultrasonic sensor and the object?
![]()
![]()
Note:
Speed of sound is 340 m/s in air medium. To calculate the distance in cm, the speed of sound is 34000 cm/s. We will be using this formula later in our code. Now we have understood what is an ultrasonic sensor and how it works let's start making the project now.
Interfacing HC-SR04 with Raspberry Pi
In this project we will be using the following components:
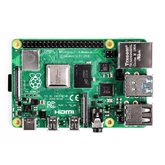
- Raspberry Pi 4 B
- HC-SR04 ultrasonic sensor module
- 1K ,2K Resistors
- Jumper cables
- Breadboard
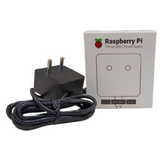
- Rasberry Pi official power supply adapter

Raspberry pi 4 B is the latest version of RPI which is very fast compared to its predecessors and also easy to use. We will be using this board in our project.
Pinout Diagram of Raspberry Pi 4 B

Above is the pin diagram for RPi 4 B. It can come in handy in not only this project but any Rpi project.
Pinout diagram of Ultrasonic sensor HC-SR04

Vcc and ground are power supply pins. Trig and echo are used to transmit and receive the ultrasonic pulse.
How To Connect Ultrasonic Sensor to Raspberry Pi
To connect your ultrasonic sensor with Raspberry Pi, make the connections as shown in the below diagram:
The trigger pin of the ultrasonic sensor goes to the GPIO 11 (physical PIN is 23) of RPI via the level shifter. The echo pin of the ultrasonic sensor goes to GPIO 12 ( physical PIN 32) of RPI. The 5V and GND pin of ultrasonic sensor is connected to 5V and GND of Raspberry Pi respectively.

Voltage divider circuit

Above is the level shifter circuit made using resistors to bring echo pin level from 5V to 3.3V. Here echo pin of the ultrasonic sensor works on 5V whereas the RPI GPIO pin work on 3.3 V. To make compatible between two different voltages this circuit is used.
Now the connections are done we can start coding!
Python code for interacting Raspberry Pi 4 with ultrasonic sensor HC-SR04
Following is the code for ultrasonic sensor interfacing with Raspberry Pi 4.
.
Note: Text following ‘#’ character in the below code are all comments added which will help you to understand the code.
#Raspberry Pi 4.0 code for interfacing with ultrasonic sensor
import RPi.GPIO as GPIO #imports modules required in program
import time #time module is used to add delays
GPIO.setmode (GPIO.BCM)
#Activates broadcom chip specific pin numbers.
#GPIO.setmode (GPIO.BOARD) -activates board pin numbers.
TRIG_PIN=11 #assign TRIG_PIN variable to GPIO pin 11
ECHO_PIN=12 #assign ECHO_PIN variable to GPIO pin 12
GPIO.setup(TRIG_PIN,GPIO.OUT) #trig pin is output
GPIO.setup(ECHO_PIN,GPIO.IN) #echo pin is input
GPIO.OUTPUT(TRIG_PIN,GPIO.LOW) #drives trig pin to 0V
time.sleep(2) #delay of 2 seconds
GPIO.output(TRIG_PIN,GPIO.HIGH) #set trig pin high
time.sleep(0.00001)
#keeps trig pin high for 10 microseconds
#this is used to trigger/start the ultrasonic module
#sends 8 ultrasonic bursts at 40KHz.
GPIO.output(TRIG_PIN,GPIO.LOW) #Set trig pin low
while GPIO.input(ECHO_PIN)==0: #check when the echo pin goes low and
pulse_send=time.time() #note down this time stamp in pulse_send
while GPIO.input(ECHO_PIN)==1: #check when the echo pin goes high and
pulse_received=time.time() #note down this time stamp
pulse_duration=pulse_received-pulse_send
#Pulse duration is the time difference between when the pulse was received #and sent.
pulse_duration=round(pulse_duration/2,2)
#The round function rounds off the value upto 2 decimal places.
distance= 34000*pulse_duration
#calculate and display the distance
print "Object is at ",distance,"cm from the ultrasonic sensor"
GPIO.cleanup()
#cleans/resets all the ports/pins used in the program.
#speed = distance/time
#distance=speed * time
#speed of sound is 340 m/s in air medium
#To calculate the distance in cm, the speed of sound is 34000 cm/s
#note that we have to calculate the distance from the ultrasonic sensor to the #object
# but here pulse duration we have considered is from the time it is sent #till it hits the target and comes back.
# But as we noted earlier we just need distance #from ultrasonic #sensor #to object
#so our pulse duration will be half
Conclusion
In this blog, we explored how to interface an Ultrasonic Sensor with Raspberry Pi 4 GPIO. The Ultrasonic Sensor measures distance using sound waves and sends the data to the Raspberry Pi. The article explains the required hardware components, wiring, and code setup needed to make the sensor work.
This guide showcased the seamless integration of an Ultrasonic Sensor with Raspberry Pi, offering accurate distance measurements. If you found this information valuable, share your thoughts in the comments below.
Please do check out other blog posts about Ultrasonic sensor with raspberry pi 4 , Interfacing MPU6050 accelerometer with Raspberry Pi , Difference Between Arduino and Raspberry Pi , Raspberry Pi vs Beaglebone ,DS18B20 with Raspberry Pi Pico , DS18B20 with Raspberry Pi Pico using MicroPython , How to use Raspberry Pi as node in LoRAWAN , NODE TO NODE COMMUNICATION ON LORA WITH RASPBERRY PI 4 and Controlling Speed and Led Brightness of Robot Using Raspberry Pi.
Make sure you check out our wide range of products and collections (we offer some exciting deals!)
Excerpt
Frequently Asked Questions
1. Does ultrasonic sensor use I2C?
Ultrasonic sensors have the ability to utilize diverse communication protocols, including the widely-adopted I2C (Inter-Integrated Circuit). This popular communication protocol facilitates communication between multiple devices by employing a two-wire interface. While certain ultrasonic sensors employ I2C to transmit and receive data between the sensor and a microcontroller, other sensors might leverage other communication protocols such as UART or SPI based on their specific requirements. These alternatives offer benefits such as power conservation, simplicity, and ease of application, further expanding their suitability for varied applications.
2. Can we use ultrasonic sensor with Raspberry Pi?
Yes! it is possible to employ an ultrasonic sensor alongside a Raspberry Pi. Ultrasonic sensors are adept at a gauging distance and find use in fields such as robotics, automation, and security systems. Several ultrasonic sensors can be promptly integrated with a Raspberry Pi by employing GPIO pins or through an I2C or SPI interface. Measuring the time taken for ultrasonic waves to travel and return to the sensor facilitates determining the distance measurement.
3. How to connect ultrasonic sensor to raspberry pi?
Connecting an ultrasonic sensor to a Raspberry Pi can be done efficiently and effectively by following these steps. First, make sure the power is off on both the sensor and the Pi before connecting any wires. Then, using jumper cables or a breadboard, connect the VCC pin of the sensor to 5V on the Pi's GPIO pins. Next, connect GND from the sensor to one of Pi's ground pins. Finally, for data transfer between devices, use either GPIO-17 (ping) or GPIO-27 (echo). Make necessary software configurations on your Raspberry Pi and test your connection with sample code provided online. This simple process allows users full control over their projects utilizing ultrasonic sensors with ease.
4. How to connect an ultrasonic sensor to Raspberry Pi 4?
To connect an ultrasonic sensor like the HC-SR04 to a Raspberry Pi 4, use the GPIO pins. Connect the VCC to 5V, GND to Ground, Trigger pin to GPIO 23, and Echo pin to GPIO 24. Ensure the pins are connected correctly to avoid damage. This setup allows the sensor to send and receive ultrasonic pulses effectively.
5. Which GPIO pins are used for HC-SR04 on Raspberry Pi?
The common GPIO pins for the HC-SR04 ultrasonic sensor on the Raspberry Pi are GPIO 23 for the Trigger pin and GPIO 24 for the Echo pin. Make sure to connect the VCC to 5V and GND to Ground for proper functioning. This configuration enables accurate distance measurement.
6. What is the code to use ultrasonic sensor in Raspberry Pi?
The HC-SR04 ultrasonic sensor is typically accurate within 3mm. Its range is about 2cm to 400cm, making it suitable for various projects. Accuracy may vary with environmental factors like temperature and humidity, so calibrating the sensor for your specific environment is recommended.
7. How accurate is the HC-SR04 sensor?
Yes, the Raspberry Pi can measure distance using ultrasonic sensors like the HC-SR04. By sending ultrasonic pulses and calculating the time taken for the echo to return, the distance can be measured accurately. This capability makes it ideal for robotics and distance-sensing applications.
8. Can Raspberry Pi measure distance using ultrasonic sensors?
If your ultrasonic sensor isn’t working on a Raspberry Pi, check the connections first. Ensure the Trigger and Echo pins are correctly wired. Also, confirm that you're using the correct voltage supply. Inspect your code for errors and verify the sensor's functionality by testing it separately, if possible.
9. Why is my ultrasonic sensor not working on Raspberry Pi?
Ultrasonic sensors with Raspberry Pi have various applications, including distance measurement, object detection, and obstacle avoidance in robotics. They are also used in automation projects, parking assistance systems, and even liquid level monitoring in tanks. Their versatility makes them valuable in many DIY and industrial projects.
10. What are the applications of ultrasonic sensors with Raspberry Pi?
To display distance on an LCD using Raspberry Pi and the HC-SR04, connect the LCD according to its specifications. Use a Python library like RPLCD to interface the LCD. Combine the distance measuring code with LCD output code to show the measured distance. Ensure proper connections and coding for seamless function.


