HAND WASH TIMER USING ARDUINO
Summary
Discover the perfect solution to elevate your hand hygiene routine with an Arduino-powered Hand Wash Timer. In this informative blog, we delve into the world of DIY electronics and explore the components required, working principles, designing techniques, and an easy-to-understand interfacing diagram. Learn how this innovative device works seamlessly to ensure thorough handwashing every time. Additionally, we provide a step-by-step guide on coding the Arduino for optimal functionality. Upgrade your hygiene practices with this engaging, informative blog that will leave you eager to implement this exciting project. Don't miss out!
Introduction:
Handwashing is one of the most effective ways to prevent the spread of germs and illnesses. To ensure that people wash their hands for the recommended amount of time, it is possible to use an Arduino-based timer to intimate users to wash their hands for a certain period.
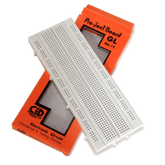
Components Required:
Working:
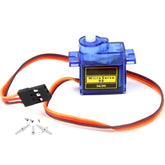
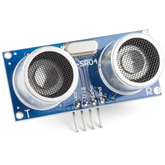
The handwash timer uses an Ultrasonic sensor to detect the presence of a hand with a precise measurement value of distance. There is a servo motor attached to this project wherein the time left to finish the handwash is shown in a form of an arc, so when the servo is pointing to the starting position, it is the time when we begin our handwash process. As time passes gradually the servo motor is slowly moving its way up to the end of the arc and making an indication that we have to terminate our handwash process. This is a fun way to motivate young children to wash their hands at least for a specific period.
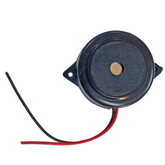
The servo will start at 0 degrees and move until the end position gradually for around 30 seconds which acts like a clock to keep track of the time, in addition, this process works only when the ultrasonic sensor reads our hands within a specific distance. Once the time is completed the buzzer will go on to indicate the hand wash process is over.
read more : How 433MHz RF Module Works & Interfacing With Arduino
Designing:
The design of the hand wash timer is simple, it consists of sensors like an ultrasonic sensor, servo motor, and buzzer. The connections to these are pretty simple to navigate.
The servo motor’s signal terminal is connected to Digital pin 9 on the Arduino. The Vcc and Gnd on the servo to 5v and Gnd on the Arduino.
The ultrasonic sensor’s Echo, trigger pin is connected to Digital pins 2, and 3 in Arduino. The Vcc and Gnd of the ultrasonic sensor to 5v and Gnd in Arduino.
Connect the Buzzer’s one terminal to Digital pin 11 on Arduino, and connect the other terminal of the buzzer to the 220-ohm resistor and another end of the resistor to GND on Arduino.
After doing all the necessary connections, define the connected PINs onto the code to ensure the proper functionality of the project. Download the appropriate package for the Servo motor which is an inbuilt package to make the servo controls seamless.
read more : Arduino Interfacing with Ultrasonic Sensor
Interfacing Diagrams:
- Arduino to sensors interfacing:

Connections:
- Servo to Arduino:
|
Servo |
Arduino |
|
Vcc |
5V |
|
Gnd |
GND |
|
Signal |
GPIO 9 |
- Ultrasonic to Arduino:
|
Ultrasonic |
Arduino |
|
Vcc |
5V |
|
Trig |
GPIO 3 |
|
Echo |
GPIO 2 |
|
Gnd |
GND |
- Buzzer to Arduino:
|
Buzzer |
Arduino |
|
Positive |
GPIO 11 |
|
Negative |
GND (via resistor) |
How it works:
The servo motor activates only when the distance read by ultrasonic is less than 30 cm.
Then, the code understands the hand is recognized and starts the timer for 30 seconds. To intimate the user about the running time, the servo motor is turning from 0 degrees to 180 degrees to give it a clock-like feel to make the timer a fun way so children are excited to wash their hands regularly.
When the timer ends, a buzzer present inside the circuit is triggered indicating the time has been completed.
Once the user removes his hand away from the sensor, the servo motor returns to its original position (0 Degrees) and waits until someone else starts to wash their hands.
This is a simple approach to make washing hands a fun activity that will motivate children to wash their hands frequently to ensure their hands are germ-free.
read our blog on infrared sensor arduino, which provides comprehensive information about IR sensors and their application in Arduino projects.
Coding:
The code for the hand wash timer uses sensors like an ultrasonic sensor, a Servo motor, and Buzzer to update the user on how much time he needs to wash his hands. This is depicted in the code below.
#include

const int echoPin = 2;

const int trigPin = 3;

const int buzzer = 11;

int buzzer_flag = 0;

Servo myservo;

long duration;

int distance, count;

void setup() {

myservo.attach(9);

pinMode(trigPin, OUTPUT);

pinMode(echoPin, INPUT);

Serial.begin(9600);

}

void loop()

{

digitalWrite(trigPin, LOW);

delayMicroseconds(2);

digitalWrite(trigPin, HIGH);

delayMicroseconds(10);

digitalWrite(trigPin, LOW);

duration = pulseIn(echoPin, HIGH);

distance = duration * 0.034 / 2;

Serial.print("Distance: ");

Serial.println(distance);

while (distance < 30)

{

count ++;

if (count < 30)

{

digitalWrite(buzzer, LOW);

int servo_angle = count * 6;

myservo.write(servo_angle);

Serial.println("Hand detected");

delay(1000);

buzzer_flag = 0;

}

else

{

if (buzzer_flag == 0)

{

digitalWrite(buzzer, HIGH);

delay(1500);

buzzer_flag = 1;

digitalWrite(buzzer, LOW);

}

break;

}

}

if (distance > 30)

{

digitalWrite(buzzer, LOW);

Serial.println("Hand removed");

count = 0;

myservo.write(count);

delay(300);

}

}
Conclusion:
A hand wash timer using Arduino is a simple project to encourage children to wash their hands frequently in a fun way and this ensures overall hygiene of them and helps them stay away from harmful germs.
If you appreciate our work don't forget to share this post and leave your opinion in the comment box.
Please do check out other blog posts about Popular electronics
Make sure you check out our wide range of products and collections (we offer some exciting deals!)


