Getting started with Arduino IoT Cloud
Summary
Unlock the potential of Arduino IoT Cloud with our comprehensive guide! Dive into the blog where we kick off with an insightful introduction to the world of Arduino IoT. Follow the step-by-step guide on setting up Arduino IoT Cloud, empowering you to seamlessly connect and monitor projects. Learn the art of creating and monitoring projects effortlessly, and master the skill of interacting with devices remotely. Discover the key to unlocking a world of possibilities in the Internet of Things. Ready to embark on a journey of innovation? Read on! Your Arduino adventure awaits!
Introduction
The Internet of Things (IoT) is transforming the way we live, work, and interact with the environment by seamlessly connecting physical objects and devices to the internet. This interconnectivity enables remote monitoring, control, optimization, and automation of these internet-enabled devices, offering immense potential to build smart infrastructure and leverage data-driven insights. Arduino IoT Cloud is an innovative cloud platform that makes it easy for anyone to harness the power of IoT and get started with connected projects rapidly.
Arduino IoT Cloud provides a user-friendly web interface for connecting, managing, and capturing data from Arduino boards and devices remotely. The key capabilities offered by the platform include:
- Easy device connectivity over WiFi, cellular networks, or Ethernet
- Remote monitoring and control of connected devices
- Data visualization with custom dashboards
- Over-the-air (OTA) firmware updates
- User and device management with authentication
- Collaboration capabilities to share access
The cloud-based infrastructure abstracts away the complexities of device connectivity, allowing developers to focus on building amazing IoT projects. Arduino IoT Cloud integrates the easy prototyping capabilities of Arduino hardware with the flexibility and scalability of cloud computing. With this powerful combination, you can take an idea from concept to deployment rapidly.
In this comprehensive guide, we will cover the end-to-end process of using the Arduino IoT Cloud platform. This includes:
- Creating an account and logging in
- Connecting and configuring devices to work with the cloud
- Building cloud-connected IoT projects
- Remotely monitoring device data through dashboards
- Interacting with devices from anywhere in the world
- And much more!
Whether you are new to IoT and Arduino or an experienced maker, this guide will help you leverage the capabilities of Arduino IoT Cloud to bring your connected project ideas to life. So let's get started!

Setting Up Arduino IoT Cloud
Getting started with Arduino IoT Cloud requires just a few simple steps. First, we will walk through the process of creating an account and logging in to the platform. Then, we will cover how to connect and configure Arduino boards and devices to work seamlessly with the cloud.
Creating an Account and Logging In
To use the Arduino IoT Cloud platform, the first step is to create an account. Visit the Arduino IoT Cloud website and click on "Get Started". You can quickly sign up with your Google, GitHub, or Facebook account. Alternatively, choose to create an Arduino account using your email address. The sign-up process just requires you to provide some basic details like name, email, and password. After account creation, you will need to verify your email to activate the account. Once your Arduino Cloud account is ready, you can log in to access the web dashboard. The dashboard gives you an overview of connected devices, active projects, data usage, and more. This is your gateway to start building IoT projects leveraging the power of the cloud.
Connecting and Configuring Devices
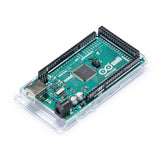
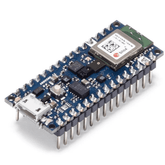
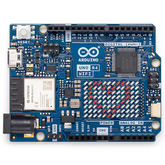
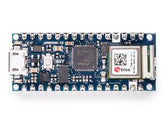
The Arduino IoT Cloud is compatible with a wide range of Arduino boards and devices. This includes boards like Arduino MKR WiFi 1010, Arduino UNO WiFi Rev 2, Arduino Nano 33 IoT, and more. To connect them to the cloud, you need to flash the appropriate Arduino IoT Cloud firmware available from the Arduino website. The firmware contains all the logic required for the device to connect with the cloud service securely. Once flashed, the device will automatically connect to the configured WiFi network and Arduino IoT Cloud when powered on. No coding is required. From the Devices section of the cloud dashboard, you can give a unique name to your device, configure WiFi network credentials, and other parameters. More advanced users can tweak configuration related to security, messaging, and data visualization as per their project needs. For devices that do not support WiFi connectivity, the Arduino IoT Cloud offers cellular and Ethernet connectivity options. This enables you to connect devices installed across broad geographies to the cloud reliably.
Creating and Monitoring Projects
Once your devices are configured and connected to the Arduino IoT Cloud, you can start building innovative IoT projects. The cloud-based tooling provides everything you need to quickly create, deploy, and manage your connected projects.

Creating New IoT Projects
To create a new project, click on "Create Project" from the Arduino IoT Cloud dashboard. The project creation wizard will guide you through the steps:
- Give your project a name
- Assign one or more connected devices
- Select license type (open-source or private)
- Invite team members for collaboration
Within the project dashboard, you can leverage built-in tools to define device behaviors without writing code:
- Flow Tool: Visually wire up logic flows to build automation rules, integrate with web services, and more.
- Trigger Tool: Set up triggers to initiate actions based on events like sensor threshold exceeded, time elapsed etc.
- Dashboard Tool: Select and customize widgets like graphs, gauges, buttons, sliders, maps, etc. to visualize your data.
These tools, along with prebuilt UI templates, enable you to build full-fledged IoT applications on the cloud quickly.
Real-Time Monitoring and Updates
The project dashboard offers real-time monitoring capabilities to help you stay on top of your deployed devices and applications. You can track:
- Current sensor values and device status
- Network connectivity information
- Location of devices on a map
- Debug messages and system events
- And more!
Whenever you need to modify your projects, you can easily update flows, triggers, dashboards and other elements through the web interface. The changes will instantly reflect on your connected devices without having to re-flash firmware. This facilitates quick iterations to your IoT systems. You can even collaborate with team members by sharing projects and granting selective access. Monitor the activity log to see all actions performed on your projects.
Example IoT Projects
Let's look at some sample projects to demonstrate the capabilities of Arduino IoT Cloud:
- Smart Agriculture: Connect soil moisture sensors and water pumps to an Arduino MKR WiFi 1010 to create an automated irrigation system. Monitor soil condition remotely and trigger watering when dry.
- Fleet Tracking: Use an Arduino MKR GSM 1400 board with GPS to track your vehicles in real-time. Visualize locations on a map widget and define geofence alerts.
- Home Automation: Build an intelligent home with SHT31 temperature/humidity sensor, motion detectors, relay switches etc. Create flows for HVAC control, security notifications and more.
- Industrial Monitoring: Monitor tank levels, valve positions, vibration and other critical parameters in factories using Arduino boards. Visualize sensor data and define alerts for anomalies.
These are just a few examples to spark your creativity. The toolbox offered by Arduino IoT Cloud enables you to build smart, connected IoT projects in a fraction of time compared to traditional development.
Interacting With Devices Remotely
Once devices are connected to the Arduino IoT Cloud, you can interact with them remotely from anywhere. The platform provides both web and mobile apps to control, monitor, debug, and update devices with ease.

Arduino IoT Cloud Web Interface
The web-based dashboard is your one-stop interface to remotely:
- Monitor real-time sensor data through charts, gauges and other visual widgets
- Control devices by toggling switches, sliders, buttons, and other actuators
- Manage dashboards by adding, configuring, and arranging widgets
- Analyze device location on maps
- View debug messages to troubleshoot devices
- Remotely push firmware updates over-the-air (OTA)
- Collaborate with team members by providing access
With the role-based user permissions, you can selectively grant access to only certain devices and dashboards. The visually rich widgets and templates enable you to build full-featured HMIs (human-machine interfaces) rapidly. You can even prototype UIs and automation flows before deploying them on hardware with Arduino IoT Cloud's simulator. This allows quick validation of your system.
IoT Remote Mobile Apps
Along with the web dashboard, Arduino provides cross-platform mobile apps (iOS and Android) to easily interact with your devices on-the-go. After pairing your smartphone, you can:
- Access device dashboards remotely to monitor sensor data
- Control digital and analog outputs through easy taps and slider adjustments
- View device variables, debug messages, and events in real-time
- Push OTA firmware updates remotely for new features and fixes
- Manage locations and geofencing rules
The user-friendly mobile interface enables anyone to monitor and control devices without needing deep technical expertise. This allows for true remote collaboration. Whether you are a farmer checking soil moisture levels or a supply chain manager tracking vehicles, the mobile apps keep you connected with your IoT deployments on-the-go.
Conclusion
Arduino IoT Cloud provides an end-to-end platform to connect, manage, and extract value from your devices - no matter where they are located. The key highlights covered in this guide include:
- Quickly connecting devices over WiFi, cellular or Ethernet using Arduino cloud firmware
- Building full-featured IoT applications leveraging simple cloud tools
- Remotely monitoring, controlling, and updating devices through web and mobile dashboards
- Prototyping UIs and flows before hardware deployment
- Collaborating seamlessly with team members
With Arduino IoT Cloud's easy-to-use workflows, anyone can bring an idea to life by prototyping, iterating, and deploying connected IoT systems rapidly. So if you have an idea for an IoT project, sign up today and start your IoT journey now!


