How to solder jumper wires
Summary
Mastering the art of soldering jumper wires is a skill every electronics enthusiast should have. In our comprehensive guide, we delve into the essential tools and materials required for flawless soldering. Learn the crucial steps of stripping and tinning wires for optimal conductivity. Discover the art of soldering, ensuring secure and durable connections. Plus, gain insights into effective desoldering techniques for those inevitable mishaps. Ready to elevate your DIY electronics projects? Join us on this soldering journey and unlock a world of endless possibilities!
Introduction
Soldering is the backbone of the electronics world. It's a fundamental skill that allows you to create secure, reliable connections between components, ensuring electrical flow and functionality. Whether you're a hobbyist tinkering with circuits, a student learning the ropes, or a professional tackling complex projects, mastering the art of soldering is essential.
In the ever-evolving landscape of electronics, soldering remains a crucial technique that bridges the gap between design and functionality. From intricate circuit boards to intricate wearable devices, soldering is the key to bringing ideas to life and ensuring that electronic components work seamlessly together.
At its core, soldering involves melting a metal alloy (solder) to join two or more metal surfaces together. This creates a strong, permanent bond that facilitates the flow of electricity. In this comprehensive guide, we'll focus on soldering a jumper wire – a simple yet crucial component in various electronic circuits.

Jumper wires are versatile and essential components that act as bridges, connecting different points in a circuit. They allow for the transfer of signals, power, and data, enabling the seamless integration of various electronic components. By mastering the art of soldering a jumper wire, you'll lay the foundation for more advanced projects and gain a deeper understanding of how electronic circuits function.
Find out how Jumper Wires simplify circuits!
Essential Tools and Materials for Soldering
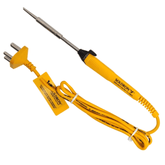
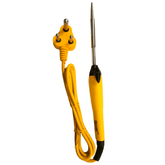
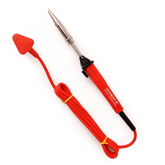
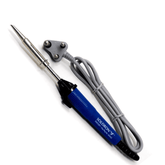
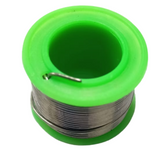
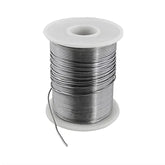
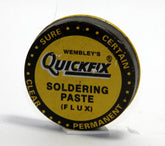
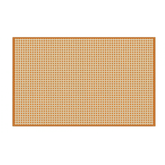
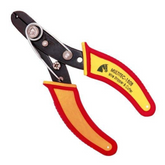
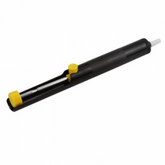
Before we dive into the soldering process, let's make sure you have all the necessary tools and materials at hand. You'll need a soldering iron, solder (lead-free is recommended), flux (paste or liquid), insulated jumper wire, a prototyping board (breadboard, veroboard, or padboard), wire strippers, diagonal cutters or flush cutters, and a solder sucker (desoldering pump).
Having the right tools and materials is crucial for achieving professional-quality solder joints and ensuring a smooth soldering experience. A high-quality soldering iron with adjustable temperature control will provide the precision and control needed for delicate work, while lead-free solder is a safer and more environmentally friendly alternative to traditional lead-based solder.

Soldering involves working with hot surfaces and potentially toxic fumes, so safety should be your top priority. Always work in a well-ventilated area and use a soldering iron stand to prevent accidental burns. Wear safety glasses to protect your eyes, and keep a fire extinguisher or heat-resistant surface nearby.
Safety should never be an afterthought when soldering. Proper ventilation is essential to prevent the inhalation of harmful fumes, which can be hazardous to your health. Additionally, soldering irons can reach temperatures exceeding 700°F (370°C), making burns a real risk if proper precautions are not taken. By prioritizing safety from the outset, you'll be able to focus on the task at hand without compromising your well-being.
Stripping and Tinning: Preparing the Wire
The first step is to strip a small portion of the insulation from the jumper wire, exposing the metal core. Use wire strippers to carefully remove the insulation without damaging the wire itself. Precision and care are key to ensuring a successful solder joint.
Stripping the wire correctly is crucial for creating a strong and reliable solder joint. Too much insulation removed can lead to short circuits or exposed wires, while not removing enough can prevent proper contact with the solder. Additionally, damaging the wire during the stripping process can weaken the overall connection and compromise the integrity of the circuit.

Tinning the exposed wire is essential for achieving a strong solder joint. Apply a small amount of flux to the wire, then heat the exposed metal with the soldering iron. Immediately touch the solder to the wire, allowing it to flow and coat the metal evenly. A properly tinned wire will ensure a smooth soldering process. Tinning the wire serves several important purposes.
First, it helps to remove any oxidation or contaminants from the metal surface, ensuring a clean and solid bond with the solder. Second, it provides a protective coating that prevents further oxidation, which can weaken the solder joint over time. Finally, the tinned surface acts as a wetting agent, allowing the solder to flow smoothly and evenly during the soldering process.
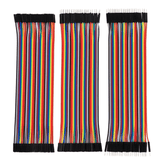
Exclusive deal: Jumper Wire Set (120 pcs) at the lowest price!
The Art of Soldering: Joining the Jumper Wire
Before you start soldering, ensure your soldering iron is clean and tinned. This helps the solder flow smoothly and creates a strong bond. A well-maintained soldering iron is crucial for achieving professional-quality solder joints.
A clean and properly tinned soldering iron tip is essential for efficient heat transfer and solder adhesion. Oxidation or contaminants on the tip can impede the flow of solder, leading to poor joints and potential cold solder joints. Regularly cleaning and tinning the tip not only ensures better performance but also extends the life of your soldering iron.

Insert the tinned end of the jumper wire into the desired hole on the prototyping board. Position the soldering iron tip on the opposite side of the wire from the solder. Apply a small amount of solder, allowing it to flow around the wire and create a smooth, shiny joint. Steady hands and precise movements are key to successful soldering.
Proper technique is crucial when creating a solder joint. Positioning the soldering iron and solder correctly ensures efficient heat transfer and even solder flow. Applying too little solder can result in a weak or incomplete joint, while using too much can lead to bridging or short circuits. Steady hands and precise movements are essential for achieving a professional-quality solder joint that is both strong and visually appealing.
A well-formed solder joint should have a smooth, concave appearance, known as a "fillet." Avoid excessive solder or cold joints, which can compromise the electrical connection and mechanical strength. A perfect solder joint not only looks great but also ensures optimal performance.
The appearance of a solder joint is a good indicator of its quality and reliability. A smooth, concave fillet suggests proper heat transfer and solder flow, resulting in a strong mechanical and electrical connection. Excessive solder or cold joints, on the other hand, can lead to issues such as short circuits, poor conductivity, and mechanical weakness, ultimately compromising the performance and longevity of the circuit.
Explore our range of Jumper Wires.
Desoldering and Cleanup:
In some cases, you may need to remove the soldered jumper wire from the board. Turn up the heat on your soldering iron and use a solder sucker or desoldering braid to remove the excess solder. Once the solder has been cleared, you can gently pull the wire free from the hole. Proper desoldering techniques are essential for reworking or repairing circuits.
Desoldering is an important skill to master, as it allows for the reworking and repair of circuits. Whether you need to replace a faulty component or modify an existing design, the ability to remove solder joints cleanly and efficiently is crucial. Solder suckers and desoldering braids are invaluable tools for this process, enabling you to remove excess solder without damaging the surrounding components or the circuit board itself.
After completing the soldering process, it's essential to clean and tin the tip of your soldering iron. This helps maintain its functionality and longevity for future projects. A well-maintained soldering iron is an investment that will pay dividends in the long run.
Proper cleaning and maintenance of your soldering iron are critical for ensuring its longevity and performance. Residual flux and solder can accumulate on the tip, impeding heat transfer and causing oxidation over time. By regularly cleaning and tinning the tip, you'll not only extend the life of your soldering iron but also ensure consistent and reliable performance for every soldering job.
Conclusion:
Soldering a jumper wire is a fundamental skill that serves as the foundation for more complex electronics projects. By following the steps outlined in this guide, you'll develop the confidence and expertise needed to create reliable solder joints. Master the basics, and you'll be well on your way to becoming a soldering pro.
Mastering the basics of soldering a jumper wire is an essential first step on your journey into the world of electronics. It lays the groundwork for tackling more advanced projects and developing a deeper understanding of circuit design and functionality. With practice and dedication, you'll not only gain confidence in your soldering abilities but also cultivate a sense of accomplishment and pride in your work.
With your newfound soldering abilities, you'll be able to tackle a wide range of tasks, from repairing broken circuits to building custom electronics projects from scratch. The possibilities are endless, and the world of electronics awaits your exploration. Soldering is a skill that will open doors to exciting projects and rewarding experiences.
The practical applications of soldering are vast and diverse. Whether you're interested in repairing household electronics, building your own Arduino projects, or exploring the world of robotics, soldering will be an invaluable tool in your arsenal. From troubleshooting and repairing broken circuits to prototyping new designs, your soldering skills will empower you to take on challenges and bring your ideas to life.
Remember, soldering is a skill that requires practice and continuous learning. As you gain more experience, you'll encounter new techniques, tools, and materials that can further enhance your capabilities. Embrace the journey, experiment, and stay curious – the world of electronics is ever-evolving, and your soldering skills will be an invaluable asset every step of the way.
Soldering is a craft that continuously evolves, with new techniques, tools, and materials emerging to meet the demands of an ever-changing industry. To stay ahead of the curve, embrace a mindset of continuous learning and experimentation. Attend workshops, read industry publications, and engage with the vibrant online communities dedicated to electronics and soldering. By staying curious and open to new ideas, you'll not only refine your skills but also gain a deeper appreciation for the art of soldering and the boundless possibilities it offers.
Excerpt
Frequently Asked Questions
1. What tools and materials do I need for soldering a jumper wire?
You will need flux paste, insulated jumper wire, a PC prototyping board (such as veroboard or padboard), wire strippers, dikes (diagonal cutters) or flush cutters, and a solder sucker (desoldering pump). These items are essential for successfully completing the soldering process.
2. How do I achieve a good solder joint?
A good solder joint should be shiny and free from any foggy or dull appearance. To achieve this, ensure your soldering iron is hot enough, clean the tip, and avoid taking too long to solder. Proper technique involves holding the iron and solder on opposite sides of the wire, allowing the solder to flow smoothly and evenly around the wire.
3. What should I do if I encounter a cold solder joint?
A cold solder joint occurs when the solder doesn't properly flow, resulting in weak electrical connectivity. To remedy this, you can try melting down the existing solder again. Additionally, ensure your soldering iron is adequately heated, the tip is clean, and you don't take too long to solder the joint.
4. How do I desolder a jumper wire from the board?
To desolder a jumper wire, turn up the heat on your soldering iron and clean the tip. Utilize a solder sucker by holding it close to the solder, melting the solder, and quickly sucking it up. Alternatively, you can use solder wick or heat up the solder and pull on the wire simultaneously. Remember to work swiftly to prevent damage to the board.
5. What tools are needed for soldering jumper wires?
To solder jumper wires, you'll need a soldering iron, solder (preferably rosin core), soldering wire cutters, a wire stripper, and possibly helping hands or a soldering jig for stability. Safety goggles are also recommended to protect your eyes from solder splashes.
6. How to strip and tin wires before soldering?
Use a wire stripper to carefully remove a small section of insulation from the wire's end. Then, heat the exposed wire with a soldering iron and apply a small amount of solder. This process, known as tinning, helps the solder flow better during the actual soldering, ensuring a stronger connection.
7. How to avoid cold solder joints?
To avoid cold solder joints, ensure the soldering iron heats the joint adequately before adding solder. Apply solder only after reaching the correct temperature. Movement during the cooling phase can create weak joints, so keep the components still while the solder solidifies.
8. What temperature should a soldering iron be?
A soldering iron should typically be set to around 350°C (662°F). This temperature melts most solder quickly without damaging components. Adjust the temperature slightly based on the specific project or type of solder you are using for optimal results.
9. What kind of solder is best for electronics?
For electronics, a 60/40 tin-lead solder is commonly recommended due to its excellent flow characteristics and ease of use. If you prefer lead-free options, consider using SAC305 solder, which is a mix of tin, silver, and copper for a safe, effective alternative.
10. How to solder wires on PCBs?
To solder wires on PCBs, first insert the wire through the hole and bend it slightly to hold it in place. Heat the pad and wire with the soldering iron, then apply solder. Remove the iron once the solder flows, allowing it to cool without movement for a strong bond.
11. How to clean the soldering tip?
To clean a soldering tip, wipe it on a damp sponge or brass wool while it's hot. This removes oxidized solder and debris. Periodically tin the tip with solder to maintain its quality and enhance heat transfer during your soldering tasks.
12. What are safety precautions while soldering?
When soldering, wear safety goggles to protect your eyes from solder splashes. Work in a well-ventilated area to avoid inhaling fumes. Avoid touching the soldering iron tip, as it can cause severe burns. Always keep flammable materials away from your workspace.
13. How to fix solder bridges?
To fix solder bridges, use a soldering iron to carefully heat the bridge and apply solder wick or a suction tool to absorb the excess solder. Patience is key; take your time to ensure that you'll only remove the excess without damaging nearby connections.
14. What is flux and why is it used?
Flux is a chemical agent used during soldering to prevent oxidation and improve the flow of solder on the surfaces. It helps create a better bond by ensuring that the metal surfaces are clean and suitable for soldering, resulting in stronger electrical connections.


