How to connect xbee to Arduino uno
Summary
Unlock the power of wireless communication with our detailed guide on connecting XBee to Arduino Uno. Start with an introduction to XBee and the necessary components. Gain a clear understanding of XBee modules and their functions. Learn how to set up your Arduino Uno for XBee connectivity, followed by step-by-step instructions on making the physical connections. Get insights into the coding required and how to test your setup effectively. Perfect for both beginners and seasoned makers, this guide will elevate your projects. Click now to master XBee and Arduino integration!
Introduction:
Hey there! So, you wanna learn how to hook up an XBee module to an Arduino Uno? Well, wireless communication is like the cool kid on the block these days. No wires needed – it's all about that wireless magic! The Digi International-manufactured XBee module has become a widely used and dependable wireless communication platform.
Due to its capability to send data over extended distances—up to hundreds of feet—the XBee module has emerged as a standard option for more and more wireless communication applications. We will examine the complexities of the XBee module and how to create a smooth connection between an XBee module and an Arduino Uno in this extensive lesson.
We will walk you through configuring wireless XBee communication, including configuring and integrating devices like an XBee Explorer, an Arduino with an XBee Shield, and a computer. After completing this lesson, you will have a firm grasp ofhow to harness the power of XBee modules for wireless communication in your projects.
check out the wide range of Original Arduino Boards, Kits and accessories.
Components required:
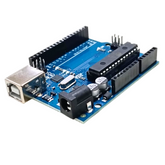
- Let's dive in and talk about what you need for setup. First up, you gotta have your trusty Arduino Uno – that's gonna be the brains of the operation.
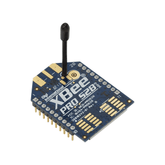
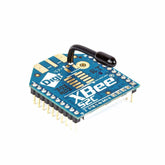
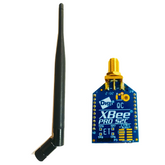
- Then, grab yourself an XBee Module. They come in Series 1 and Series 2 flavors. If you're new to this stuff, go with Series 1 – it's easy peasy lemon squeezy.
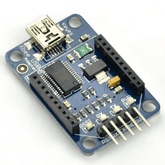
- Next on the list are accessories like an XBee Shield or an XBee Explorer. These make life easier when connecting your XBee module to the Arduino.
- Jumper wires come in handy too if you're not using a shield. Oh, don't forget your USB cable – that's gonna link your Arduino Uno to your computer for programming and power.
Understanding XBee:
- Now comes the fun part - understanding what makes those XBee modules tick! Made by Digi International, they're all about that wireless goodness. Using Zigbee protocol means they sip power and are super reliable. Perfect for home automation or industrial control systems.
- For different purposes, there are different series of XBee modules out there: Series 1 is great for simple setups while Series 2 rocks mesh networking like a boss! Think about what range and power consumption you need before choosing one.
- So there you have it - with a little know-how and some gear, you can create some awesome wireless projects with XBee and Arduino Uno. Let's get tinkering!
Setting up Arduino uno for XBee connectivity.
Let's talk about getting your Arduino Uno set up for XBee connectivity.
- But hold on a sec, before you go pl in that XBee module, we've got to configure it first. Yeah, gotta set things like the baud rate, PAN ID, and all that jazz. Don't worry, it's not too.
- So here's the - you'll need to download and install this called X-CTU. It's from Digi International and you can snag it for free from their website. Once you've got that sorted out, connect your XBee module using an Explorer or FTDI cable.

- Fire up X-CTU and choose the right COM port. Now comes the fun part - configuring the module. Set that baud rate to 9600 (that's standard) and give it a unique PAN ID so it can join your personal network club.

- Once you've tinkered with those settings, write them to the XBee module and voila! Your XBee is now best buds with your Arduino Uno.
Connections:
Now onto connecting the XBee module to the Arduino Uno itself. You ready for this?

- Slap that XBee shield onto your Arduino Uno nice and proper-like. Make sure those pins line up real good because this shield does all the heavy lifting for you - socket for your XBee module included!
- Next up: gently slide that XBee module into its cozy little socket on the shield. Push it in snugly so it makes good contact - we don't want any flaky connections here!
- If you're not using a shield (hey, no judgment), grab some jumper wires and make those manual connections between VCC pin of XBee with 3.3V pin on Arduino, GND with GND (obviously), DIN with TX (Digital Pin 1), and DOUT with RX (Digital Pin 0). Oh yeah, important note - our buddy XBee runs at 3.3V so don’t go hooking it up directly to 5V pins or we might fry something!
- Ready? Power everything up by connecting your Arduino Uno to your computer via USB cable. This way both Arduino and XBee get juiced up while establishing a programming connection through serial protocol.
Coding:
Now comes the exciting bit - time for some coding action! Upload a simple code snippet onto your Arduino to test that sweet communication between its soulmate USB-Ethernet bridge thingy (aka the UB-XBEE) and see those responses pop up on your serial monitor screen like magic.
And there you have it folks! Your Arduino Uno is now feeling cool as a cucumber hanging out with its new BFF - the mighty proud-to-be-a-pal-of-an-Arduino-XBEE-duo alliance ride!
example:
```cpp
#include <SoftwareSerial.h>
// RX, TX
SoftwareSerial XBee(2, 3); // Define the pins for RX and TX
void setup() {
Serial.begin(9600); // Start the serial communication with the computer
XBee.begin(9600); // Start the serial communication with the XBee module
Serial.println("Enter AT commands:"); // Prompt user to enter AT commands
}
void loop() {
if (Serial.available()) { // If data is available on the serial port
char c = Serial.read(); // Read the data
XBee.write(c); // Send the data to the XBee module
}
if (XBee.available()) { // If data is available from the XBee module
char c = XBee.read(); // Read the data
Serial.write(c); // Send the data to the serial monitor
}
}
```
Alright, so this code here helps create a software serial connection on pins 2 and 3 to chat with the XBee module. It basically listens for any input from the Arduino’s serial monitor and then shoots it over to the XBee module. And vice versa - anything from the XBee gets sent back to the serial monitor.
Testing:
Now that you've uploaded the code to Arduino Uno, let’s see if this baby works smoothly:
1. Get That Serial Monitor Ready:
- Fire up the Arduino IDE, go into Tools, and open up that Serial Monitor. Make sure you set that baud rate at 9600 just like in your snazzy code.
2. Let's Send Some AT Commands:
- Type in “+++” into that Serial Monitor and hit Enter. If your XBee module is good to go in command mode, it’ll reply with an “OK”. That means we're locked 'n loaded for some AT commands fun!
- Try throwin' some basic AT commands out there like “ATID” to check our PAN ID or maybe “ATMY” just to peep at our lil' module’s address.
3. Checking Our Connection Status:
- Got a second XBee module hanging out on another Arduino or computer? Well, why don’t you try tossing a message from one to the other! Drop a line into one Serial Monitor and keep an eye out if it pops up on t’other device's screen. Now that right there is proof positive them modules are chattin' happily with each other.
4. Can We Fix It? Yes We Can!:
- Plug ‘n Play: Check those connections; don't want things gettin' loosey-goosey when we're tryna talk.
- Check Configs: Double trouble-check those little settings inside your XBee: baud rate, PAN ID – all need max attention.
- Power Patrol: Stick close by watchin’ power levels; ensure your beloved XBee gets its much-needed juice at 3.3 volts, not more!
- Software Snoopin’: Cross their T's n undot those I's; confirm yer Arduino code plays fair via spike-filled checks in that ol’ IDE app of yours.
Conclusion:
Whipping up an XBee marriage with ya shiny new Arduino Uno ain’t just small fry – this duo will make waves when it comes to wireless tricks up ya sleeve! Whether it's pumpin’ out remote sensor networks or sorta sci-fi home automation gigs ya got brewin’, these sneaky fellas safely deliver data wirelessly like clockwork precision horology old mate ticks away trice daily!
Follow along these steps I’ve scribbled down above (‘cause hey they ain't mere gibberish), reel in this robust communication bond between yer gadgets and swing wide them doors for fresh tricks 'em Arduinos been dreamin’ ‘bout!


